T-shirts are the staple of everyone’s wardrobe nowadays. They are comfortable, versatile and go well with every dressing style. Oversized T-shirts with jeans, crop tops for the beach, or modern classic T-shirts under the jacket.
Sometimes we opt for colorful graphic T-shirts; other times, we choose plain black or white colors. And sometimes, we aim for a personalized look. Something simple but original and one of a kind.
The good news is that it’s easy to personalize your plain T-shirt with simple hand embroidery stitches. So let’s do that together!
Hand embroidery on stretchy fabric – the basics
 Photo credit: Tatjana Iljaseviciute from Practical Embroidery
Before we dive in into embellishing our T-shirt, there are some things you should know about hand embroidery on stretchy fabrics.
- Some hand embroidery stitches stretch, and some – don’t. Carefully choose what stitches to apply around the neckline, as this part of the T-shirt stretches the most. Avoid continuous lines of the backstitch, running stitch, or other non-stretchy stitches. Opt for stitches with horizontal and vertical directions, like a Blanket stitch or Herringbone stitch. Or choose embroidery designs that are formed from separate sections.
- Be careful with the tension of the fabric while you embroider. Too loose is as bad as too tight. I recommend using a water-soluble stabilizer for pattern transfer to jersey fabrics, as this stabilizer also helps us maintain the tension of the material.
- Use only sharp needles. If the needle doesn’t pass through the fabric smoothly – opt for a smaller size or take a fresh needle from the package. Damaging the fabric with blunt needles is easy, resulting in a small hole in your T-shirt.
- If you put aside your embroidery on a T-shirt for the night or a couple of days – remove the fabric from the hoop and stretch it again when you come back to your project. Stretchy fabrics are sensitive and can be deformed by constant tension in the hoop. Besides, this way ironing the T-shirt after the work is finished is easier.
- T-shirts and other finished garments are not the most convenient objects to embroider. Carefully roll the garment pieces outside the hoop and pin them to keep excess fabric off the way while embellishing them with stitches.
Supplies you will need for this project:
 Photo credit: Tatjana Iljaseviciute from Practical Embroidery
- The pattern. I chose a Butterflies art line drawing design from the Creative Fabrica library.
- A T-shirt. I used a plain white crop top. You can select a brand new T-shirt or refresh the one you already own or a second-hand one.
- Embroidery floss. I used DMC Embroidery floss: Black #310. You can choose any contrasting color that will stand out on your T-shirt.
- Embroidery needle. Choose a medium embroidery needle (e.g., No 7) for two strands of embroidery floss.
- Pattern transferring tools. I used a water-soluble stabilizer and a friction pen for pattern transfer. When the project is finished, it will go out by dipping the embroidery into lukewarm water.
- Embroidery hoop. Choose a size that will fit the design. Mine is 20 cm in diameter.
- Scissors – small embroidery scissors or nips to cut the thread.
Tips before you start embroidering:
- You can use other methods of pattern transfer too. Read the “Four ways to transfer embroidery patterns to fabric” article and decide which method will work best for your chosen fabric and the project.
- If you are new to hand embroidery, learn the basic hand embroidery stitches you will need for this project. The “Six Hand Embroidery Stitches for Lettering” article will be helpful.
- Avoid making knots when you start and finish stitching; they irritate the skin and can get loosened when the T-shirt is washed. I demonstrate in detail how to start stitching with a folded thread method and secure the threads when you finish them in the article “Hand Embroidered Mother’s Day Card. DIY Tutorial.”
Step-by-step tutorial
Download and transfer the pattern.
- Download and resize the Butterflies art line drawing from the Creative Fabrica library to your liking.
- Print the pattern.
 Photo credit: Tatjana Iljaseviciute from Practical Embroidery
- Choose the butterflies you want to embroider and transfer them to the water-soluble stabilizer. TIP. Be careful with the tools you use to draw on the stabilizer. You will have to wash it to remove it from the fabric. Keep in mind that some pens bleed when wet. I opt for the friction pen – it’s accurate enough and does not bleed when washed.
- Cut out the butterflies and position them on the T-shirt.
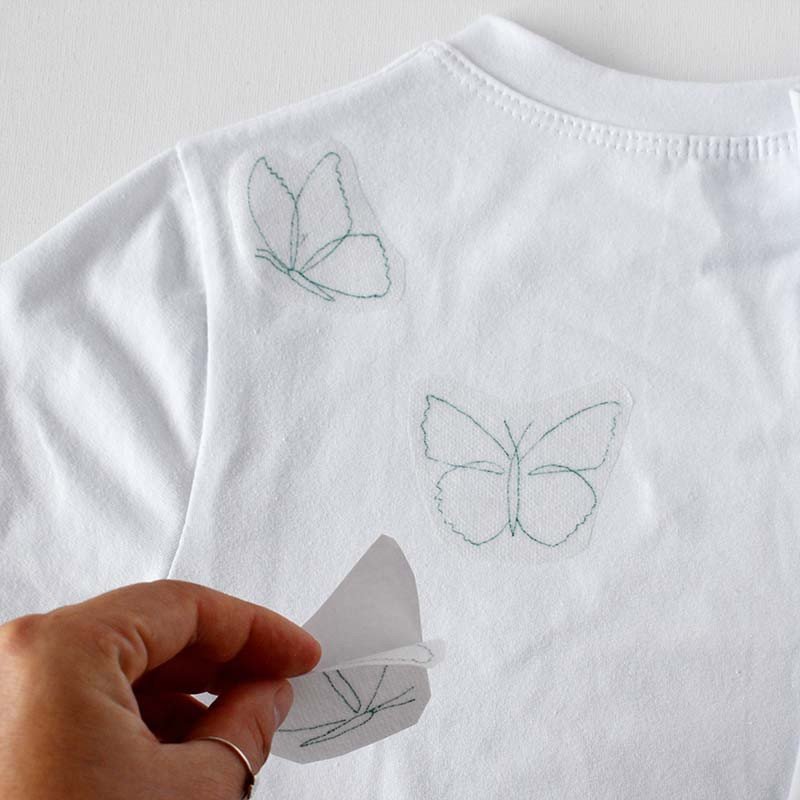 Photo credit: Tatjana Iljaseviciute from Practical Embroidery
- Peel and stick the stabilizer with the design in the desired positions on the T-shirt. TIP. Place the T-shirt on a solid surface and make sure it is not wrinkled. Iron it if needed. Do not stretch the fabric, but lay it straight. Place the stabilizer stickers on the T-shirt first and only then put the material in the hoop.
- Place the T-shirt in the hoop. Do not stretch the material too much – the water-soluble stabilizer will keep the shape of the fabric stable.
Embroider the butterflies
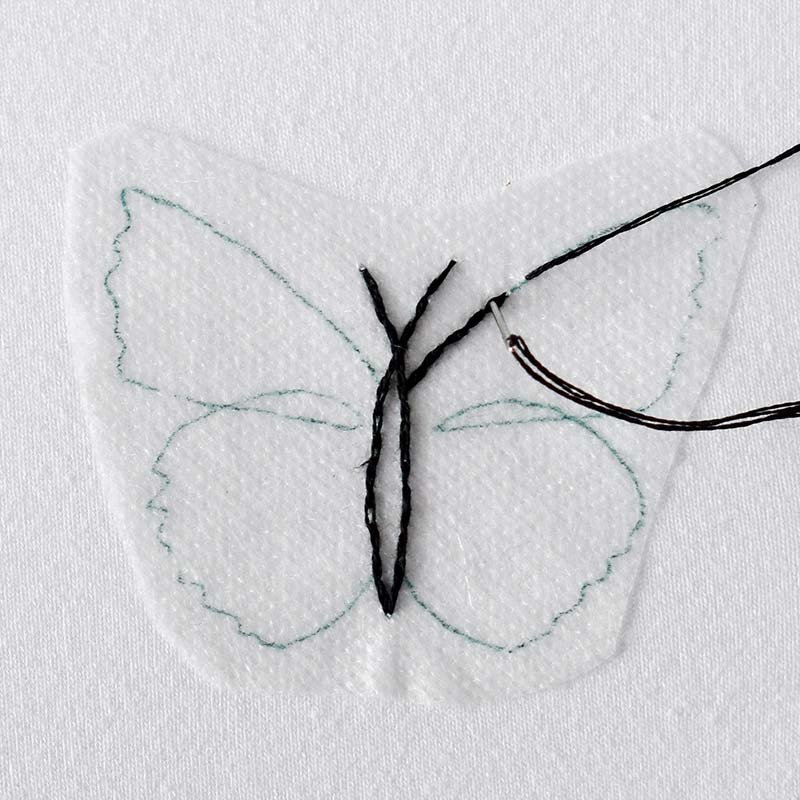 Photo credit: Tatjana Iljaseviciute from Practical Embroidery
- Embroider with two strands of Black embroidery floss (DMC #310). Use Split Backstitch for embroidery.
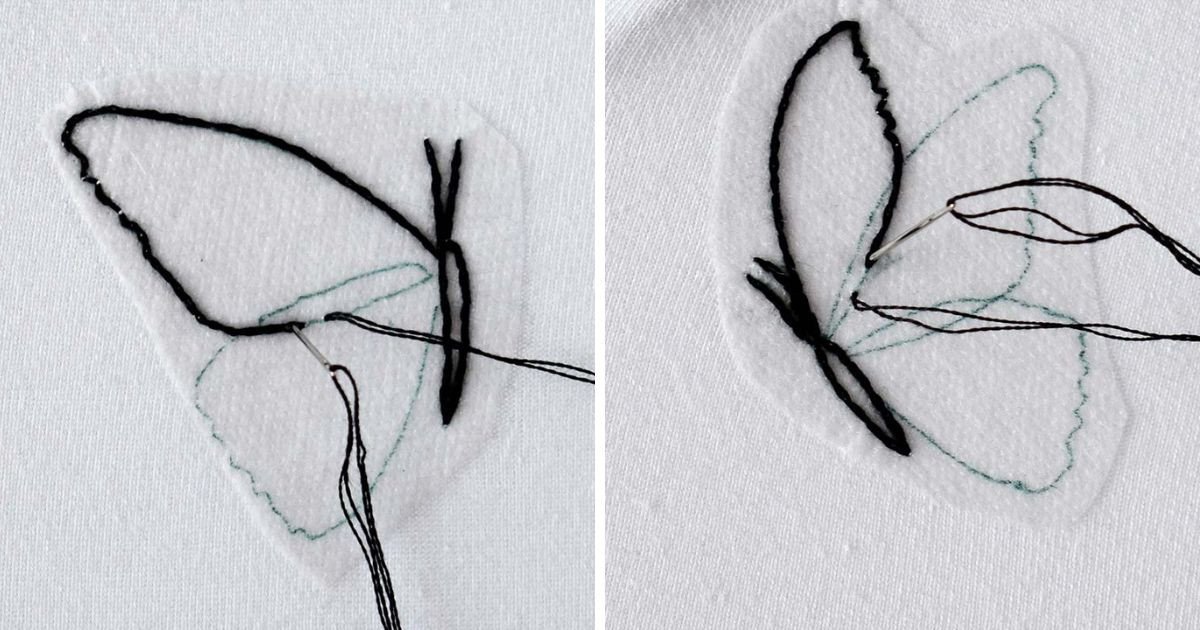 Photo credit: Tatjana Iljaseviciute from Practical Embroidery
- Avoid big knots on the back of the embroidery, and carefully secure the threads on the back of the fabric. Frequent washing can relax the yarn, and the knots can get loose over time. Choose a folded thread method for starting.
Remove the stabilizer
 Photo credit: Tatjana Iljaseviciute from Practical Embroidery
- After all the pieces of embroidery are finished, remove the water-soluble stabilizer.
- Place the part of the T-shirt with a stabilizer and embroidery into a bowl of lukewarm water, and it will dissolve.
- Rinse with running water to remove the residue of the stabilizer.
- Dry the T-shirt and iron it.
Go chasing butterflies!
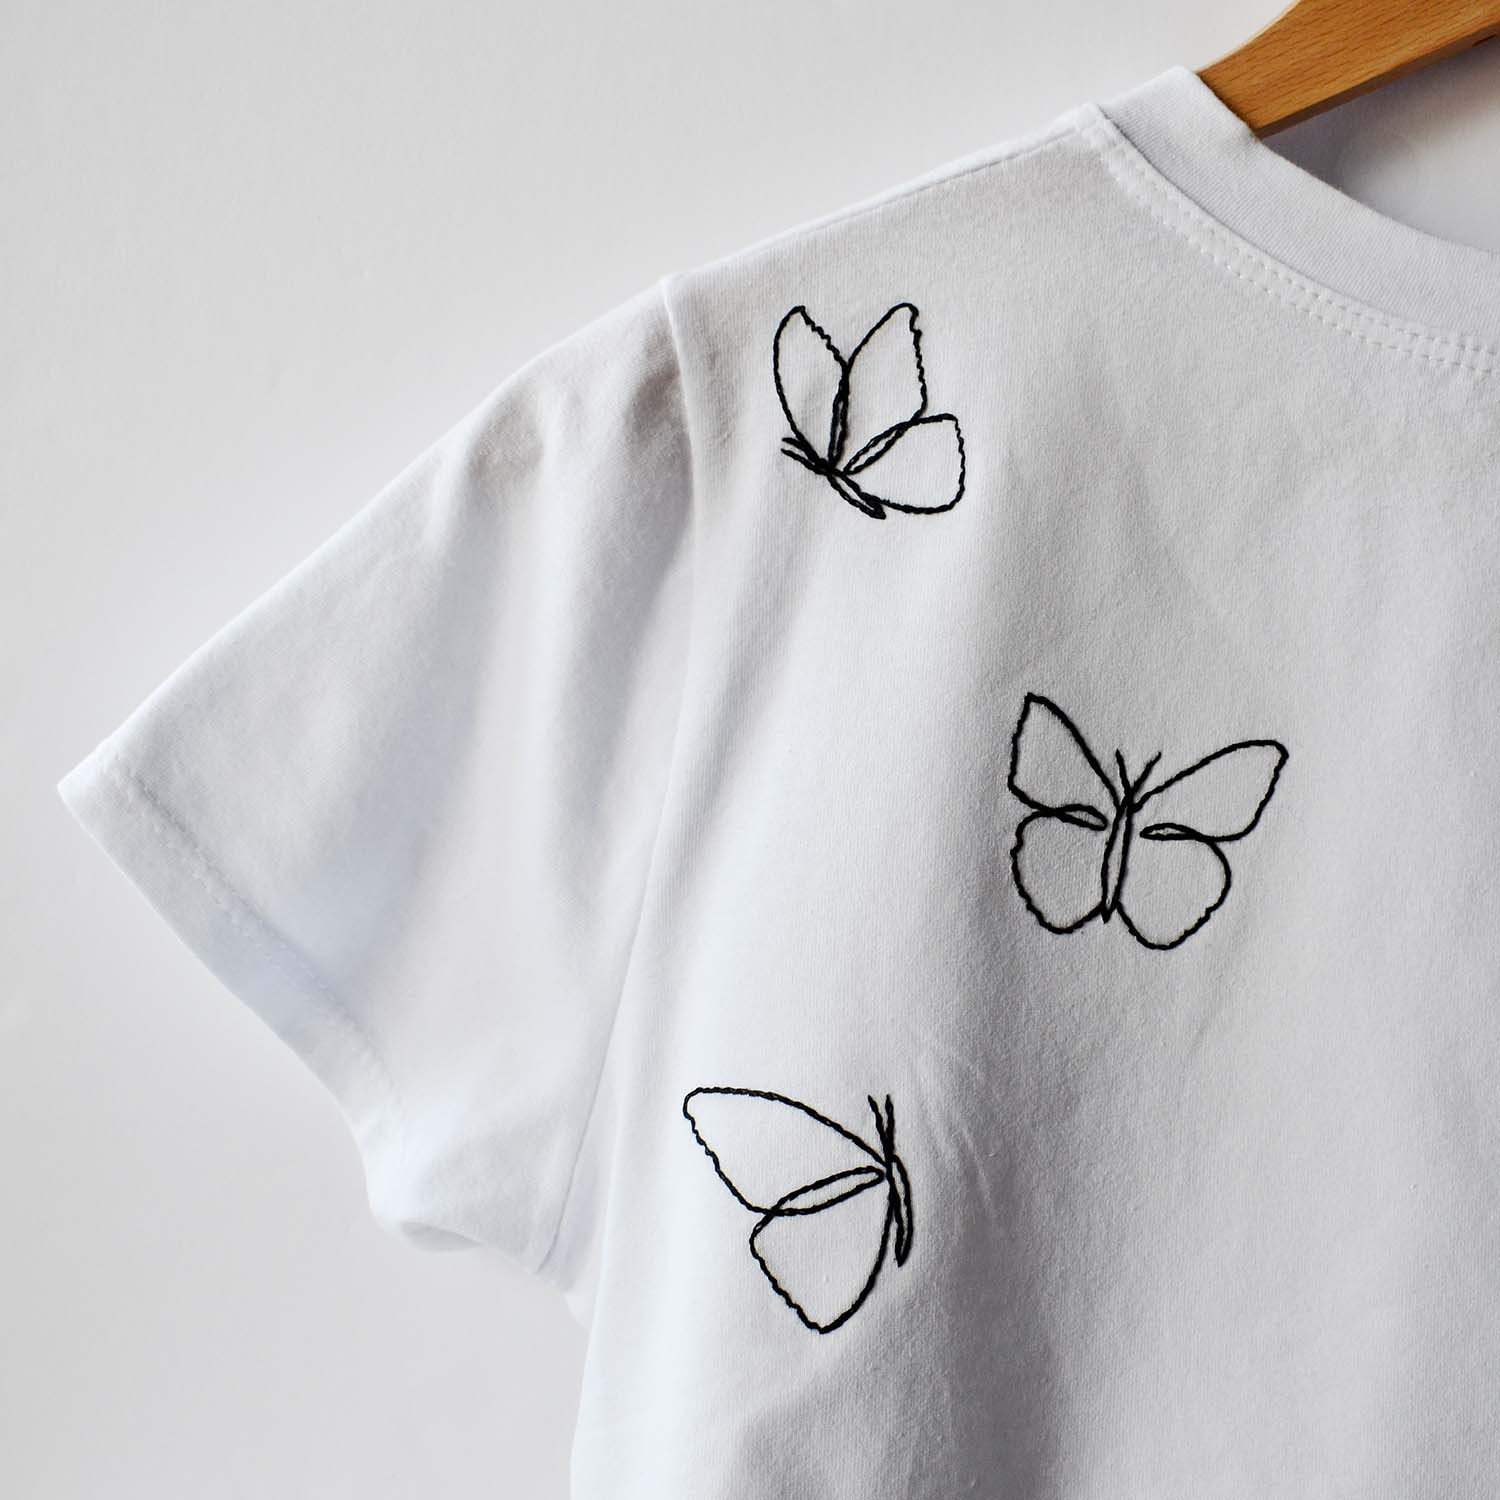 Photo credit: Tatjana Iljaseviciute from Practical Embroidery
Your customized one-of-the-kind T-shirt with butterfly embroidery is ready!
Wear it to the beach, during your city holiday trip, or to work and express your original style.
With this simple step-by-step tutorial and thousands of original designs in the Creative Fabrica library, you can create a T-shirt that perfectly fits your style and reflects your personality.
Artículo escrito por