Flowers not only gift beauty to our eyes and decorate our environment. These fragile plants are indispensable for the bees and for our planet. They give us medicine, feed the pollinators, and bring us joy.
But did you know that flowers also have secret meanings? The meaning of a Daisy flower can be purity, innocence, new beginnings, joy, and cheerfulness. In the Victorian Era, Daisies symbolized innocence, loyalty, and an ability to keep things secret.
Modern art found thousands of ways to depict Daisy. We can opt for monochromatic black-and-white drawings, minimalistic images, or decorative and voluminous pictures. Different hand embroidery styles will suit various purposes. For example, a fully filled Daisy flower will look great embroidered on a sweatshirt or knitwear. On the other hand – the Black & White option would suit a tote bag or a pouch better.
Let’s try four different ways to embroider Daisy together so that you can choose the best one for your next project!
Tools and materials you will need for this project:
 Photo credit: Tatjana Iljaseviciute from Practical Embroidery
- Embroidery pattern. I used a Daisy flower line art file from the Creative Fabrica library.
- Fabric: I used non-bleached linen fabric (25×25 cm). You can use any darker material.
- Embroidery floss. I used DMC Embroidery floss: Black #310, Light Topaz #726, Mild Light Topaz #725, Mild Topaz #783, White #BLANC, Light Beige Gray #822, Cream #712, and #ECRU.
- Embroidery needle. Choose a medium embroidery needle (e.g., No 7) for two or three strands of embroidery floss and a bigger one (e.g., No 5) for six strands.
- Pattern transferring tools. I used a friction pen for pattern transfer. It will go out with the iron heat when the project is finished.
- Embroidery hoop. Choose a size of the hoop that will fit the design. Mine is 20 cm in diameter.
- Scissors – fabric shears to cut the material and small embroidery scissors or snips to cut the thread.
Embroidery stitches
For this project, we will use the following:
- French knots
- Stem stitch
- Running stitch
- Chain stitch
- Weave stitch
- Split backstitch
- Satin stitch
Suppose you are unfamiliar with these embroidery stitches or need to refresh your knowledge. In that case, these articles on The Artistry blog will be helpful:
Step-by-step tutorial
Download and transfer the pattern
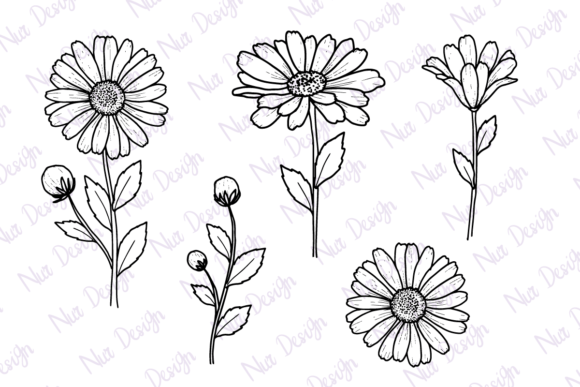 Photo credit: Creative Fabrica
- Download and resize the Daisy flower line art from the Creative Fabrica library. I resized my flower to approximately 5,5 cm and placed four Daisies on one sheet.
- Print the pattern.
- For the pattern transfer – use a lightbox method. Tape your printed pattern to a bright sunny window. Tape the fabric above the design with the image positioned in the center. Repeat all the outlines of the image to the material. Use a friction pen or water-soluble pen for the pattern transfer.
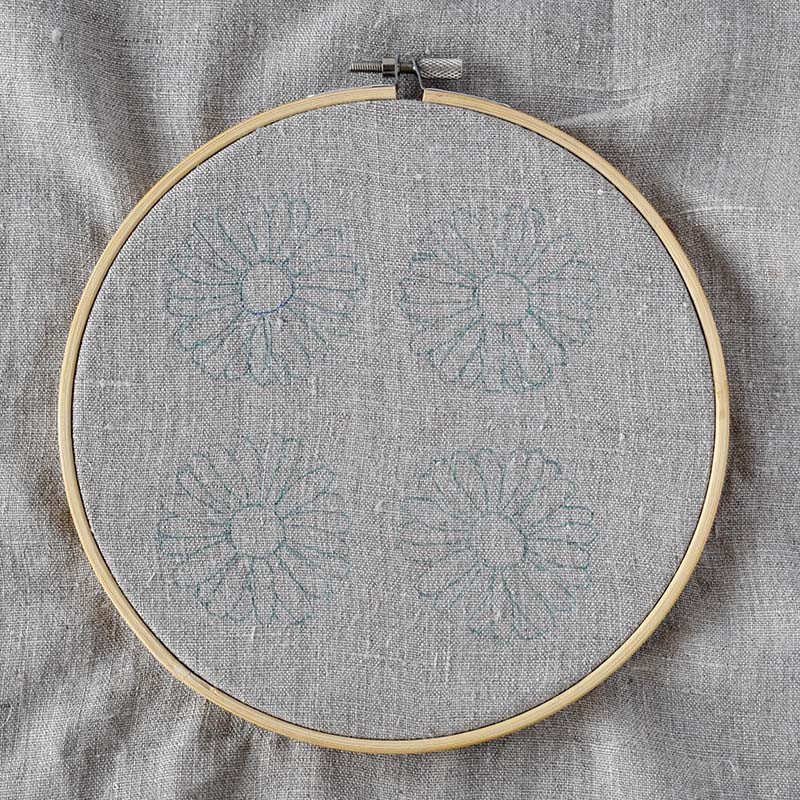 Photo credit: Tatjana Iljaseviciute from Practical Embroidery
- Place the fabric with a Daisy design in the hoop with the image centered, adjust the tension, and tighten the screw.
Black & White Daisy
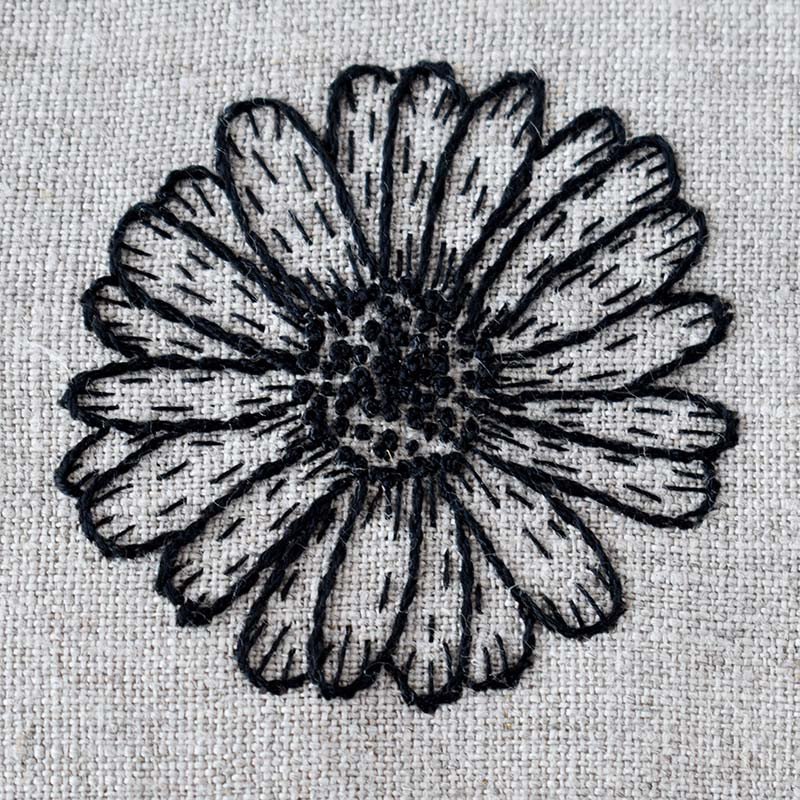 Photo credit: Tatjana Iljaseviciute from Practical Embroidery
- We will use only black embroidery floss (DMC #310) and embroider with one and two embroidery floss strands for this flower.
- Start from the center of the flower and fill it with French knots. Make some knots with two strands of the floss.
 Photo credit: Tatjana Iljaseviciute from Practical Embroidery
- Then – add more knots with a single thread.
 Photo credit: Tatjana Iljaseviciute from Practical Embroidery
- Embroider the petals with a Stem stitch. Start with the petals that are in front of the drawing.
 Photo credit: Tatjana Iljaseviciute from Practical Embroidery
- Then embroider the petals that are in the back – behind the other petals.
 Photo credit: Tatjana Iljaseviciute from Practical Embroidery
- To avoid long jumping threads on the back of the embroidery – pass the thread under the previously made stitches on the back to reach the starting point of the new stitch.
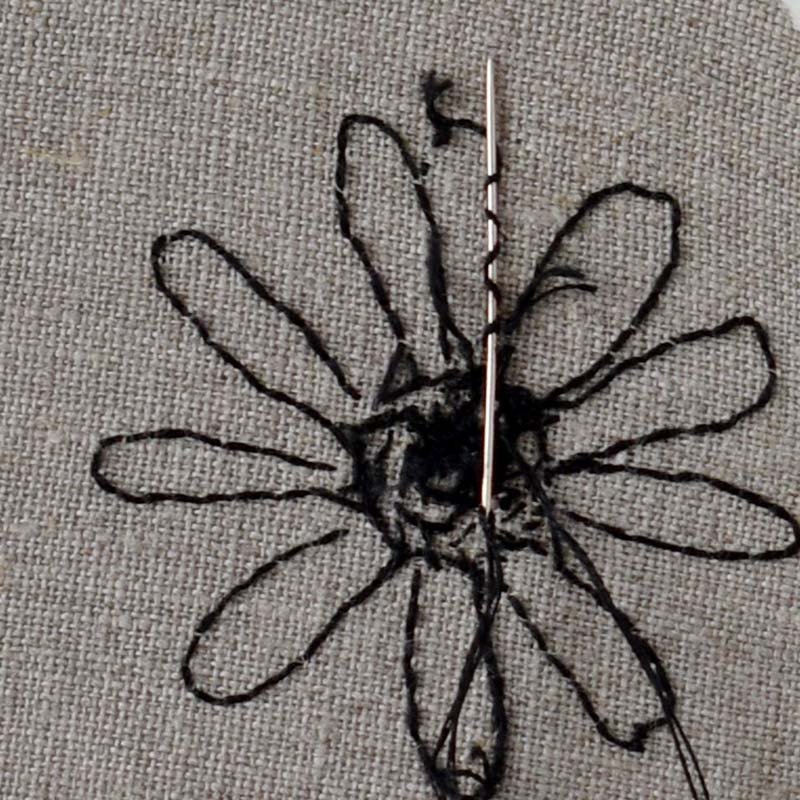 Photo credit: Tatjana Iljaseviciute from Practical Embroidery
- Add nectar guides with a Running stitch. Use one strand of embroidery floss.
 Photo credit: Tatjana Iljaseviciute from Practical Embroidery
Chain stitch Daisy
 Photo credit: Tatjana Iljaseviciute from Practical Embroidery
- This Daisy is embroidered with three strands of embroidery floss: DMC #726, DMC #783, and #BLANC.
- Start with the center of the flower. Use a Weave stitch for this part of the design. First, embroider vertical stitches with DMC #726.
 Photo credit: Tatjana Iljaseviciute from Practical Embroidery
- Then, weave horizontal stitches with DMC #783. Use the back of the needle for weaving to save the stitches from snagging.
 Photo credit: Tatjana Iljaseviciute from Practical Embroidery
- Outline the Weave stitch with a Chain stitch. Use DMC #783.
 Photo credit: Tatjana Iljaseviciute from Practical Embroidery
- TIP. Connect the Chain stitch by passing the last stitch under the first one to make a perfect circle.
 Photo credit: Tatjana Iljaseviciute from Practical Embroidery
- Outline the petals of the Daisy with a Chain stitch. Use three strands of White embroidery floss DMC #BLANC. First, outline the front petals.
 Photo credit: Tatjana Iljaseviciute from Practical Embroidery
- Then – outline the petals in the second row.
 Photo credit: Tatjana Iljaseviciute from Practical Embroidery
Simple Daisy
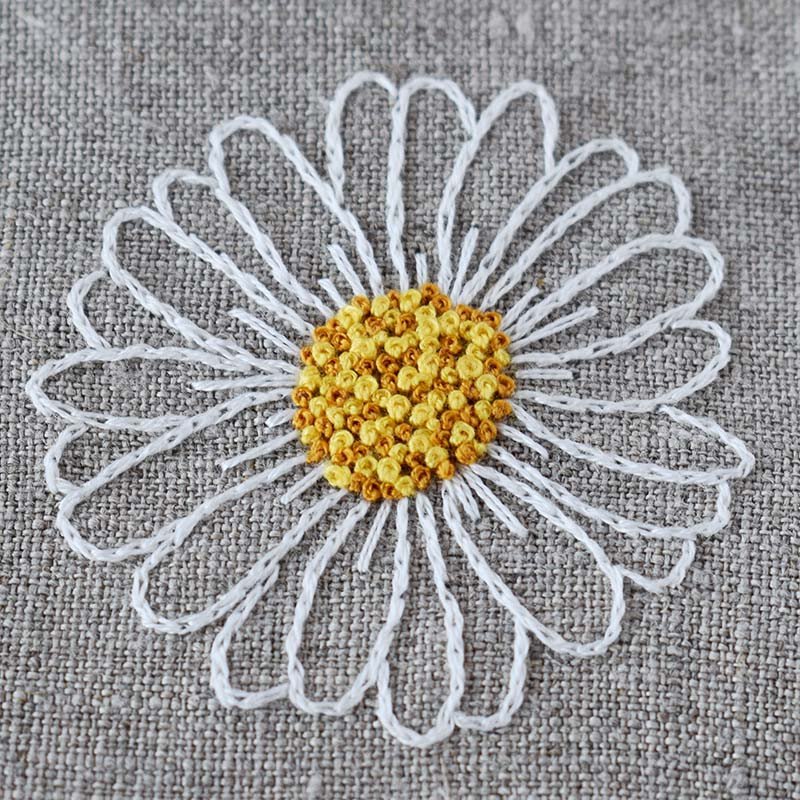 Photo credit: Tatjana Iljaseviciute from Practical Embroidery
- This Daisy is embroidered with two and three strands of embroidery floss: DMC #726, DMC #783, and #BLANC.
- Start with the central part of the flower. Make some French knots with three strands of DMC #726.
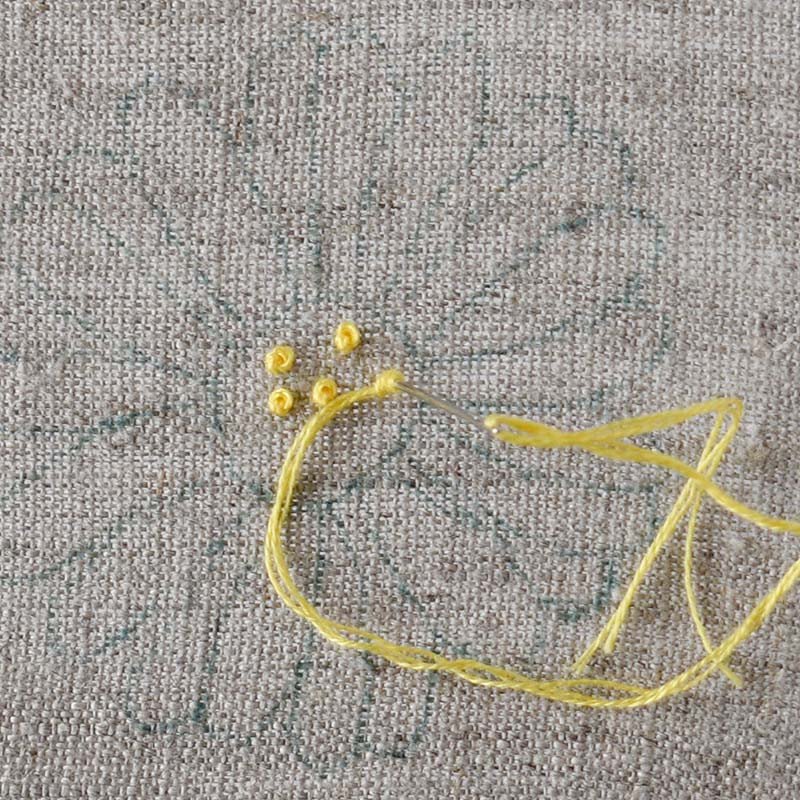 Photo credit: Tatjana Iljaseviciute from Practical Embroidery
- Then, add French knots with two strands of DMC #783.
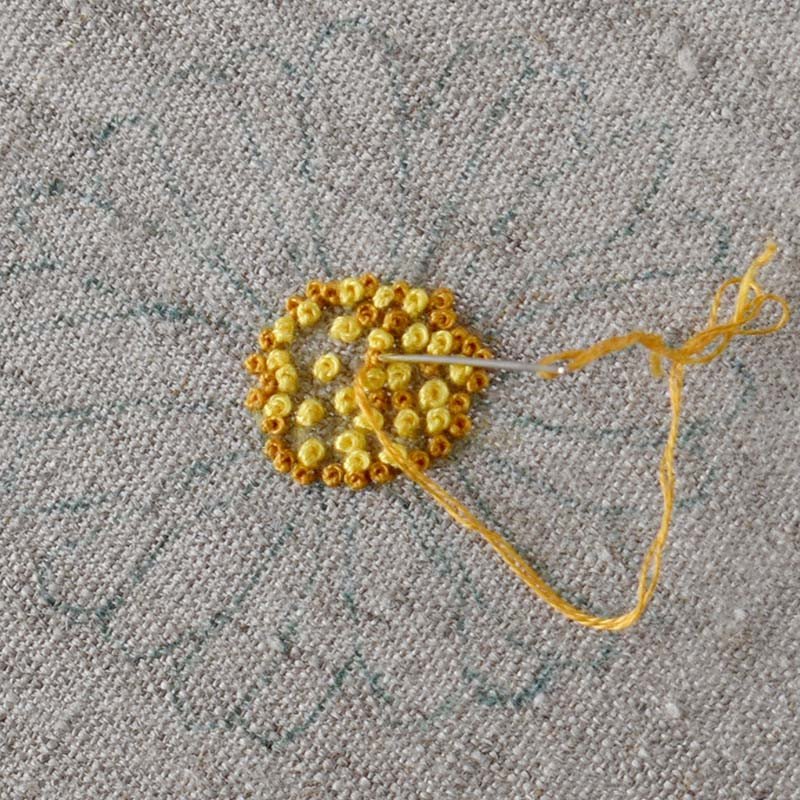 Photo credit: Tatjana Iljaseviciute from Practical Embroidery
- Finally, fill the rest of the space with French knots made with two strands of DMC #726.
 Photo credit: Tatjana Iljaseviciute from Practical Embroidery
- Outline the petals with a Split backstitch. Use two strands of white embroidery floss.
 Photo credit: Tatjana Iljaseviciute from Practical Embroidery
- Add nectar guides with a simple straight stitch. Make them of various lengths. Use two strands of White embroidery floss.
 Photo credit: Tatjana Iljaseviciute from Practical Embroidery
Full Daisy
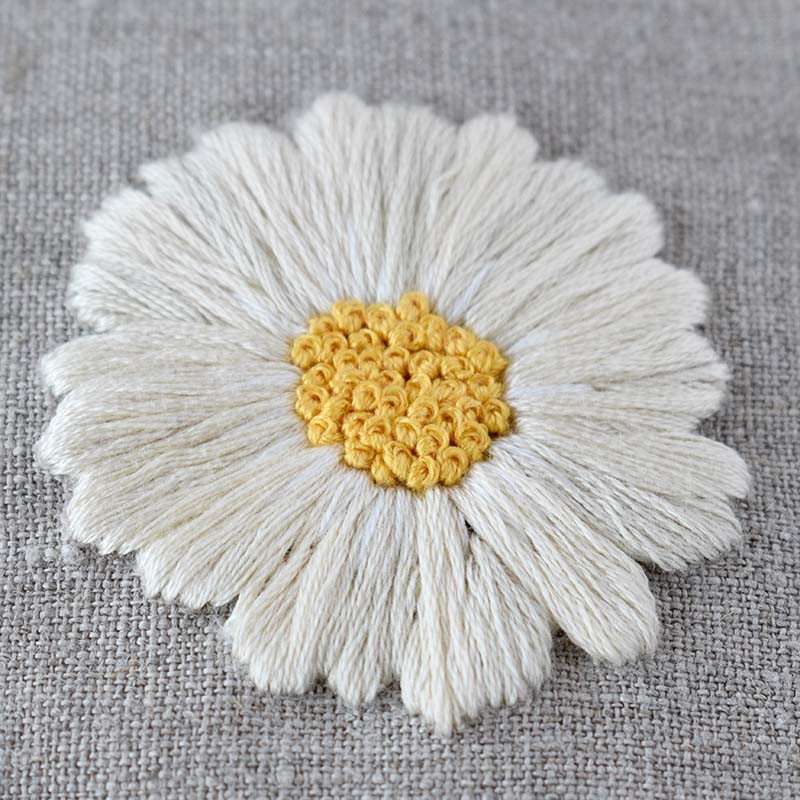 Photo credit: Tatjana Iljaseviciute from Practical Embroidery
- This Daisy is embroidered with all six strands of embroidery floss. I used three shades of off-white colors – DMC #822, DMC #712, and #ECRU for the petals and bright yellow (DMC #725) for the center. Also, you will need some white floss.
- Start with the petals that are behind other petals. Use the darkest shade of the floss (DMC #822). Outline the edge of the petal with a Split backstitch.
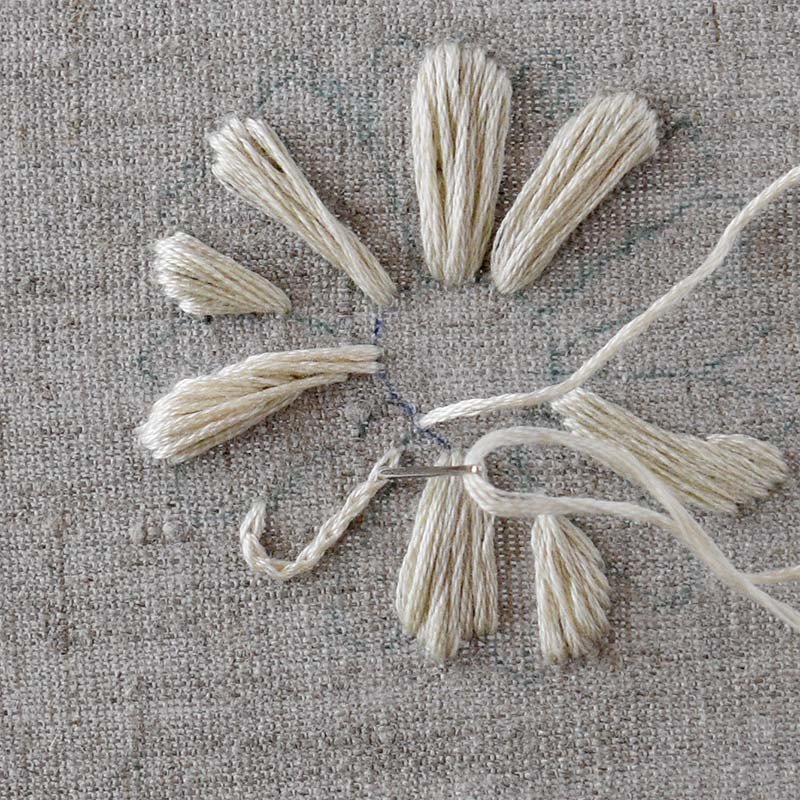 Photo credit: Tatjana Iljaseviciute from Practical Embroidery
- Then, fill the petal with a Satin stitch.
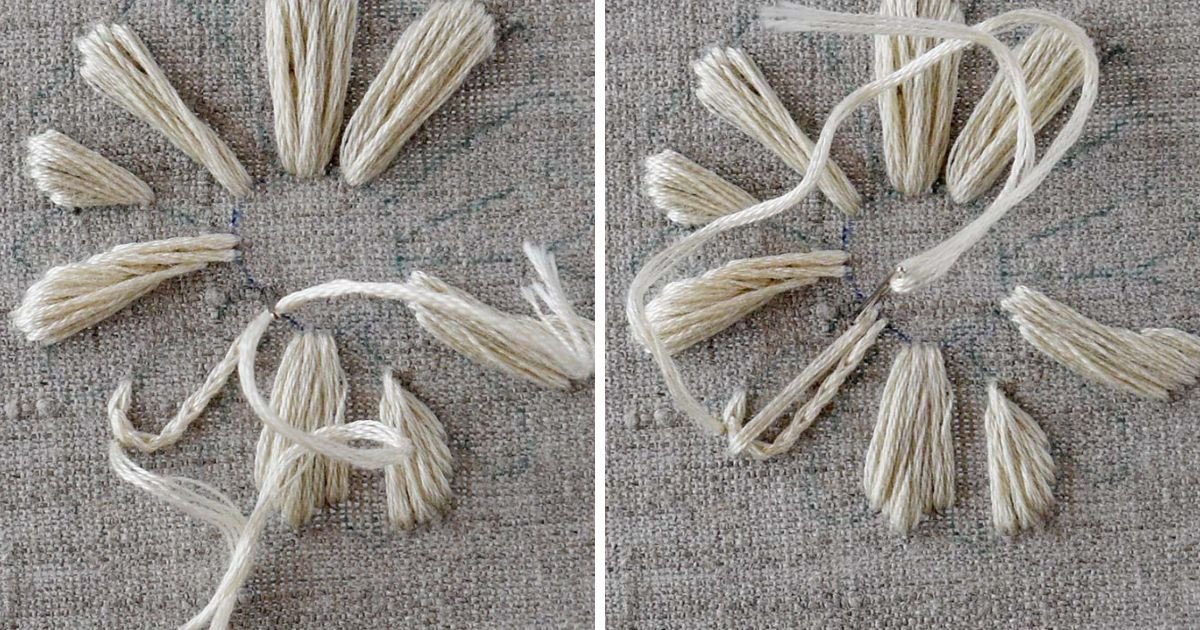 Photo credit: Tatjana Iljaseviciute from Practical Embroidery
- For the petals in the middle, I used DMC #712, and for the petals in front – I used DMC #ECRU.
- For the nectar guides, use a simple straight stitch. Make them of various lengths. Use two strands of White embroidery floss.
 Photo credit: Tatjana Iljaseviciute from Practical Embroidery
- At the end – fill the center of the Daisy with French knots. Use six strands of DMC #725 embroidery floss.
Which one is your favorite?
 Photo credit: Tatjana Iljaseviciute from Practical Embroidery
Now you know four different ways to embroider the Daisy flower. There are many more options – one short tutorial can’t explore all the possibilities.
If you need more than these four options for your creative idea – try to mix and match different stitches from my examples. For example, you could use the Weave stitch center with Split stitch petals or a Satin stitch for the center and the Chain stitch for the petals.
Please let me know which of the designs you like most. Will you try to embroider it?
Artículo escrito por