Six Hand Embroidery Stitches for Lettering

What is the best way to personalize the gift? Putting the name or a personal message on it!
But how can you personalize textile gifts? Simple! Instead of writing it, embroider your message or the person’s name on the present or packaging.
Where can you use embroidered lettering?
- Embroider the name on the textile gift bags. Add the gift receiver’s name on the fabric gift bag or Furoshiki cloth.
- Add a name tag on the clothes of your child. I used to embroider my daughter’s name on the towels and swim robe when she took swimming lessons. It’s an excellent personalization. It also guarantees that the belongings are not mixed in the crowded dressing room.
- Add monograms or funny quotes on the textile tissues or tea towels.
- Embroider some words directly on the pieces of clothing. A child’s name on a sweater or a provocative phrase on your T-shirt is just a couple of ideas.
 Photo credit: Personalized Embroidered Baby and Toddler Name Sweater by FTGstudio
- Tote bags, Zip pouches, pillowcases – anything made from fabric can be embellished with words.
Six + one embroidery stitches that are great for lettering
Most of the hand embroidery stitches could be used for lettering. But some stitches work better than others.
Backstitch, Whipped Backstitch, Stem stitch, Chain stitch, Split stitch, and Running stitch are at the top of this list. I also added the French knots as an extra stitch, as they are great for the dots and other punctuation you might need when stitching.
Running Stitch
 Photo credit: Tatjana Iljaseviciute from Practical Embroidery
Running stitch is the most simple and basic embroidery stitch. The needle is continuously pushed through the cloth, starting on one side and ending on the other. When embroidered, this stitch will create equally sized straight surface stitches spaced at regular intervals.
When used for lettering, the Running stitch will create light letters as it has empty spaces in the stitch. You can adjust the spacing and make longer stitches on the surface and smaller gaps between the stitches.
Running stitch works excellent for Capital letters and fonts that have more angles. However, script fonts are more complex to embroider with the Running stitch.
How to embroider Running stitch:
1. Bring your needle up at the beginning of the line and make a stitch of the desired size.
 Photo credit: Tatjana Iljaseviciute from Practical Embroidery
2. Bring your needle up, estimating the same stitch length for the gap.
 Photo credit: Tatjana Iljaseviciute from Practical Embroidery
Backstitch
 Photo credit: Tatjana Iljaseviciute from Practical Embroidery
Backstitch is one of the most popular basic embroidery stitches. It works great for outlines, sewing, and of course – lettering. When you embroider the Backstitch, the stitches are worked backward to the general direction of sewing and create a continuous solid line that visually looks like a machine sewing seam.
This stitch works great for lettering, as you can adjust the length of the stitches to depict even the most minor curves and details. The letters you embroider will be as thick as the thread you used for embroidery.
How to embroider Backstitch:
1. Bring the needle up on the design line that distances one stitch from the start. Insert the needle through the fabric at the beginning of the line to make the first stitch.
 Photo credit: Tatjana Iljaseviciute from Practical Embroidery
2. Continue along the line, bringing the needle up at the desired stitch length from the previous stitch and coming down at the end of the last stitch.
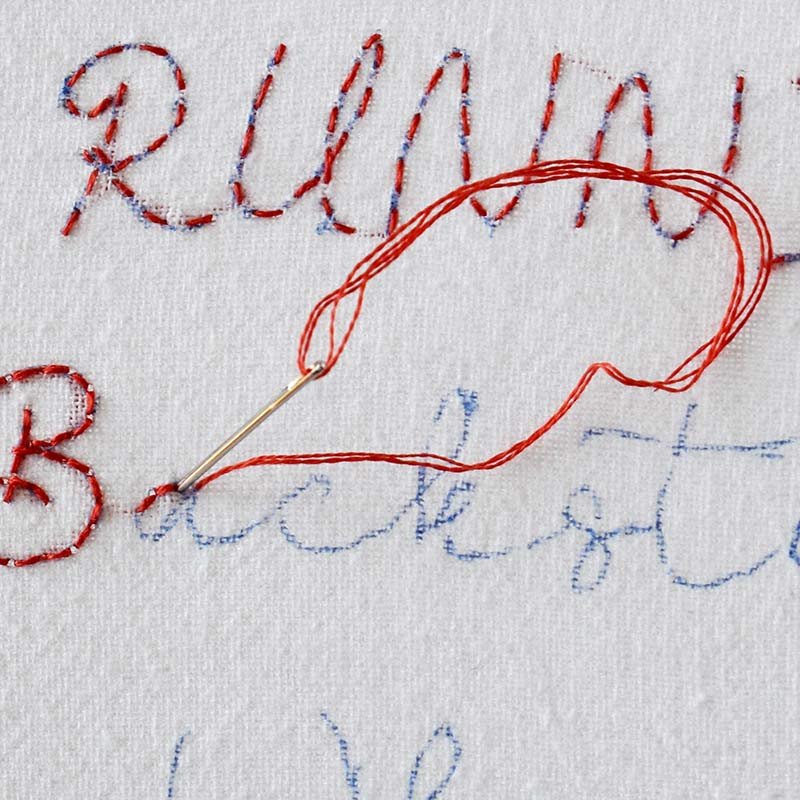 Photo credit: Tatjana Iljaseviciute from Practical Embroidery
Whipped Backstitch
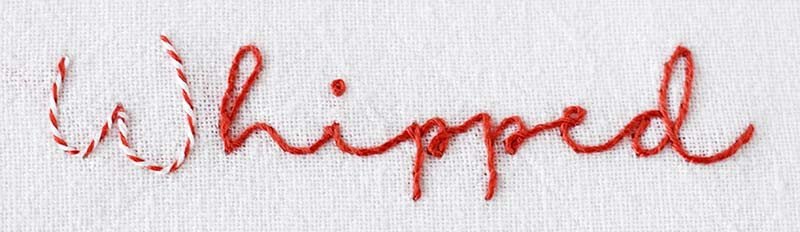 Photo credit: Tatjana Iljaseviciute from Practical Embroidery
Whipped Backstitch is a variation of Backstitch that can add a beautiful twist to your embroidered letters. Whipping of the backstitches makes the embroidered line smoother, more fluid, and also raised from the surface. Another benefit of the Whipped Backstitch is that you can use two contrasting colors for this stitch and create colorful lettering.
The letters you embroider with the Whipped Backstitch will be slightly thicker than the number of threads you use for the stitch — also, the lettering will look raised from the surface.
How to embroider Whipped Backstitch:
1. Embroider Backstitch.
 Photo credit: Tatjana Iljaseviciute from Practical Embroidery
2. Come up with the needle at the beginning of the first stitch.
 Photo credit: Tatjana Iljaseviciute from Practical Embroidery
3. Pass the needle under the backstitch.
 Photo credit: Tatjana Iljaseviciute from Practical Embroidery
4. Repeat this step and pass the needle under the next stitches. Keep the direction of the lacing stitches the same throughout all the stitches.
 Photo credit: Tatjana Iljaseviciute from Practical Embroidery
Chain stitch
 Photo credit: Tatjana Iljaseviciute from Practical Embroidery
Chain stitch is made from interlocking loops, each held by the next stitch. This simple stitch creates a chain-like solid line that works great for outlines, lettering, and filling.
Embroidering letters with Chain stitch will be fun and easy. This stitch takes curves well and creates rather bold letters. However, the thickness of the characters will be more than double the number of threads you used, as the chain has some empty space between the threads that form it.
How to embroider Chain stitch:
1. Bring your needle up and down in the same hole, leaving a large loop on the fabric’s surface.
 Photo credit: Tatjana Iljaseviciute from Practical Embroidery
2. Bring the needle up again at the point you wish to anchor your loop, making sure you bring the needle up inside the loop.
 Photo credit: Tatjana Iljaseviciute from Practical Embroidery
3. Bring the needle and thread all the way through to the surface, tightening the loop of the chain.
4. Form the second chain by taking the needle back through the same hole.
 Photo credit: Tatjana Iljaseviciute from Practical Embroidery
6. Finish the row with an anchor stitch.
TIP. If you want to add an extra touch to the lettering – use a Lazy Daisy stitch for the dots. Embroider tiny single chain stitches placed in a circle around a french knot.
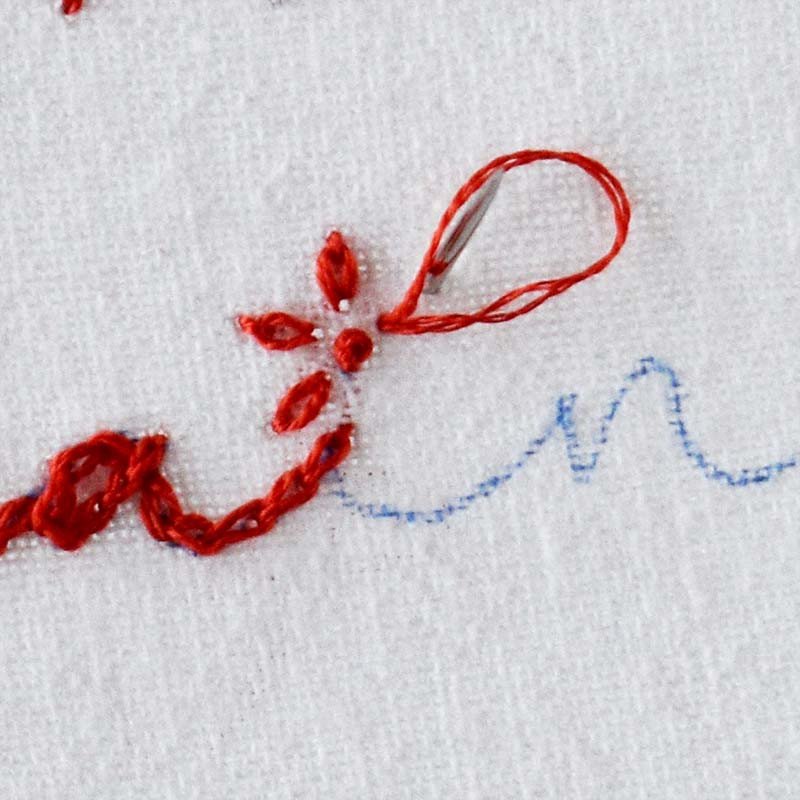 Photo credit: Tatjana Iljaseviciute from Practical Embroidery
Stem stitch
 Photo credit: Tatjana Iljaseviciute from Practical Embroidery
A Stem stitch is a line of straight stitches placed beside the previous stitch to form a rope-like line. Stem stitch is perfect for all Script fonts, as it will work great on all the curves.
The final line of the embroidered letter will be two times thicker than the thread you use – If you use a single thread, the line will look like two threads. Remember it when deciding the number of threads to use in your design.
How to embroider Stem stitch:
1. Push the needle up through the fabric at the base of your stitching area. Decide on the stitch length and take the needle down through the material at that point. Pull the thread through the fabric, leaving a loop on the fabric’s surface. Hold the loop out of the way to the right. Bring the needle up to the surface halfway between the stitch length.
 Photo credit: Tatjana Iljaseviciute from Practical Embroidery
2. Leave the needle in the fabric while you tighten the slack on the loop against your needle.
3. Pull the needle up through the fabric and make another looped stitch equal in length to the first. Bring the needle up halfway between the stitch length.
 Photo credit: Tatjana Iljaseviciute from Practical Embroidery
Split stitch
 Photo credit: Tatjana Iljaseviciute from Practical Embroidery
This is a form of back stitch, with the needle splitting the center of the previous stitch rather than coming up in the same hole. This results in what looks like a mini Chain stitch.
This stitch is excellent for lettering as it takes the curves very well and creates a smooth, continuous line. The letters you embroider with a Split stitch will be slightly thicker than the number of threads used but not as bold as with a Chain stitch.
TIP. Use a paired number of embroidery threads or easily divisible thread for this stitch. The yarns, like Pearl cotton or a single thread of embroidery floss, can be complicated to split when you embroider this stitch.
How to embroider Split stitch:
1. Make one stitch in the direction of the stitching.
 Photo credit: Tatjana Iljaseviciute from Practical Embroidery
2. Push the needle up through the fabric in the center of your first stitch, splitting the thread with the needle on the way to the surface.
 Photo credit: Tatjana Iljaseviciute from Practical Embroidery
3. Each next stitch should be equal in length to the first but halfway back along the previous stitch.
 Photo credit: Tatjana Iljaseviciute from Practical Embroidery
French knots
The French knot is an excellent addition to the embroidery stitches for lettering. You can use it to add dots to all the letters that require specks. Also, you can create commas and colon or semi-colon punctuations in the text you embroider.
TIP. When embroidering French knots, use the Straw needle instead of the Embroidery needle. It has a shaft of the needle the same size as an eye, and it will be easier to pass the needle through wrapped threads.
How to embroider French knots:
1. Bring the needle up through the fabric where you want the knot to sit. Wrap the thread around the needle twice to form a spiral.
 Photo credit: Tatjana Iljaseviciute from Practical Embroidery
2. Place the needle into the fabric very close to where it emerged (but not in the same spot). Next, draw the knot down to where the needle enters the cloth.
 Photo credit: Tatjana Iljaseviciute from Practical Embroidery
3. Keeping the thread taut at all times, pull the needle through to complete the knot.
 Photo credit: Tatjana Iljaseviciute from Practical Embroidery
Let’s practice lettering
 Photo credit: Tatjana Iljaseviciute from Practical Embroidery
If you want to make a similar drop cloth for practicing stitches, here is what you will need:
- Family Farmhouse Script font. I downloaded it from the Creative Fabrica website, wrote the names of the stitches (I used Microsoft Word), and changed the font size to 70. Then printed it and transferred the letters to the fabric.
- Piece of fabric. I used a piece of white cotton.
- Embroidery floss. I used two strands of DMC embroidery floss, Mild coral (#350) and White (#BLANC), for the Whipping stitch.
- Embroidery needle.
- Hoop. Mine is 20 cm in diameter.
- Scissors or snips to cut the thread.
- For the pattern transfer, I used a Lightbox method. You can find a detailed description of this method in the “Hand Embroidered Tote Bag With Mandala” project.
Tips for practicing:
- Transfer the lettering to the fabric with a lightbox method.
 Photo credit: Tatjana Iljaseviciute from Practical Embroidery
- To start embroidering – use a folded thread method, so there are no visible knots on the backside. Cut a single thread twice long then you would typically use. Fold it in half and thread cut ends into the needle. Make the first stitch and pass the needle into the loop on the backside. This loop will hold your first stitch like a knot.
 Photo credit: Tatjana Iljaseviciute from Practical Embroidery
- When you jump from one letter to another, try to make the jumping thread as short as possible. Pass the thread under previous stitches on the back if the distance is significant.
 Photo credit: Tatjana Iljaseviciute from Practical Embroidery
- When finished stitching, carefully anchor the last stitch and hide the end of the thread under the previous stitches on the back.
 Photo credit: Tatjana Iljaseviciute from Practical Embroidery
- For more visual guidance – watch this Video tutorial
If practicing stitches on the dropcloth is not your thing – check out the “Hand-embroidered bookmark with a romantic quote” project or any other embroidery project on The Artistry, and start creating!
What will be the first word you embroider, and which stitch will you use? Please share with us in the comments!
 Photo credit: Tatjana Iljaseviciute from Practical Embroidery
Artículo escrito por