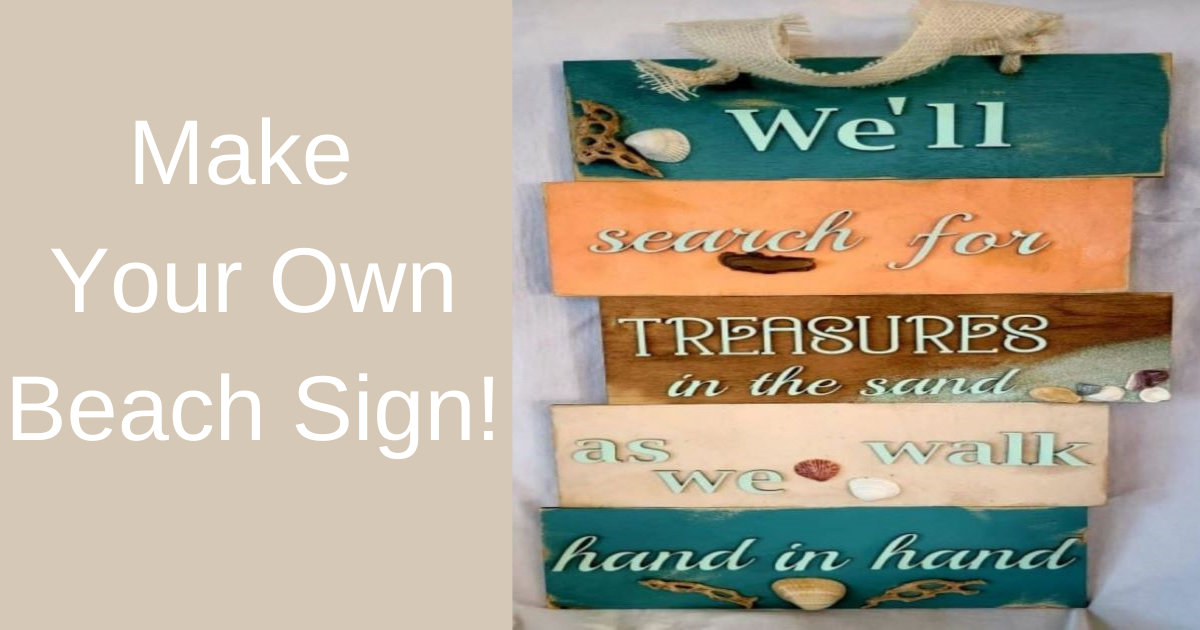
If you have been following me, you know I LOVE to use my laser and LOVE to incorporate different mediums while crafting. Today I will be demonstrating how to make a Beach Sign (I am making this for a friend so I hope she gets it in the mail before she reads this). Making items for myself is GREAT, making something for someone else is FUN, making something for a friend is WONDERFUL!
What is great about this sign is that you can make it your own with whatever supplies you have lying around your crafty cupboard or a quick trip to your local craft store. Use the sign shape and saying as a base. From here, you get to decide what fonts to use (craft masters recommend using no more than three fonts on a project), what colors to use for the boards and the letters, and what elements you want to place on the sign. And of course, finish it with a rope, ribbon, or nothing at all. Your creativity and imagination can take you to the ocean for this one!
Supplies
- Laser of your choice
- A design program of your choice like AI or Inkscape to work with the words and fonts and design, etc.
- 1/4 “hardwood of your choice. (I purchase mine from the local big box store and have them cut it down for me) You can also use 1/8” but it will not be as sturdy.
- Acrylic paints, spray paint, stain, or whatever color you want to color it, if any
- Sander – I always sand my wood for even consistency after cutting. This will also take care of burn marks but Isopropyl Alcohol can do this as well. I also use my sander to “rough up” or age the project as well. Makes it look like it has been hanging on a quaint seaside villa for a few years.
- Sea/beach objects – nothing too round or large – has to have a good edge on it to add the hot glue to.
- Hot Glue gun – better at adhering the beach items to the wood than wood glue
- Wood Glue
- Sand or fine glitter – I added some “sand” to my sign, this was some white powder glitter but you can get actual sand or other colored fine glitter, or even paint it sand-colored. YOUR SIGN – YOUR CHOICE!
- Nails to hold the pieces together with another piece of wood.
- I seal most of my projects with Shellac of Polyurethane. This gives it a nice little shine, adds protection, and will keep the sand adhered to the wood better.
- Spray adhesive – not completely necessary but as a spray, it is better at holding the glitter (sand) on better than just wiping glue on it. I use E600. Plus, you can spray OVER the “sand” if you have a few bare spots. Not as easy to cover with wiping glue on it.
- Ribbon, rope, or something if you are going to hang it. You can leave it bare and use a command strip as well.
- Optional – Caribbean music to get you in the mood while you make this!
Get to making!
My friend stated she wanted a 24” long sign so I designed on my program 5 boxes, 12” wide by 5” tall. (I know that’s 25 Inches but I wanted it to be even). I then colored the boxes in as to what colors I thought I was going to use. She did state she wanted teal and peach, so then I thought I could do an off-white and a brown stain. Then I offset the boards. This, coupled with the mismatched colors and “roughening up” of the wood, is meant to make it look like they found old weather-hardened wood pieces they slapped together for a sign.

I then added the words and edited the fonts to the customers’ liking.
Fonts in order of appearance – Lucida Bright, Playbill, and Nemo Hunter
As you can see from this pic and the final project, I moved words around a bit. You get your words cut and laid out and make sure you put together your beach items next to the words. That way you can see what fits, what looks good, and what you have on hand.
I cut out the boards (add holes to the top if you want to hang it) and cut the words out on my Glowforge Laser. BUT, before I cut out the words, I outline them. That way when I have them out to paint, I leave the words in the outline and no paint gets on the outside of the letters. This gives them a clean, finished look. This also helps with the alignment and placement of your letters.

After cutting, pain/stain your boards with two even coats. Then paint your letters as well. Or don’t, again, YOUR SIGN – YOUR CHOICE. If you want to weather the boards, take a little sandpaper to the edges and the front in random places to make it looks like it has been out braving Mother nature for several years.
After the boards are dry, BEFORE you put anything on them, attach another board to the back with nails. This will help secure the sign. Wood glue or a glue gun will not hold this together long term. MAKE SURE the nails do not go through the board to the front of your pretty paint job. Measure first!

Flip it over and NOW you can start being creative. If you want sand, use the spray adhesive and add the sand or glitter. Line up your words and the shells, coral, sponge rocks, etc. to see where you want things. Place the outline or stencil down first and lay items around it. Line the words up straight, or not, and add wood glue to the back of each letter, and place into the outline or stencil. Not too much glue or it will stick to the outline. You can lift the outline after each letter to make sure it doesn’t stick. Hold each letter with a little pressure for 10 seconds. Repeat with each word. Remove outline after each word is complete.
Use the hot glue gun to adhere beachy objects. After you have it how you like it, I seal it and THEN add the ribbon or rope. Now, finish up the Mai Tai and marvel at your beachy wonder!
I hope this helps inspire you to make something beachy like this or use this as a standard for something else. A John Muir Quote with woodsy objects or a sign with different places you have traveled. One more time, YOUR SIGN – YOUR CHOICE!
Artículo escrito por