Creative Easter Gift Tag Made With Polymer Clay

There is something special about a handcrafted gift, the idea of someone giving their time, pouring love and attention into something made especially for the recipient. No matter how big or small, simple or complex the thought is as meaningful, if not more, than the gift itself.
So, with Easter around the corner this Polymer Clay Gift Tag project is a great way to create something personal for family and friends. Not only can these tags be used to add the finishing touch to a basket of chocolate eggs or to inject some Easter fun into a “non-chocolate” gift, but the recipient can further enjoy them by repurposing as Easter décor for their home, Easter table or re-gifting them. The Easter joy is endless!
Easter Gift Tag Project
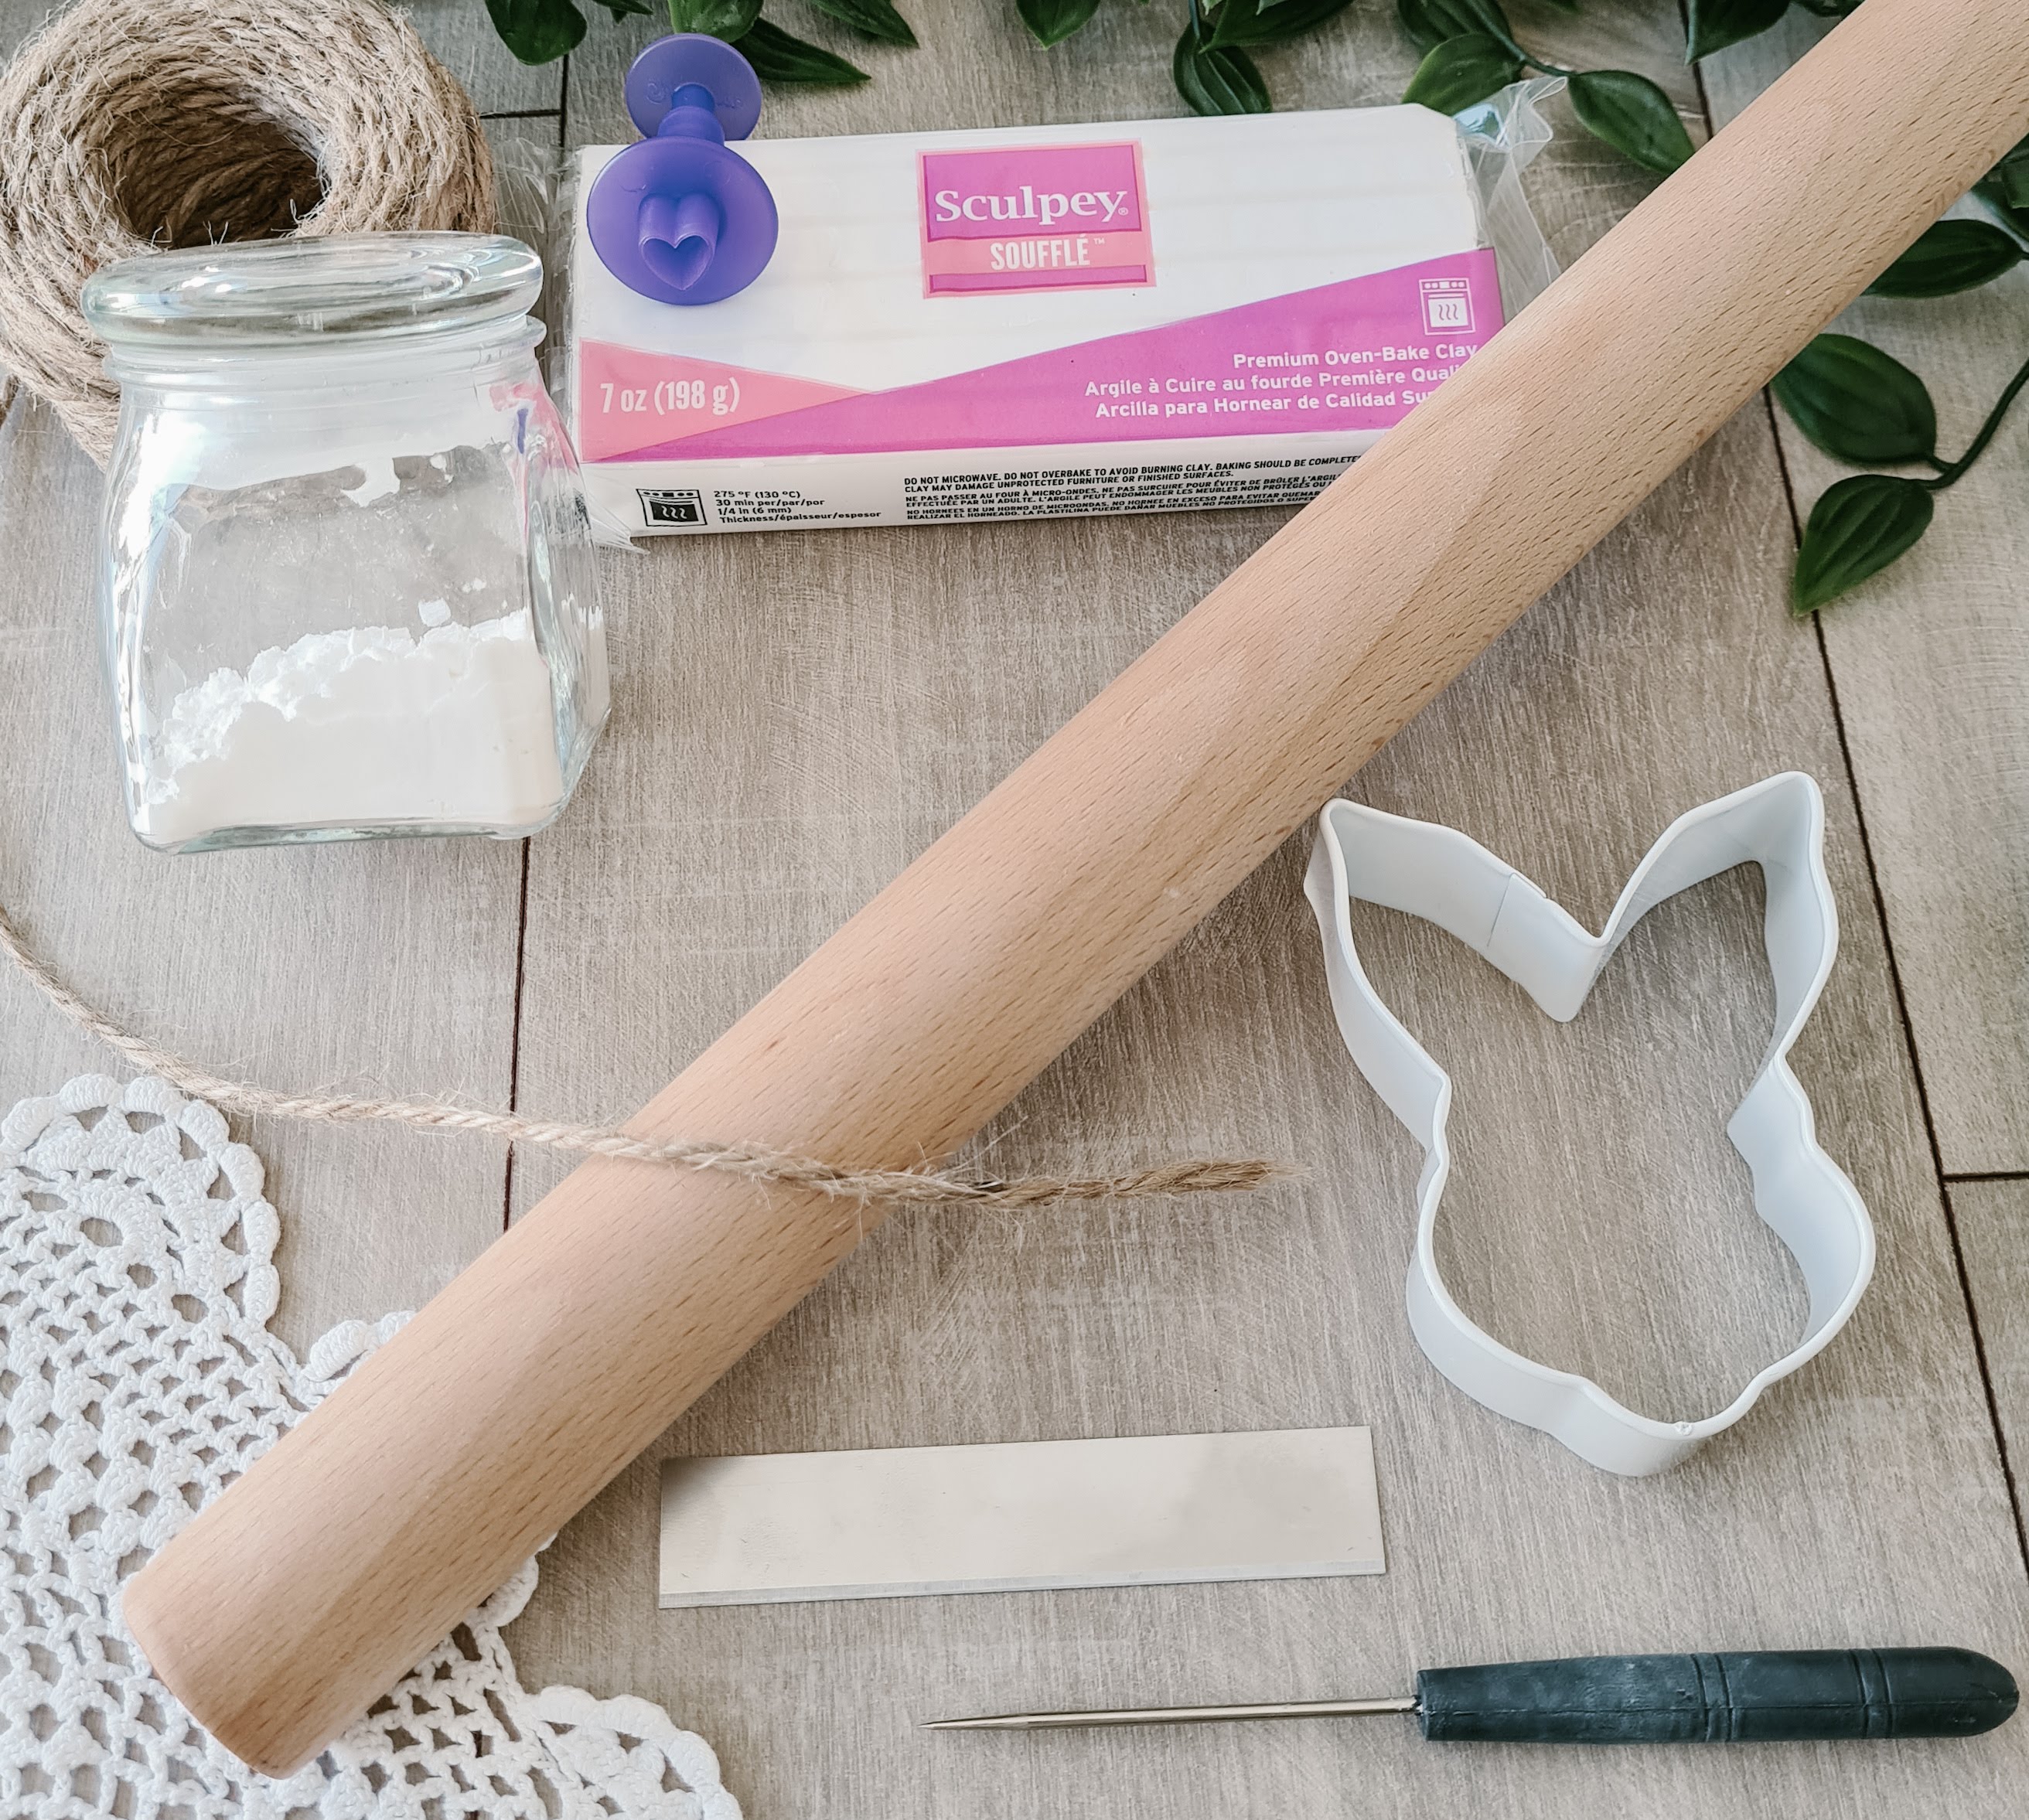
What You Will Need
What You Will Need
- Polymer Clay (colour of your choice. 2oz/57g block will make approximately 3-6 large tags)
- Easter Themed Cookie Cutter or Clay Cutter
- Additional cutters for details/embellishments (optional)
- Rolling Pin
- Needle Tool
- Blade
- Corn Starch
- Doily, Lace or Texture Mat
- Jute Twine (Ribbon of your choice)
- Access to an oven
Useful Tools
- Isopropyl Alcohol
- Clean Paint Brush
- Bamboo skewers or then wooden craft sticks
- Nail file
- Fine Grit Sandpaper
Getting Started
Make sure your work surface is spotless and free of dust and lint. Especially if working with white clay as the debris is very easily visible and can be difficult to remove. If you do pick up dust on your clay it can be removed with Isopropyl Alcohol and a clean paint brush.
Conditioning Your Clay
Polymer clay is a wonderful medium and while it is used by professional artists it is user friendly enough for those inexperienced to enjoy. The most important part about using Polymer clay what is called “Conditioning” your clay. This is done by rolling, folding and kneading the clay between your hands and fingers. The purpose of conditioning the clay is to soften it and remove any air bubbles that may be trapped inside. Your clay is conditioned when it is soft and easy to shape. If you fold it, it should not crack at the fold. It should not be tacky. (This quick YouTube video by PolymerClayTutor explains the basic process).
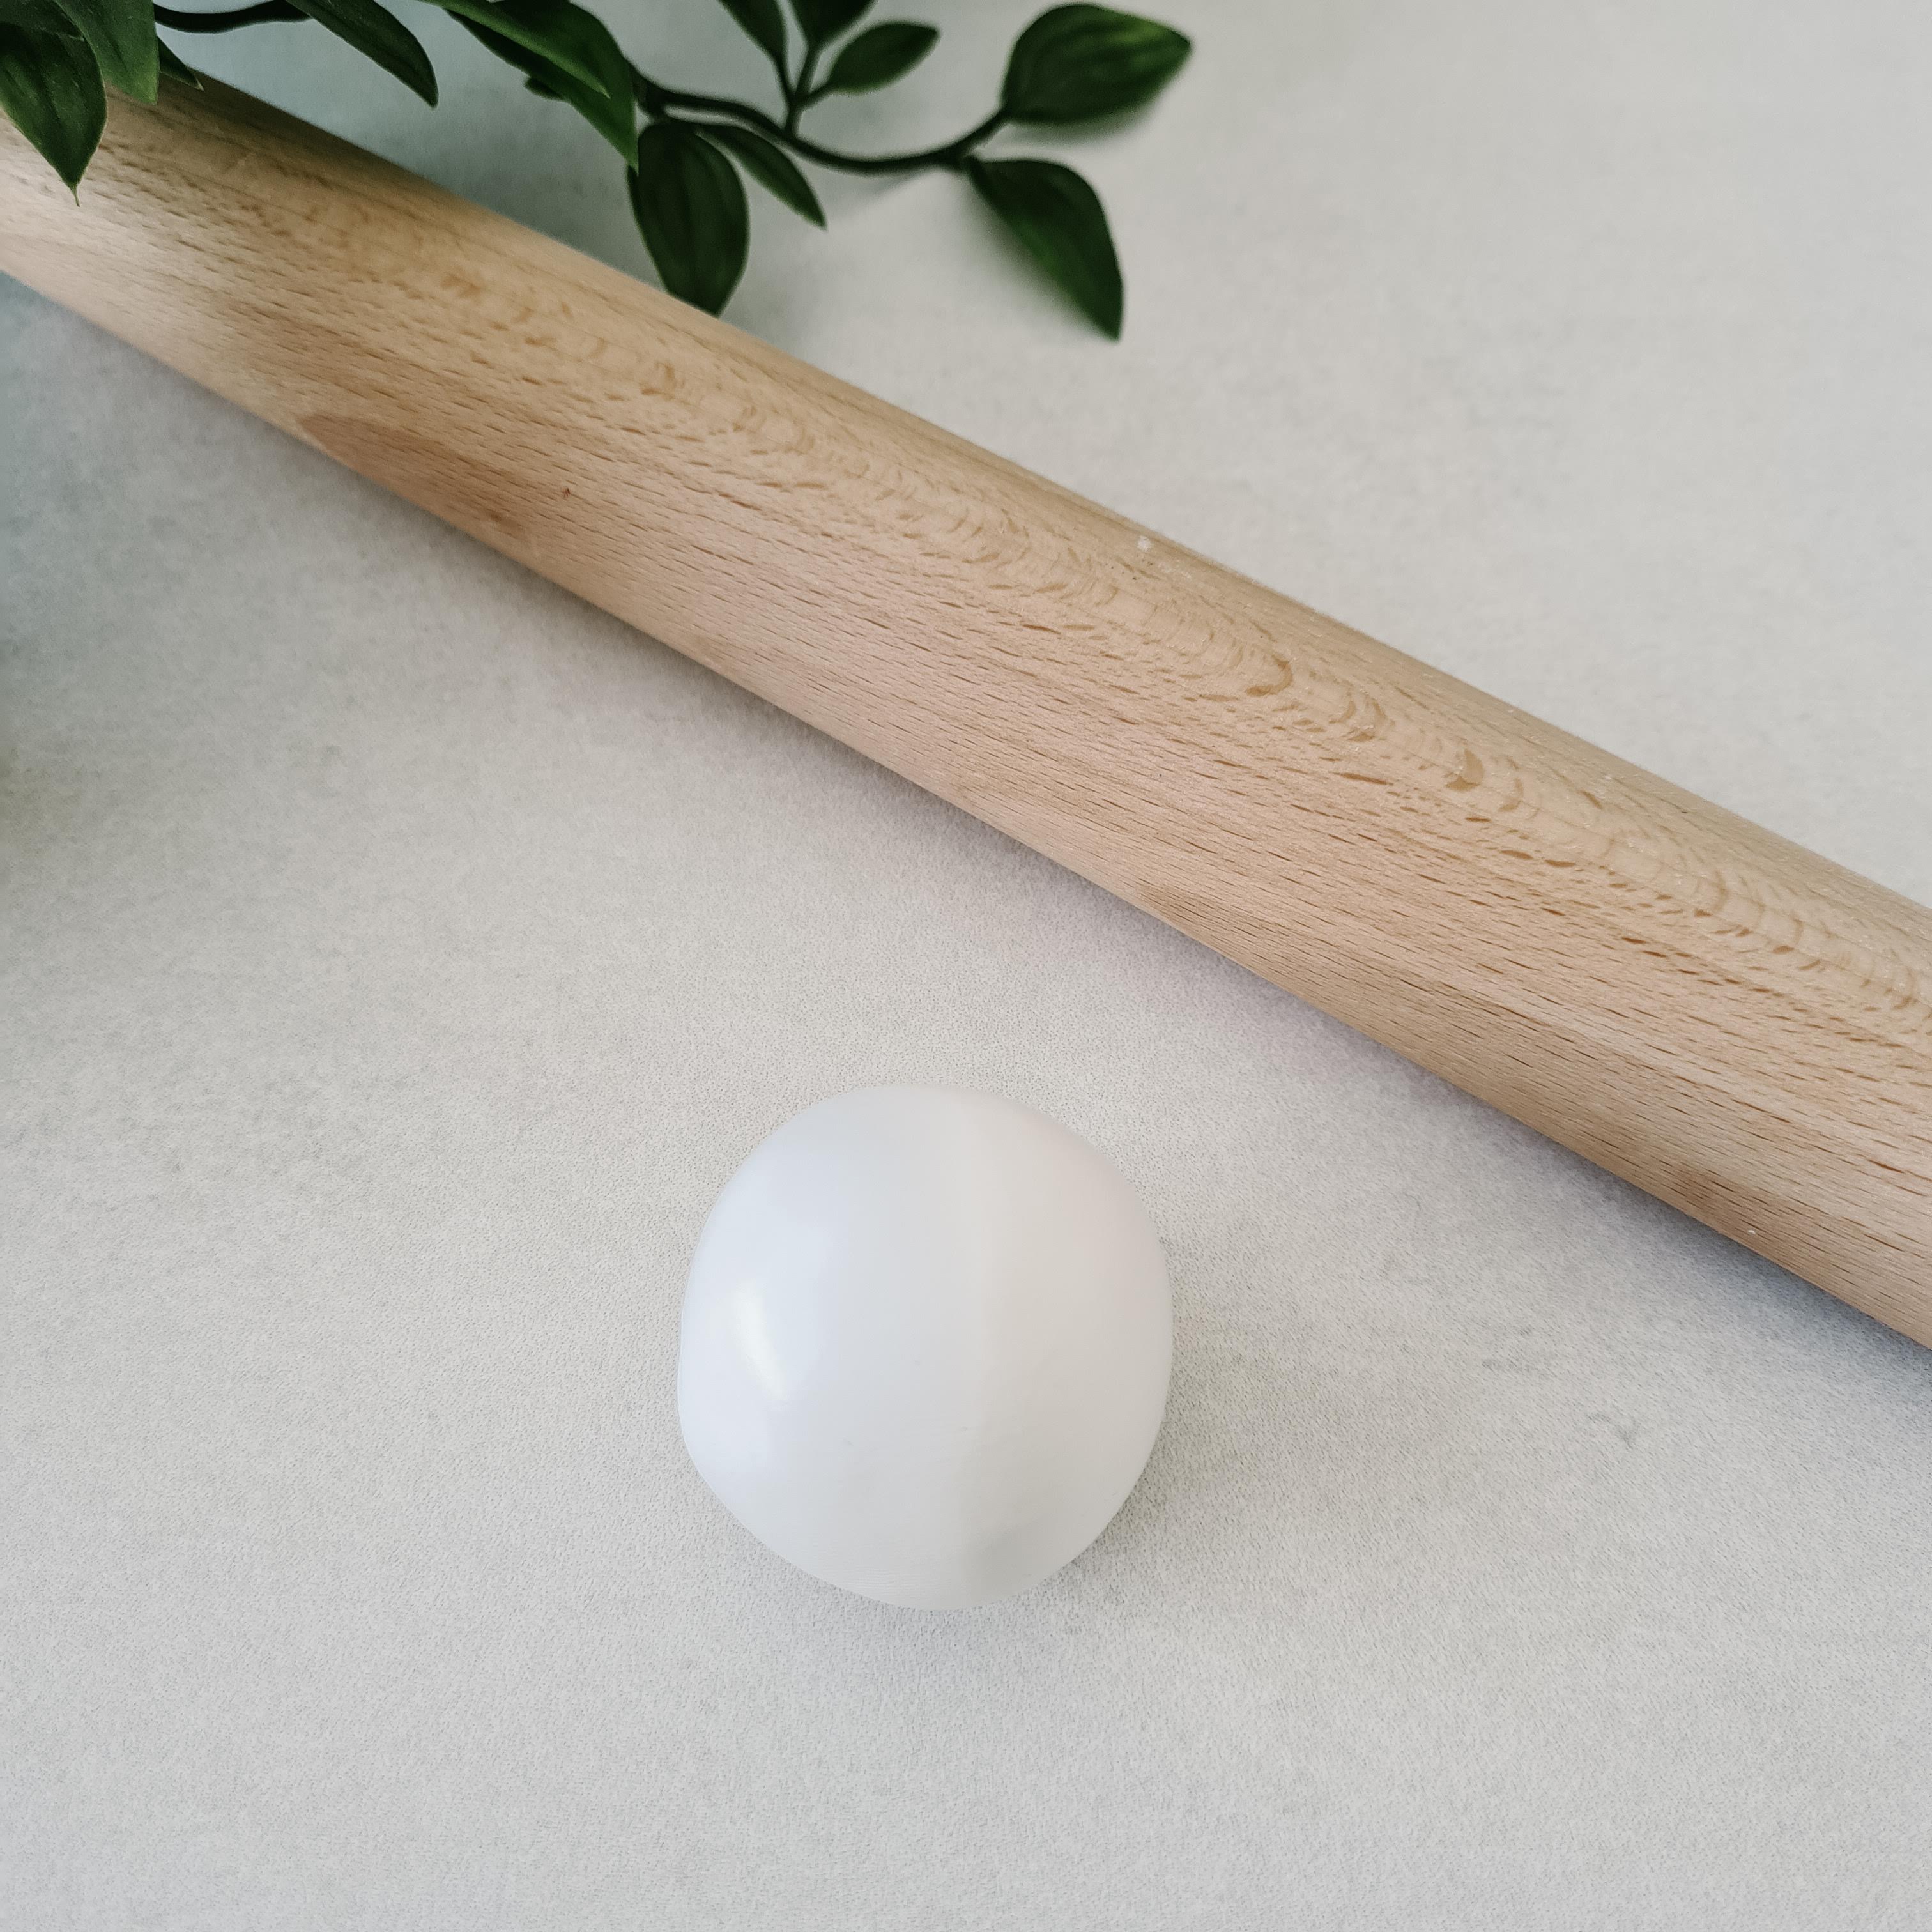
Conditioned Clay
Rolling Out Your Clay
Dust your work surface and rolling pin with corn starch. Placing “guides” (Bamboo skewers or wooden craft sticks) to the left and right of your rolling pin will help keep your clay an even thickness throughout. Be mindful not to roll your clay out too thin as this will make it more difficult to work with. Roughly no thinner than 1/8 inch or 3mm is suitable.
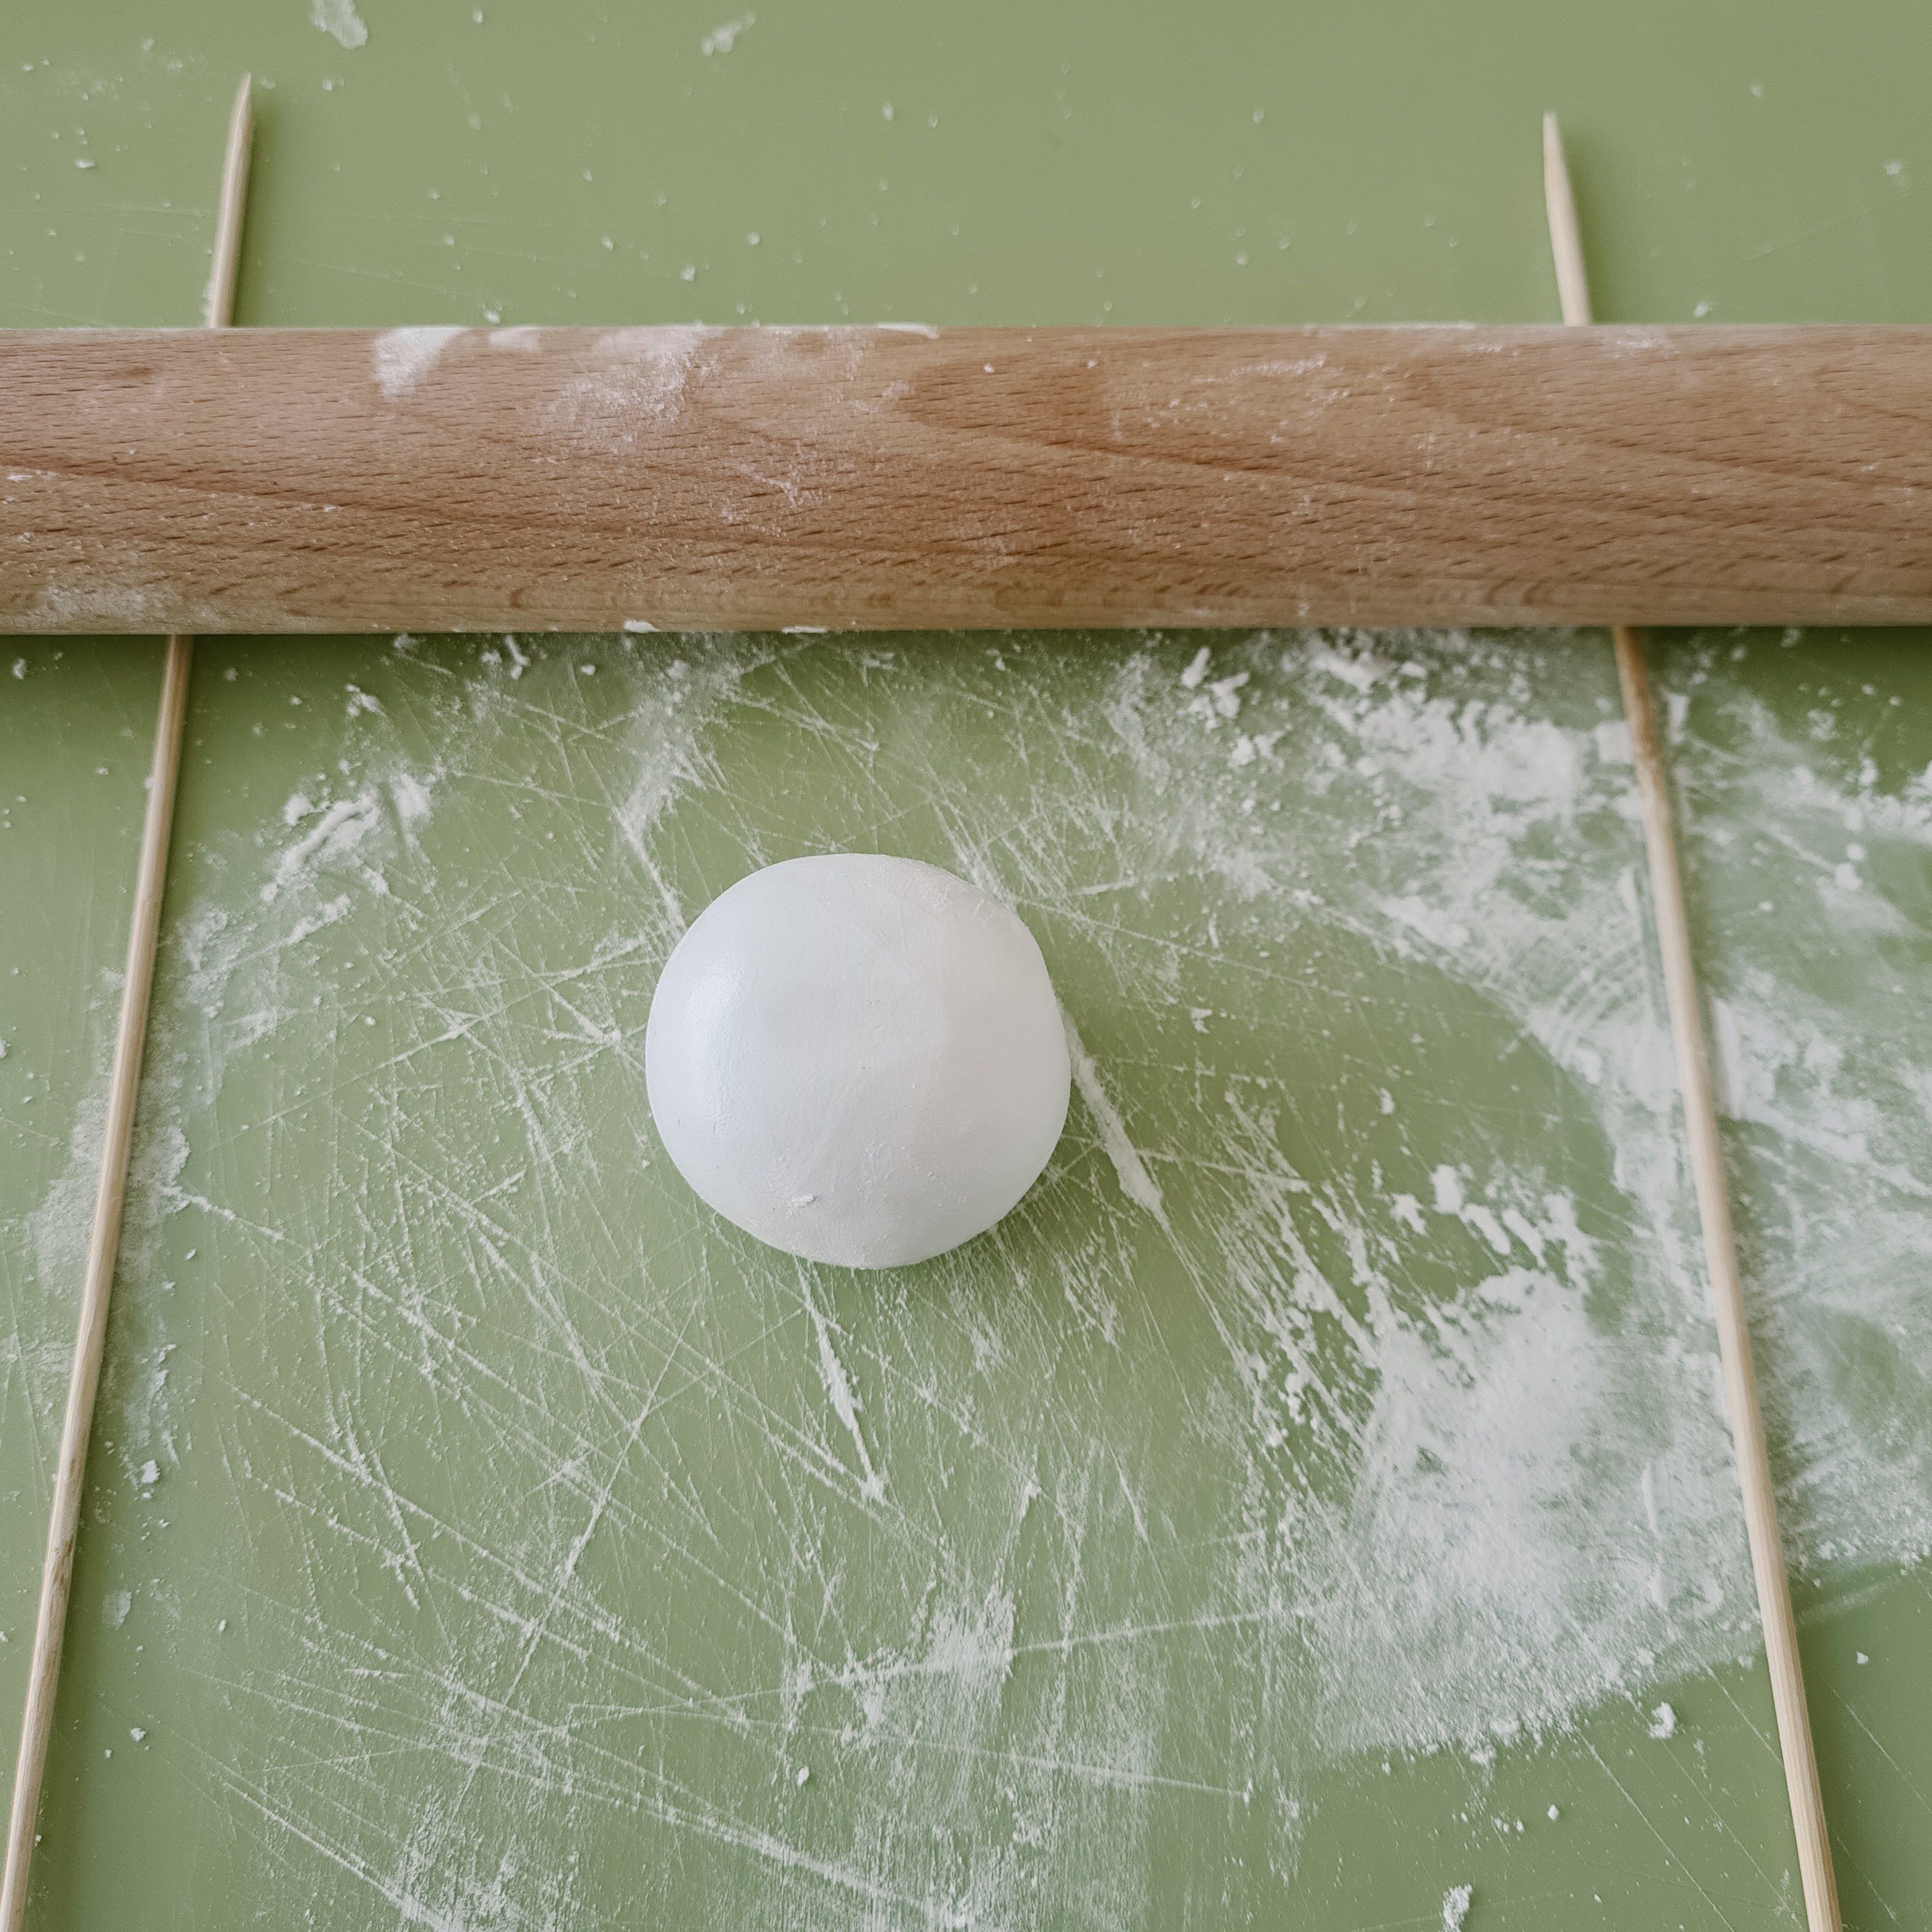
Rolling Out Your Clay
Cutting Your Clay
Dust your cutter in corn starch to prevent it from sticking. You can also lightly dust your clay if need be. Once cut remove the excess clay from around the cutter and gently lift the cutter from your piece of clay. Your cut out piece should be easy to lift from your work surface however a knife blade can be helpful for this process.
It’s during this point in the process that you can really get your creative juices flowing! Cut out details on your piece or add textures, your options are endless!

Cutting Your Clay

Cutting Out Details
Adding Texture
After rolling out your clay apply your doily/lace or texture mat over the clay as desired and gently press it in. Lift it carefully from the clay to reveal the imprinted texture. You can now “fussy cut” the clay with your cutter as described above.

Adding Texture

Fussy Cutting
Adding Clay Details to Your Piece
For simple projects clay details can easily be added to your piece without using glue or bonding agents by gently pushing them into your base clay. Make sure they have a good footing. Once baked the bond will be secure. 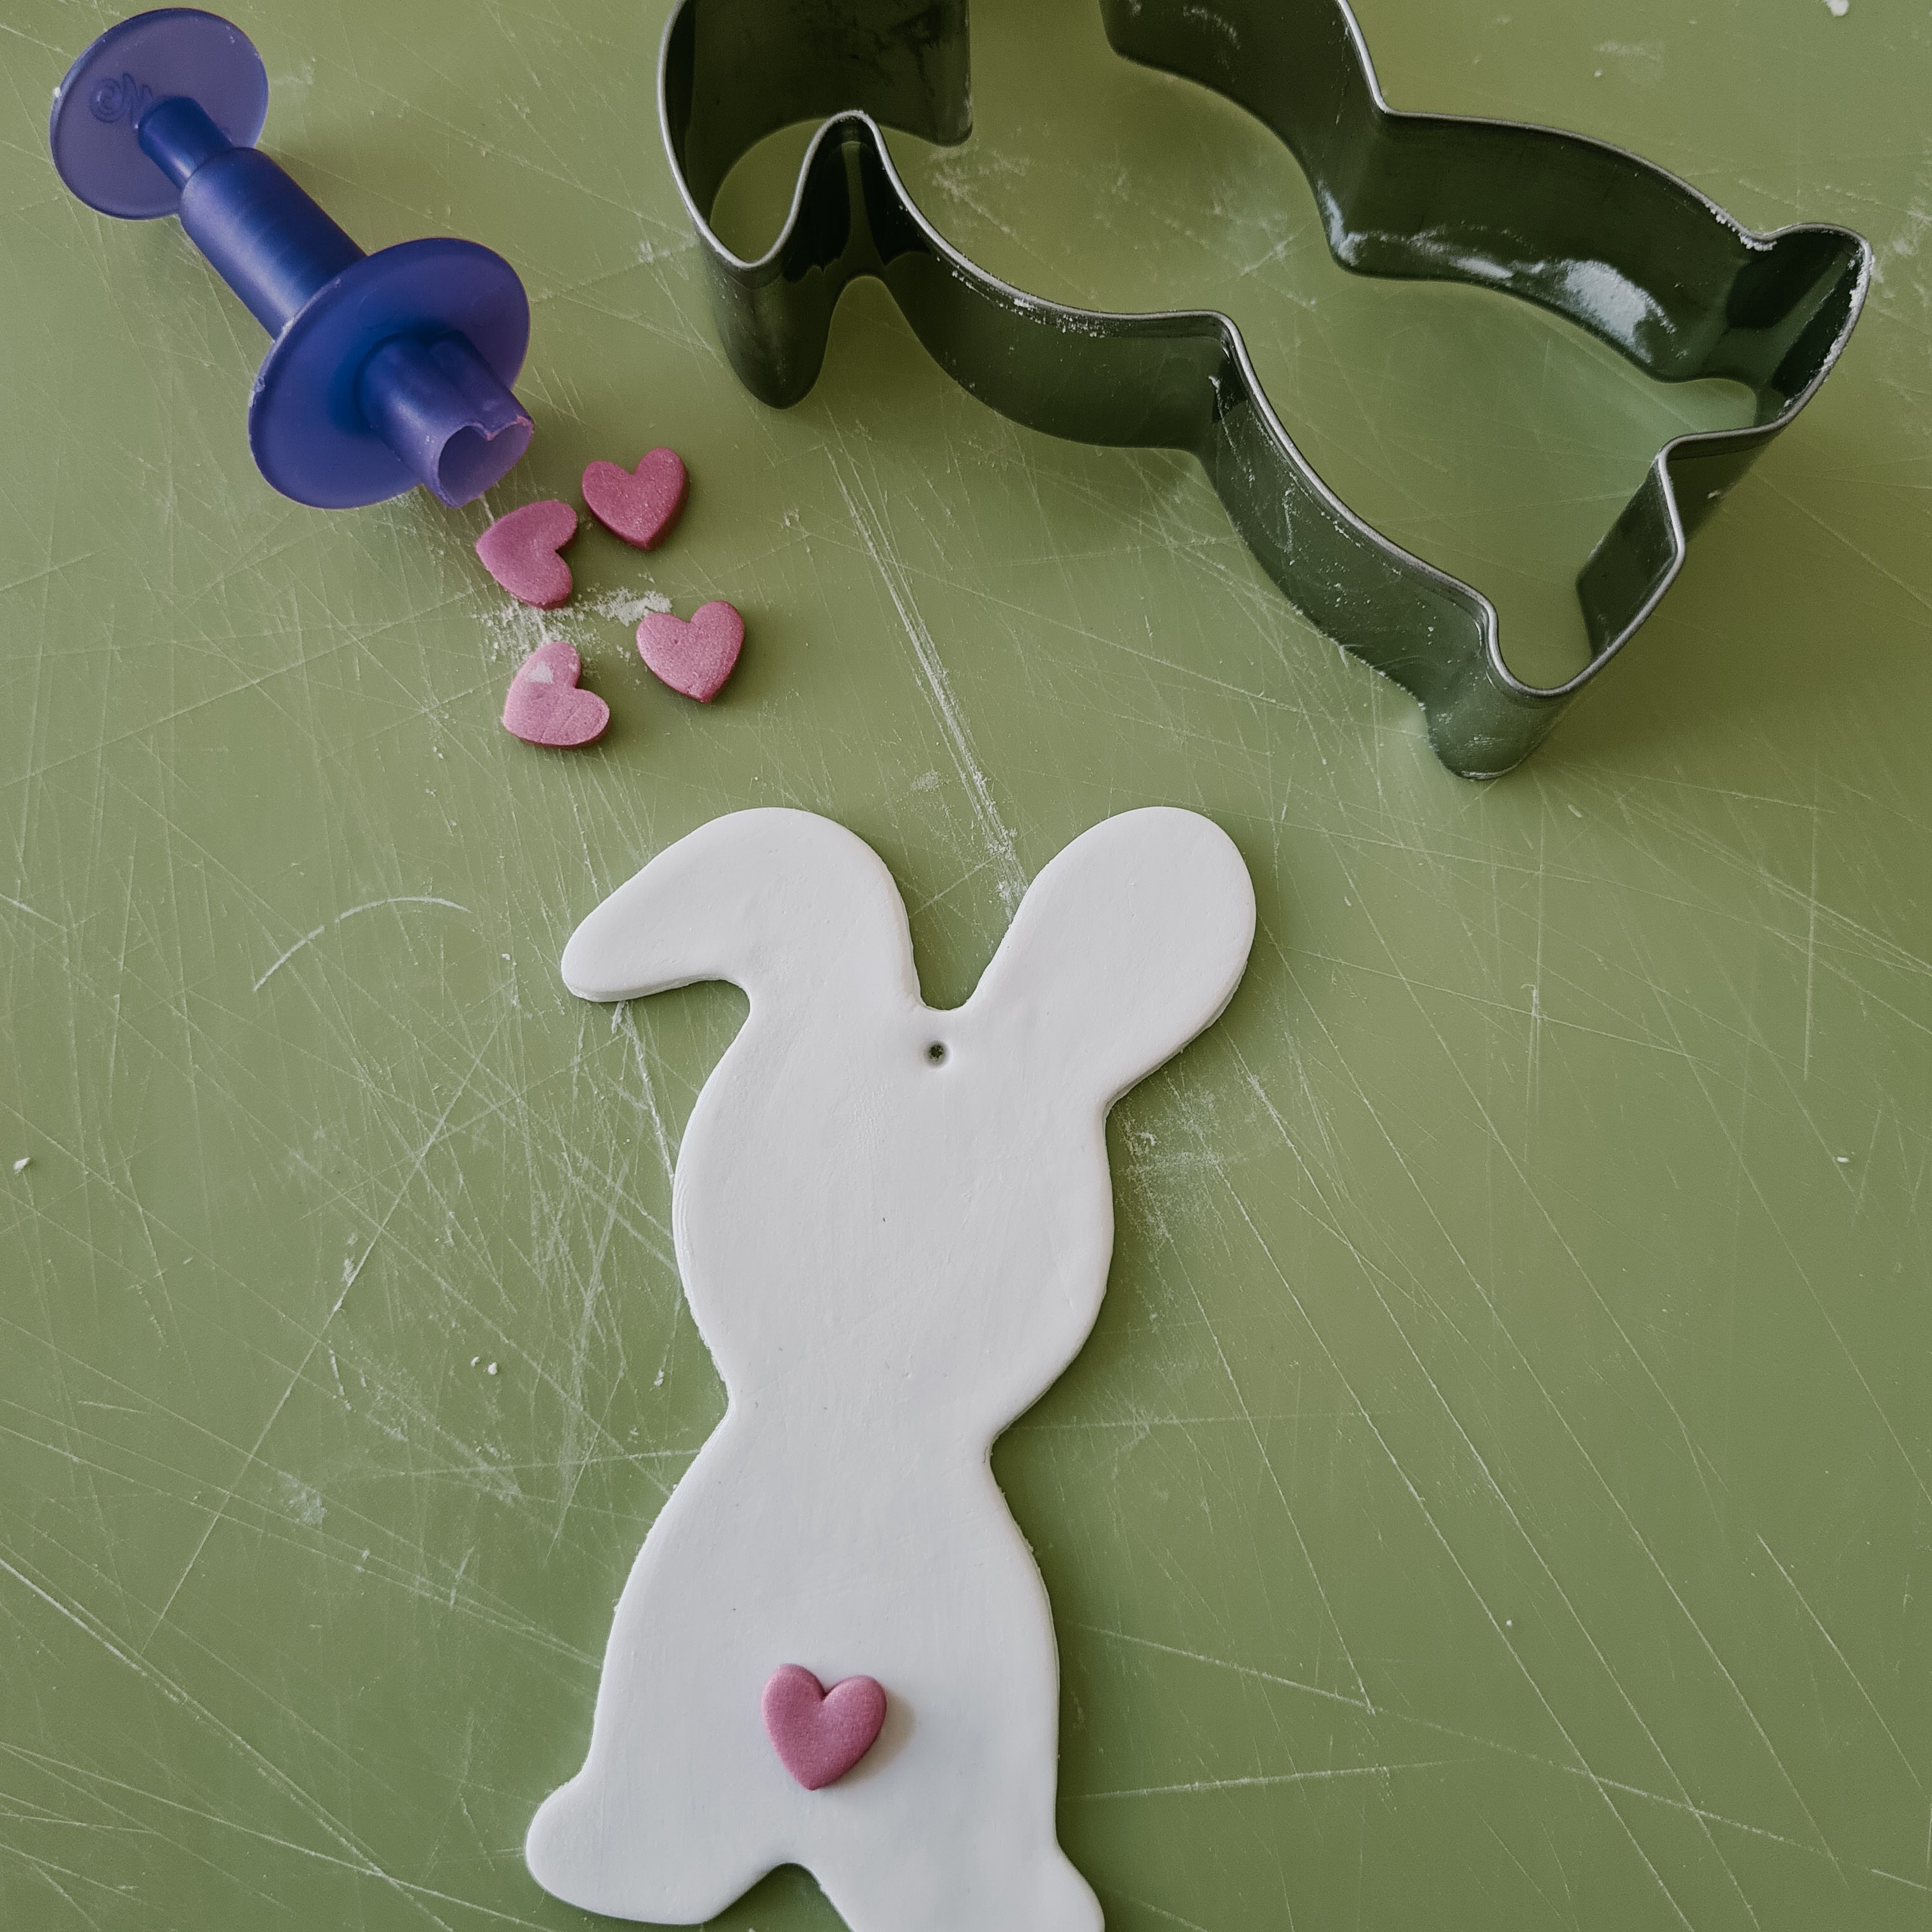
Adding Clay Details
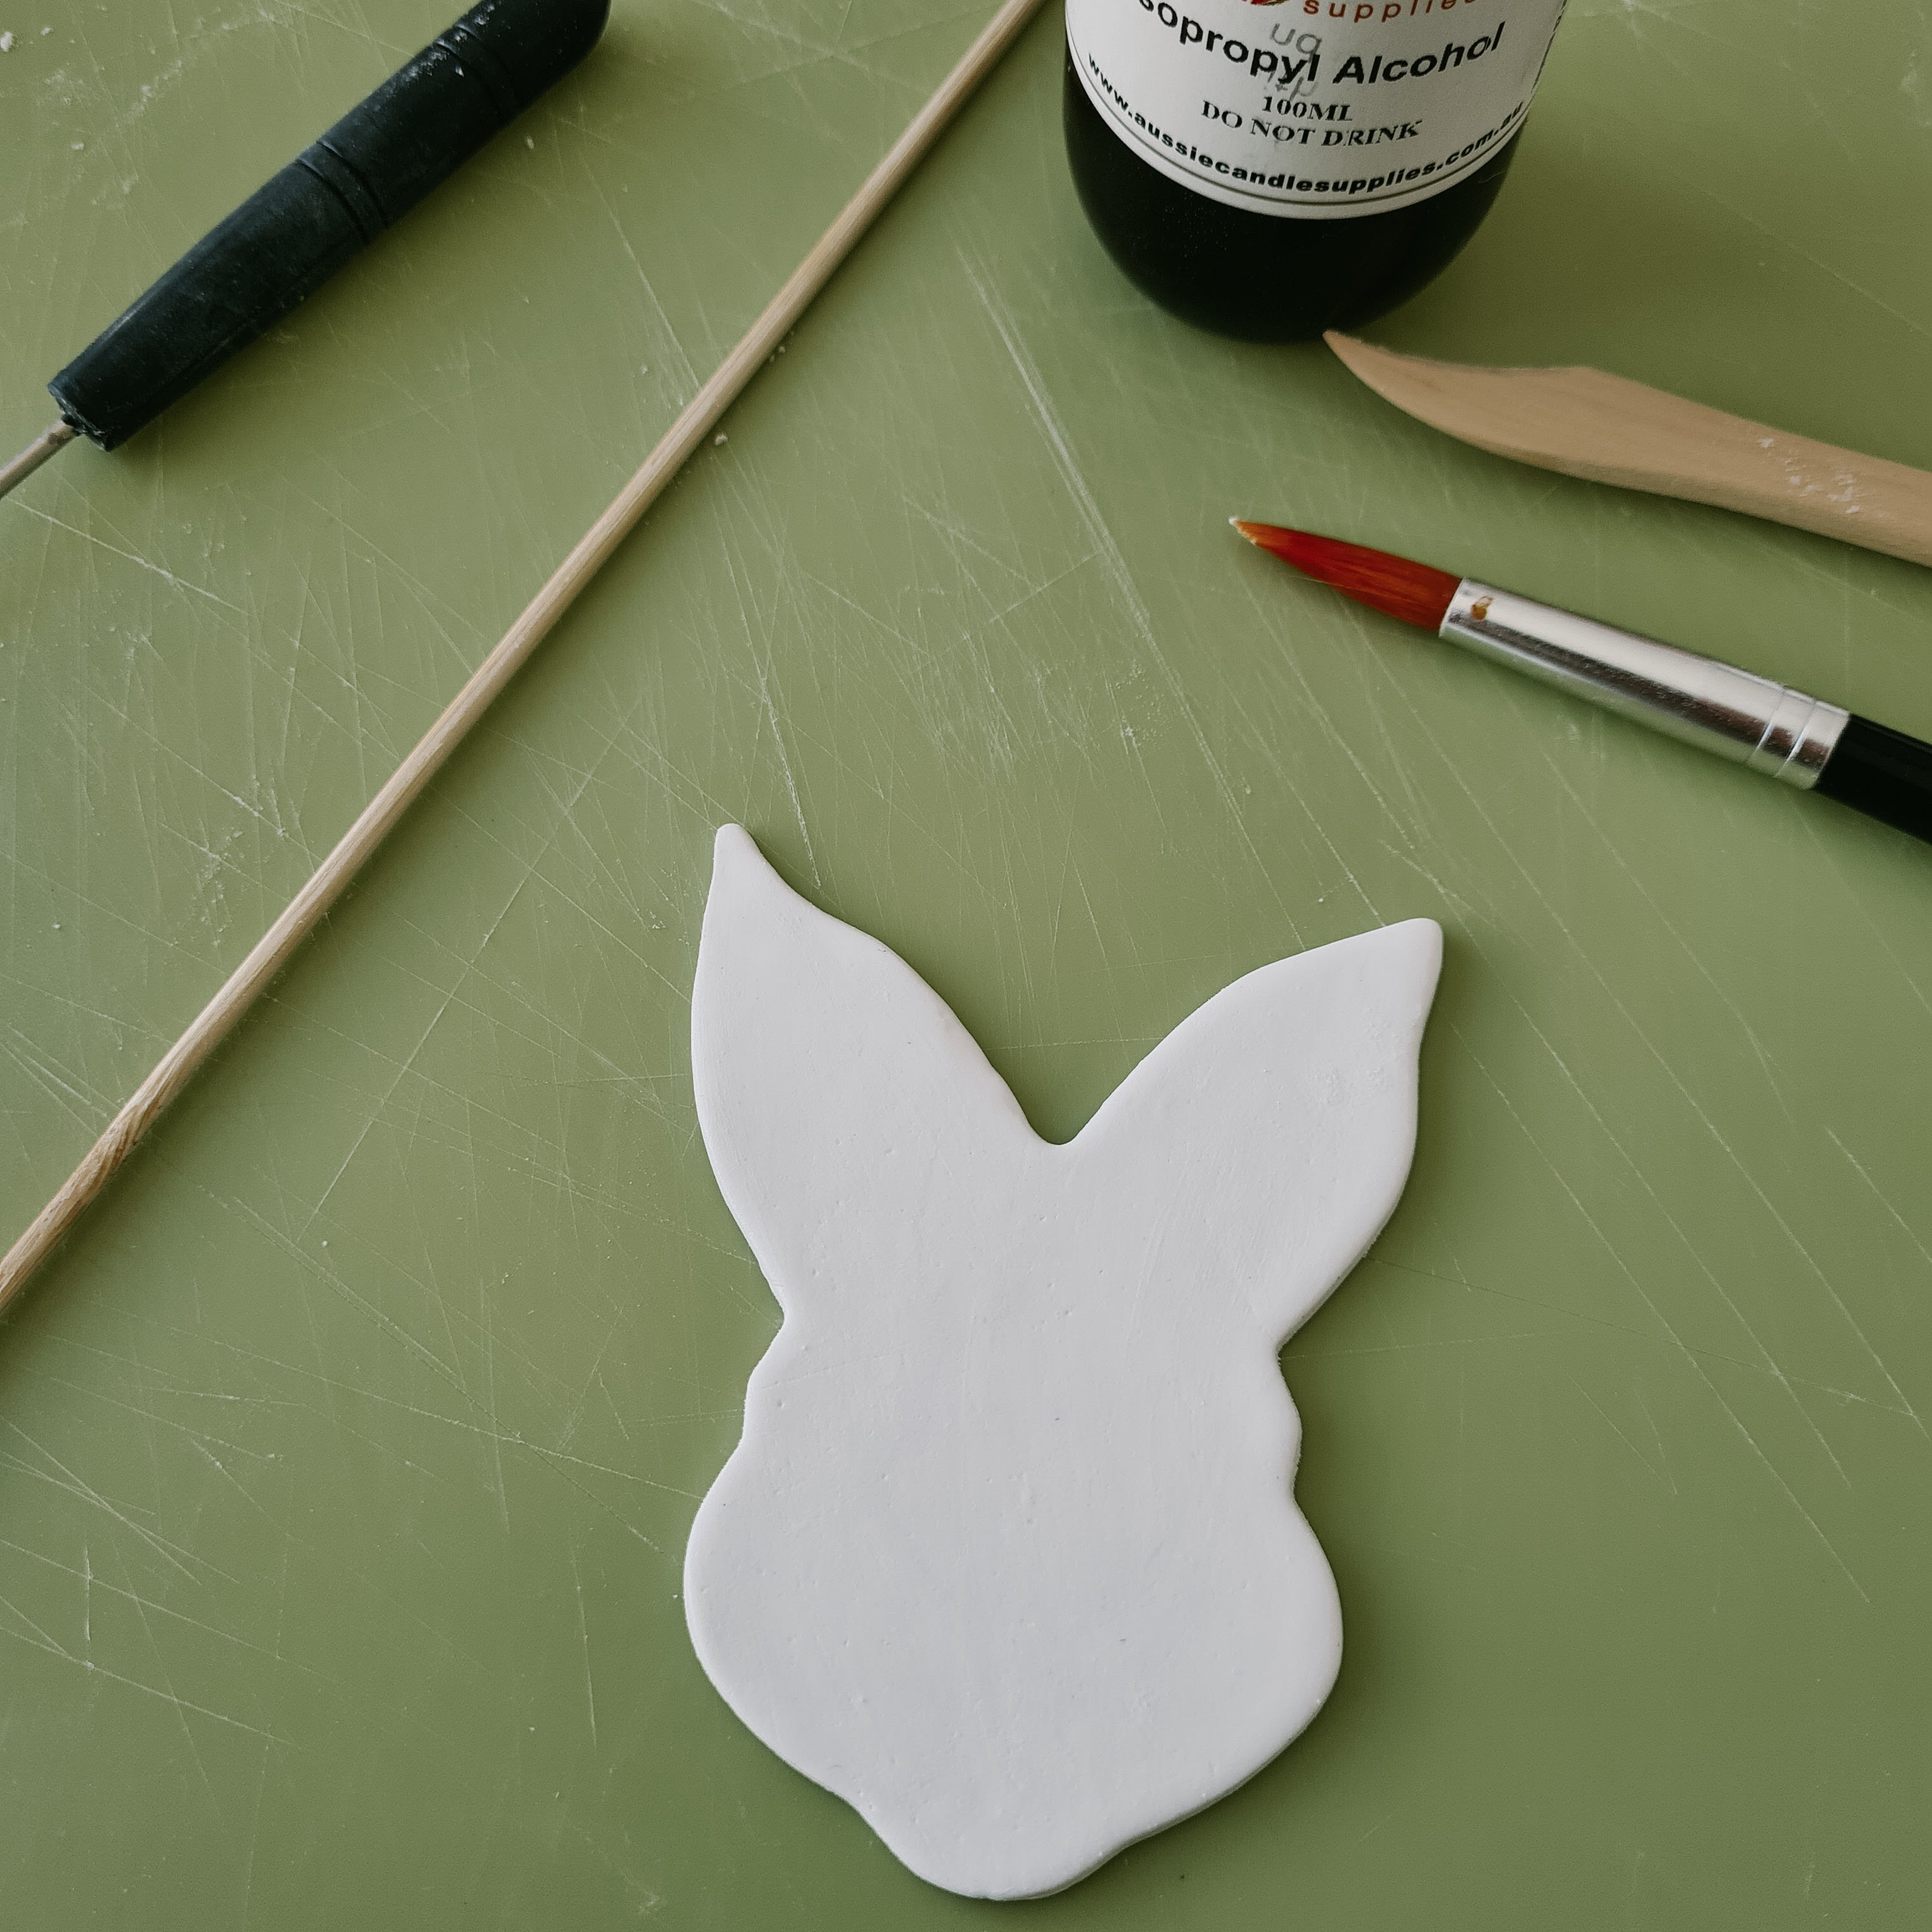
Cleaning Your Pieces
Before baking, fingerprints and any unwanted surface debris can be wiped away using Isopropyl alcohol and a clean paint brush.
Cleaning Using Isopropyl Alcohol
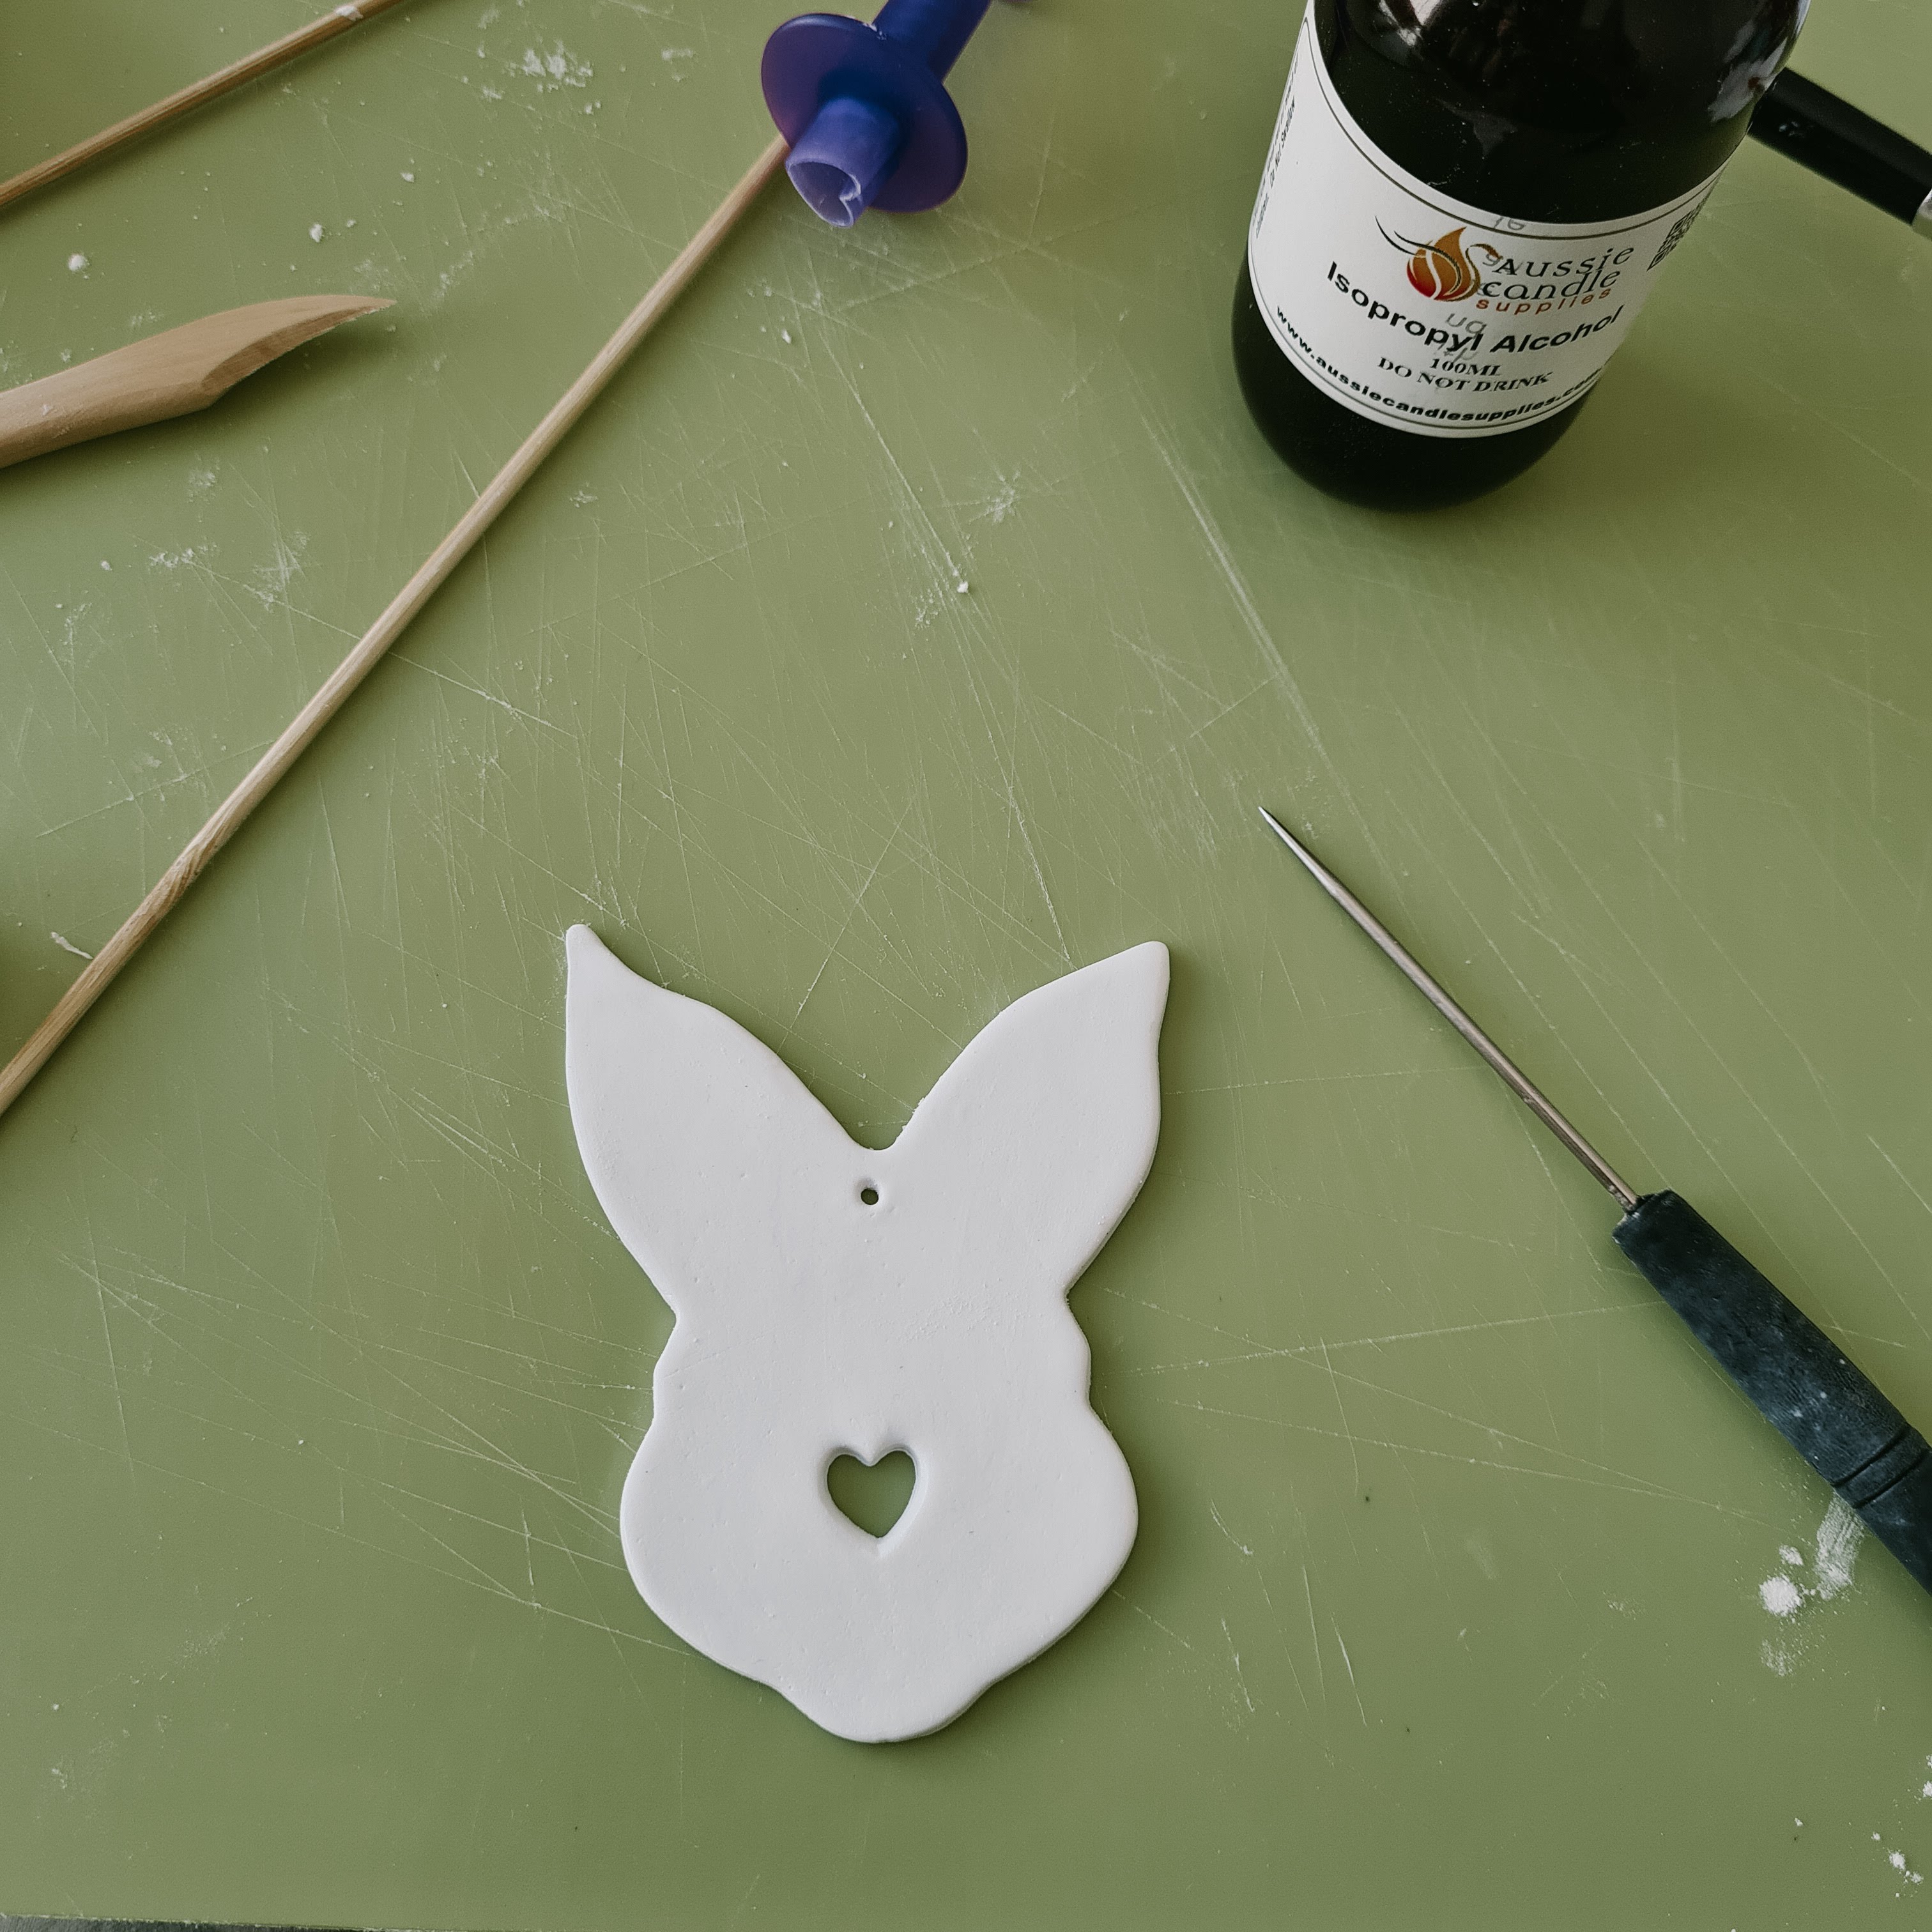
Making A Ribbon Hole
The final step before baking is to make a hole for your gift tag ribbon. Using a needle tool or similar sharp smooth tool, gently pierce a hole through your clay where desired. Adding corn starch to your needle will create a smoother finish.
Making a Ribbon Hole
Baking Your Finished Pieces
Lay your pieces on a bed of corn starch, this will prevent them from burning and help maintain the shape of your pieces.
Bake your pieces according to the packaging instructions. Different brands require different temperatures and times. The most important thing is oven temperature. Make sure your oven is preheated to the correct temperature. An oven thermometer is most useful for monitoring the baking process.
Too low temperatures will mean your clay will not cure properly and will be susceptible to cracking and braking. Too high temperatures and you risk scorching your pieces.
Covering your pieces in foil or what is referred to as “tenting” will assist with temperature control and prevent your pieces from burning during the baking process.
Once your pieces are baked it is recommended to allow them to slowly cool in the oven to prevent them from cracking or breaking.
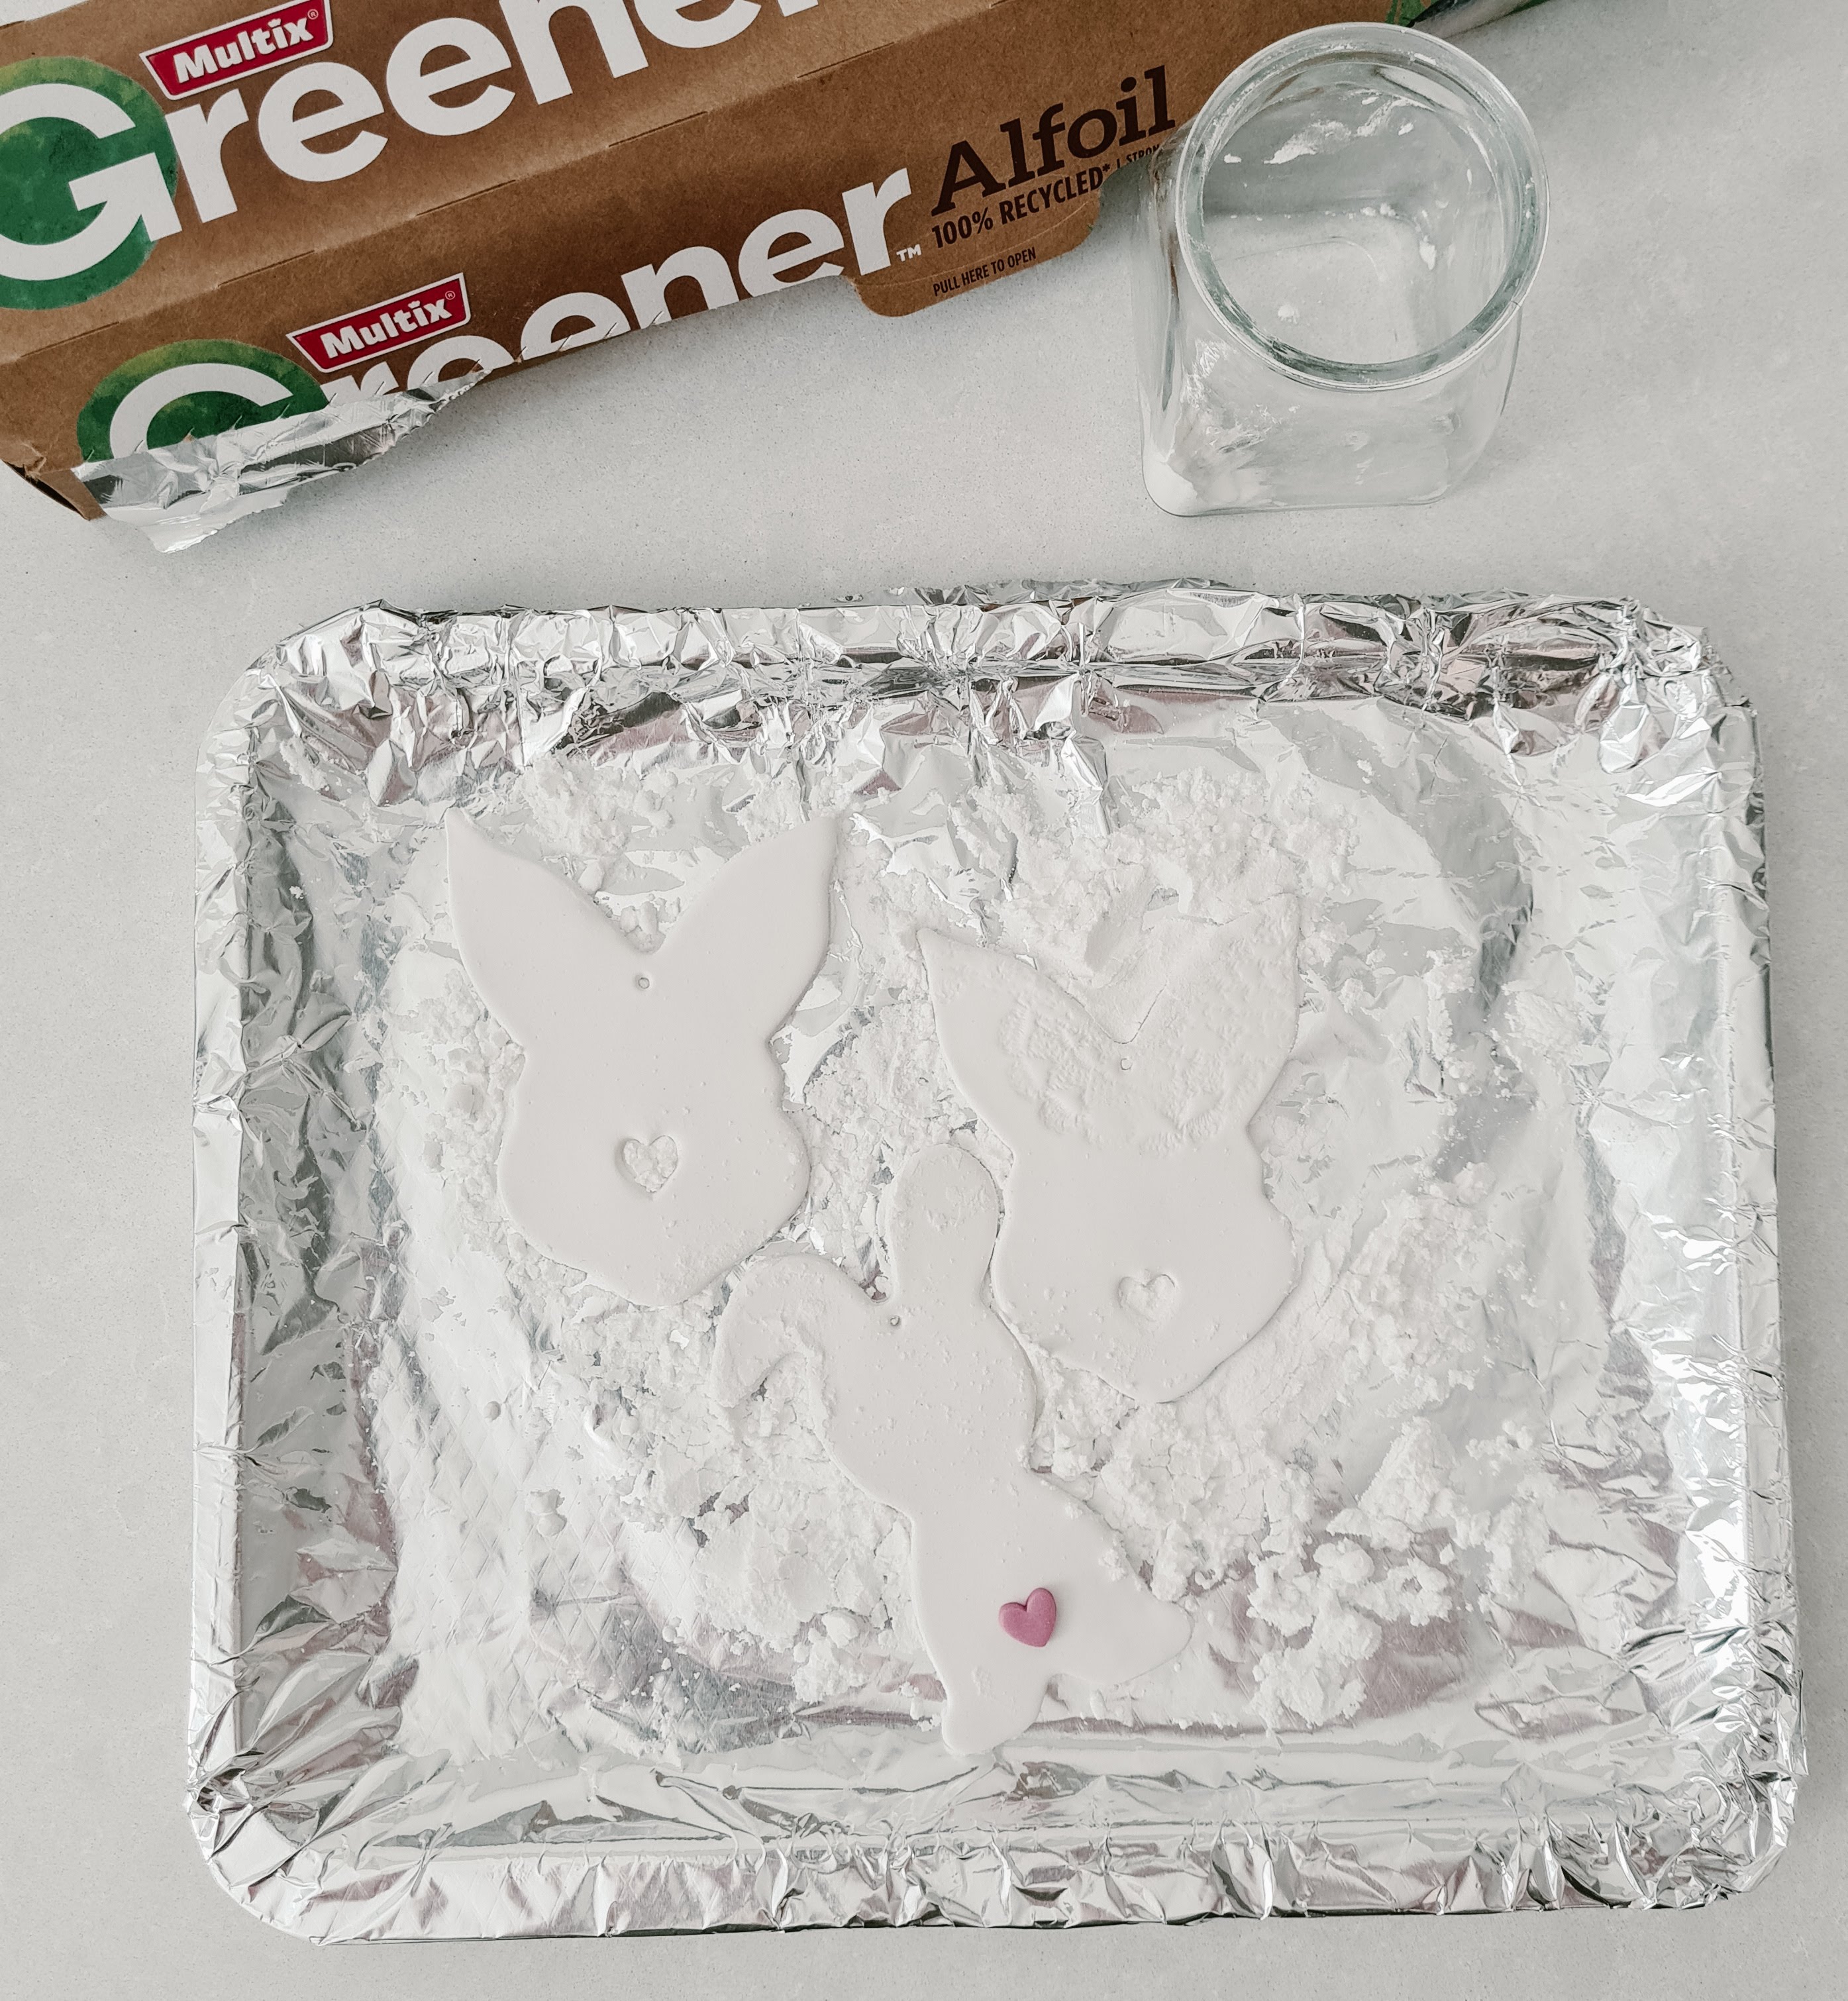
Bake Your Pieces on a Bed of Corn Starch
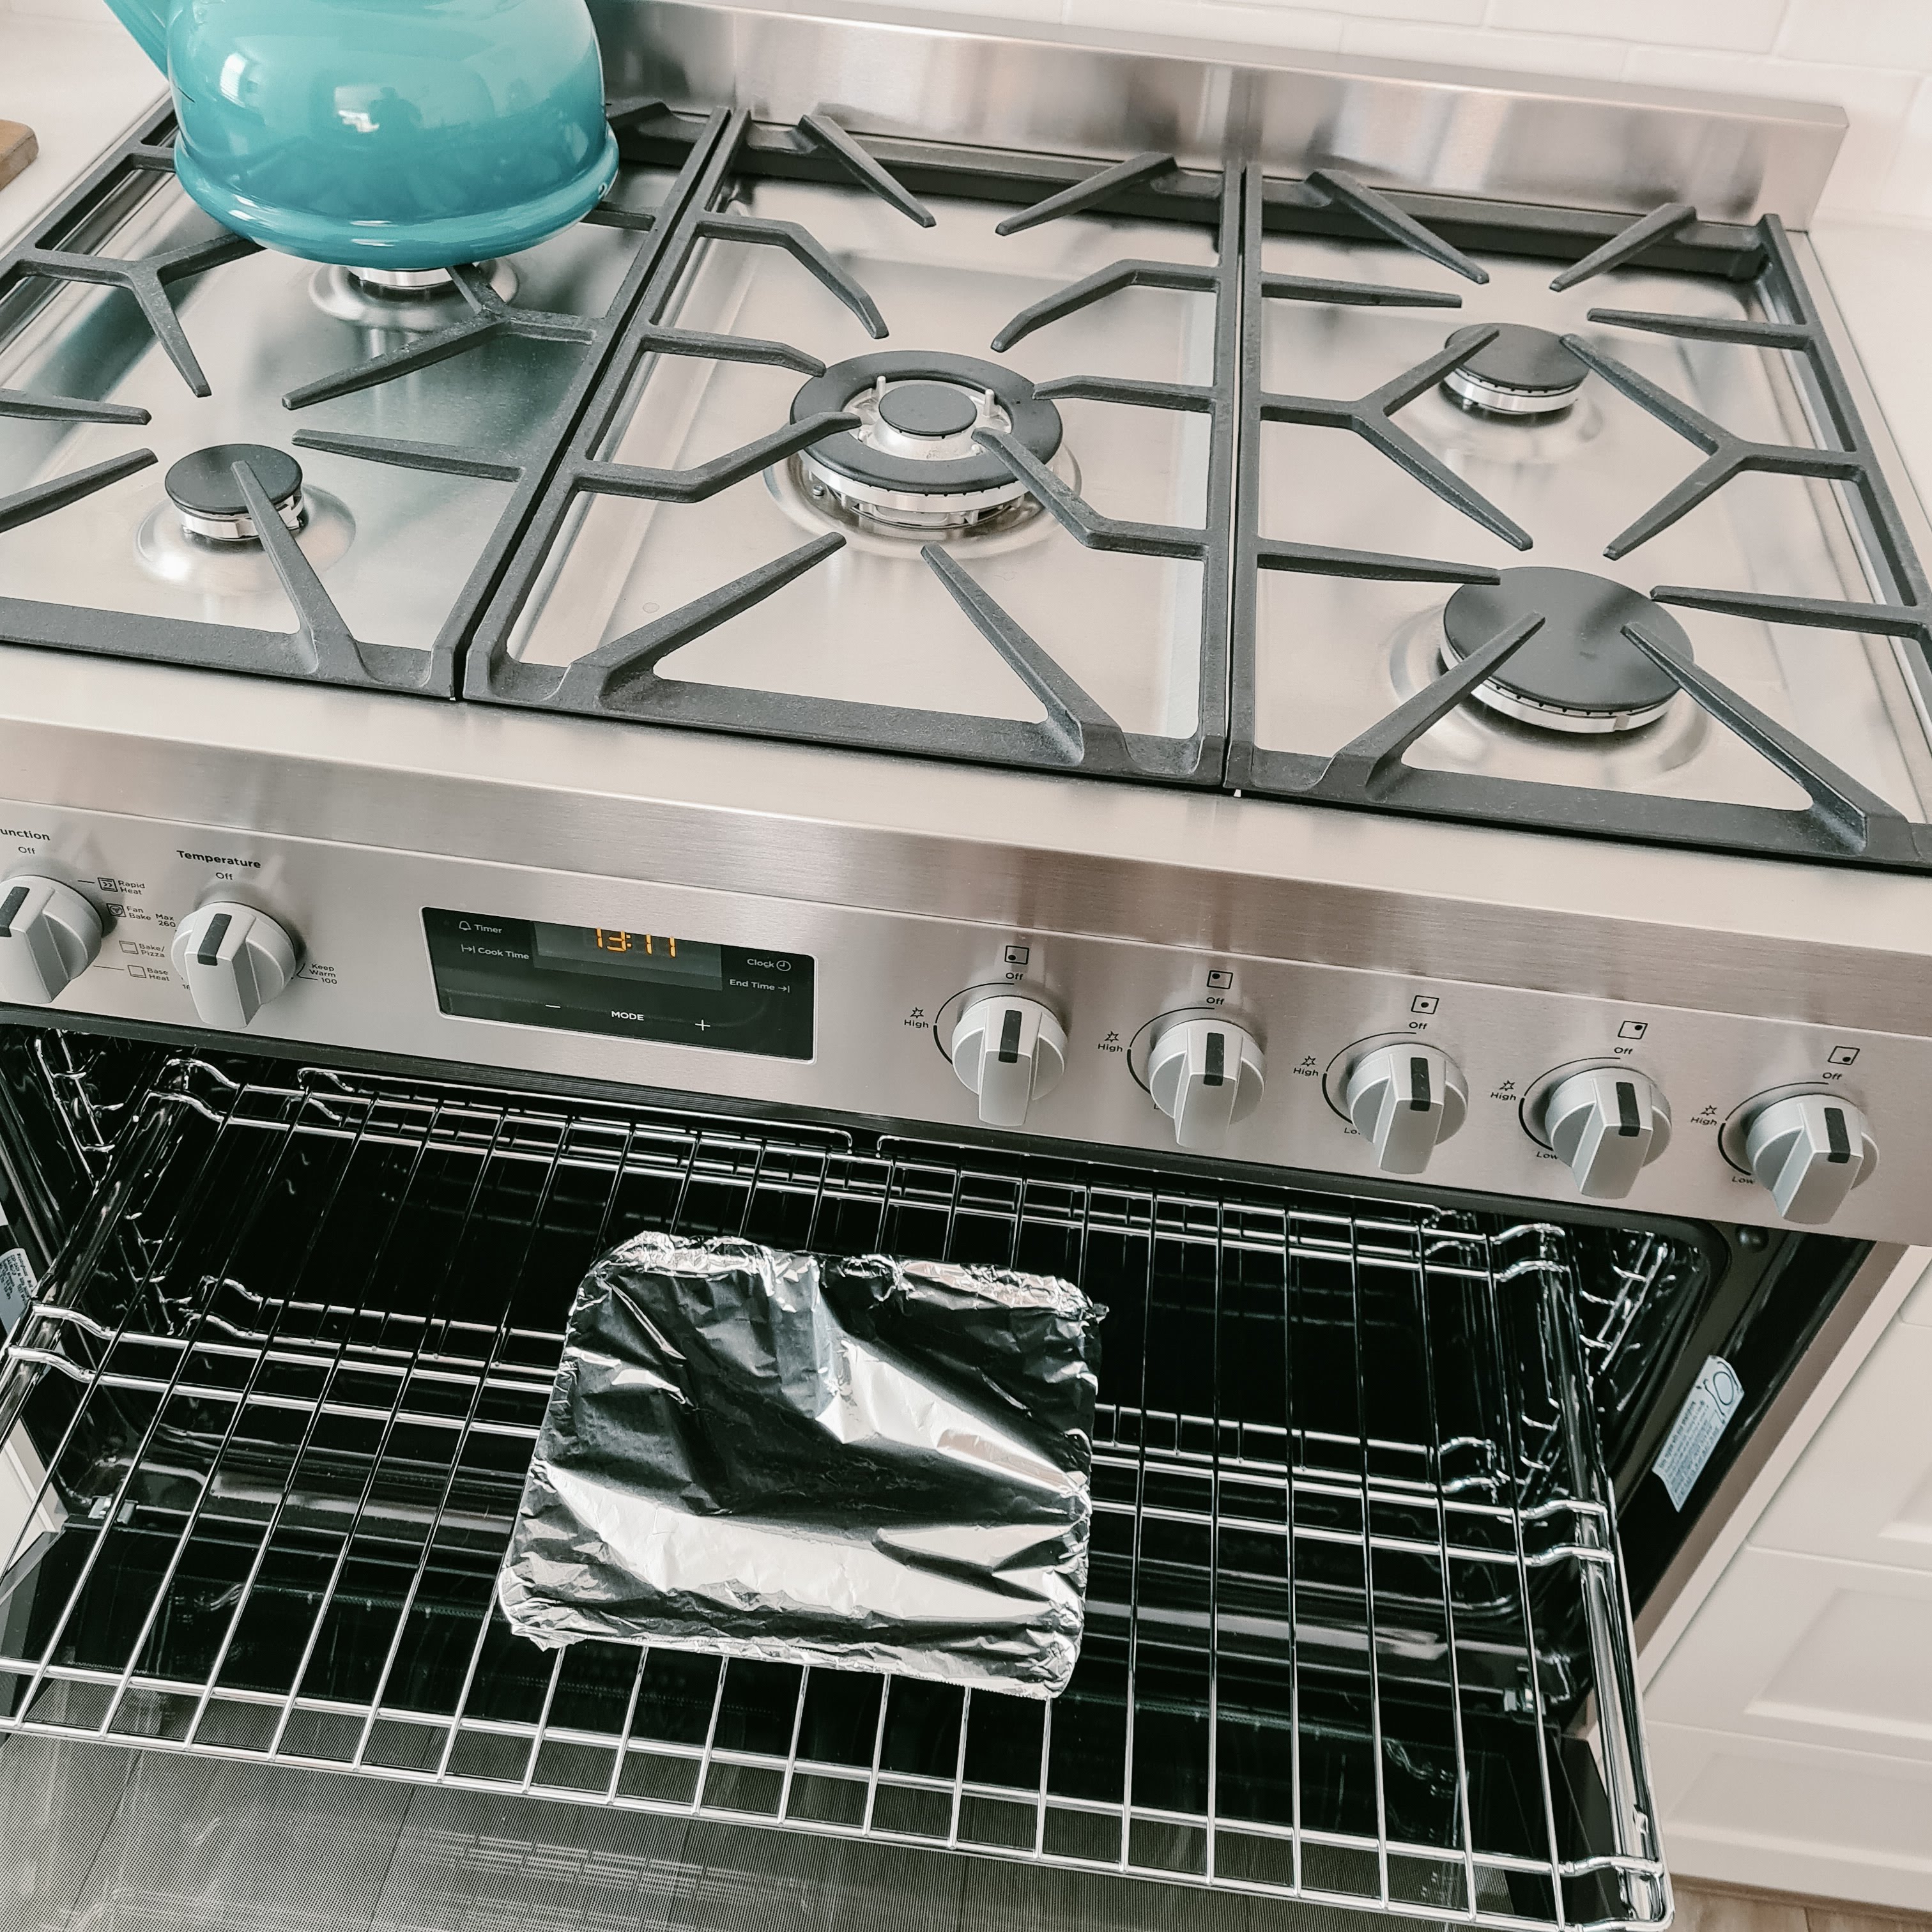
Tenting Your Pieces
- Baking is probably one of the most talked about topics of this medium it is therefore suggested that if you are considering taking up more polymer clay projects you invest some time learning more about the baking process. The internet is a treasure trove of useful tutorials and tips.
Finishing Your Pieces
After baking and cooling you may want to remove any rough edges or inconsistencies on the surface of your piece. This can be done using a nail file or fine grit sandpaper. Water can be added to your piece during sanding to get a smooth finish. Your first few attempts at working with Polymer Clay may result in surface bubbles during the baking process. This can happen for many reasons but never fear, the bubbles can be sanded down!

Sanding Your Pieces for The Perfect Finish
Some artists glaze their pieces after baking using polymer clay glazes, but this is optional. Polymer clay does not require sealing.
- Your baked pieces can be painted with acrylic paint, however you may choose to glaze these pieces to prevent the paint from rubbing off over time.
The final step in creating your Gift Tag is to thread the twine/ribbon through the clay piece. You can further personalise your piece with beads or other embellishments – There are no limits!

Thread Twine or Ribbon Through the Hole.
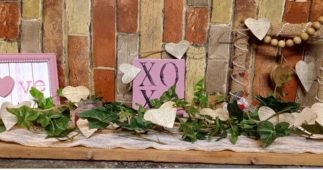
Voila! Your Completed Easter Gift Tag

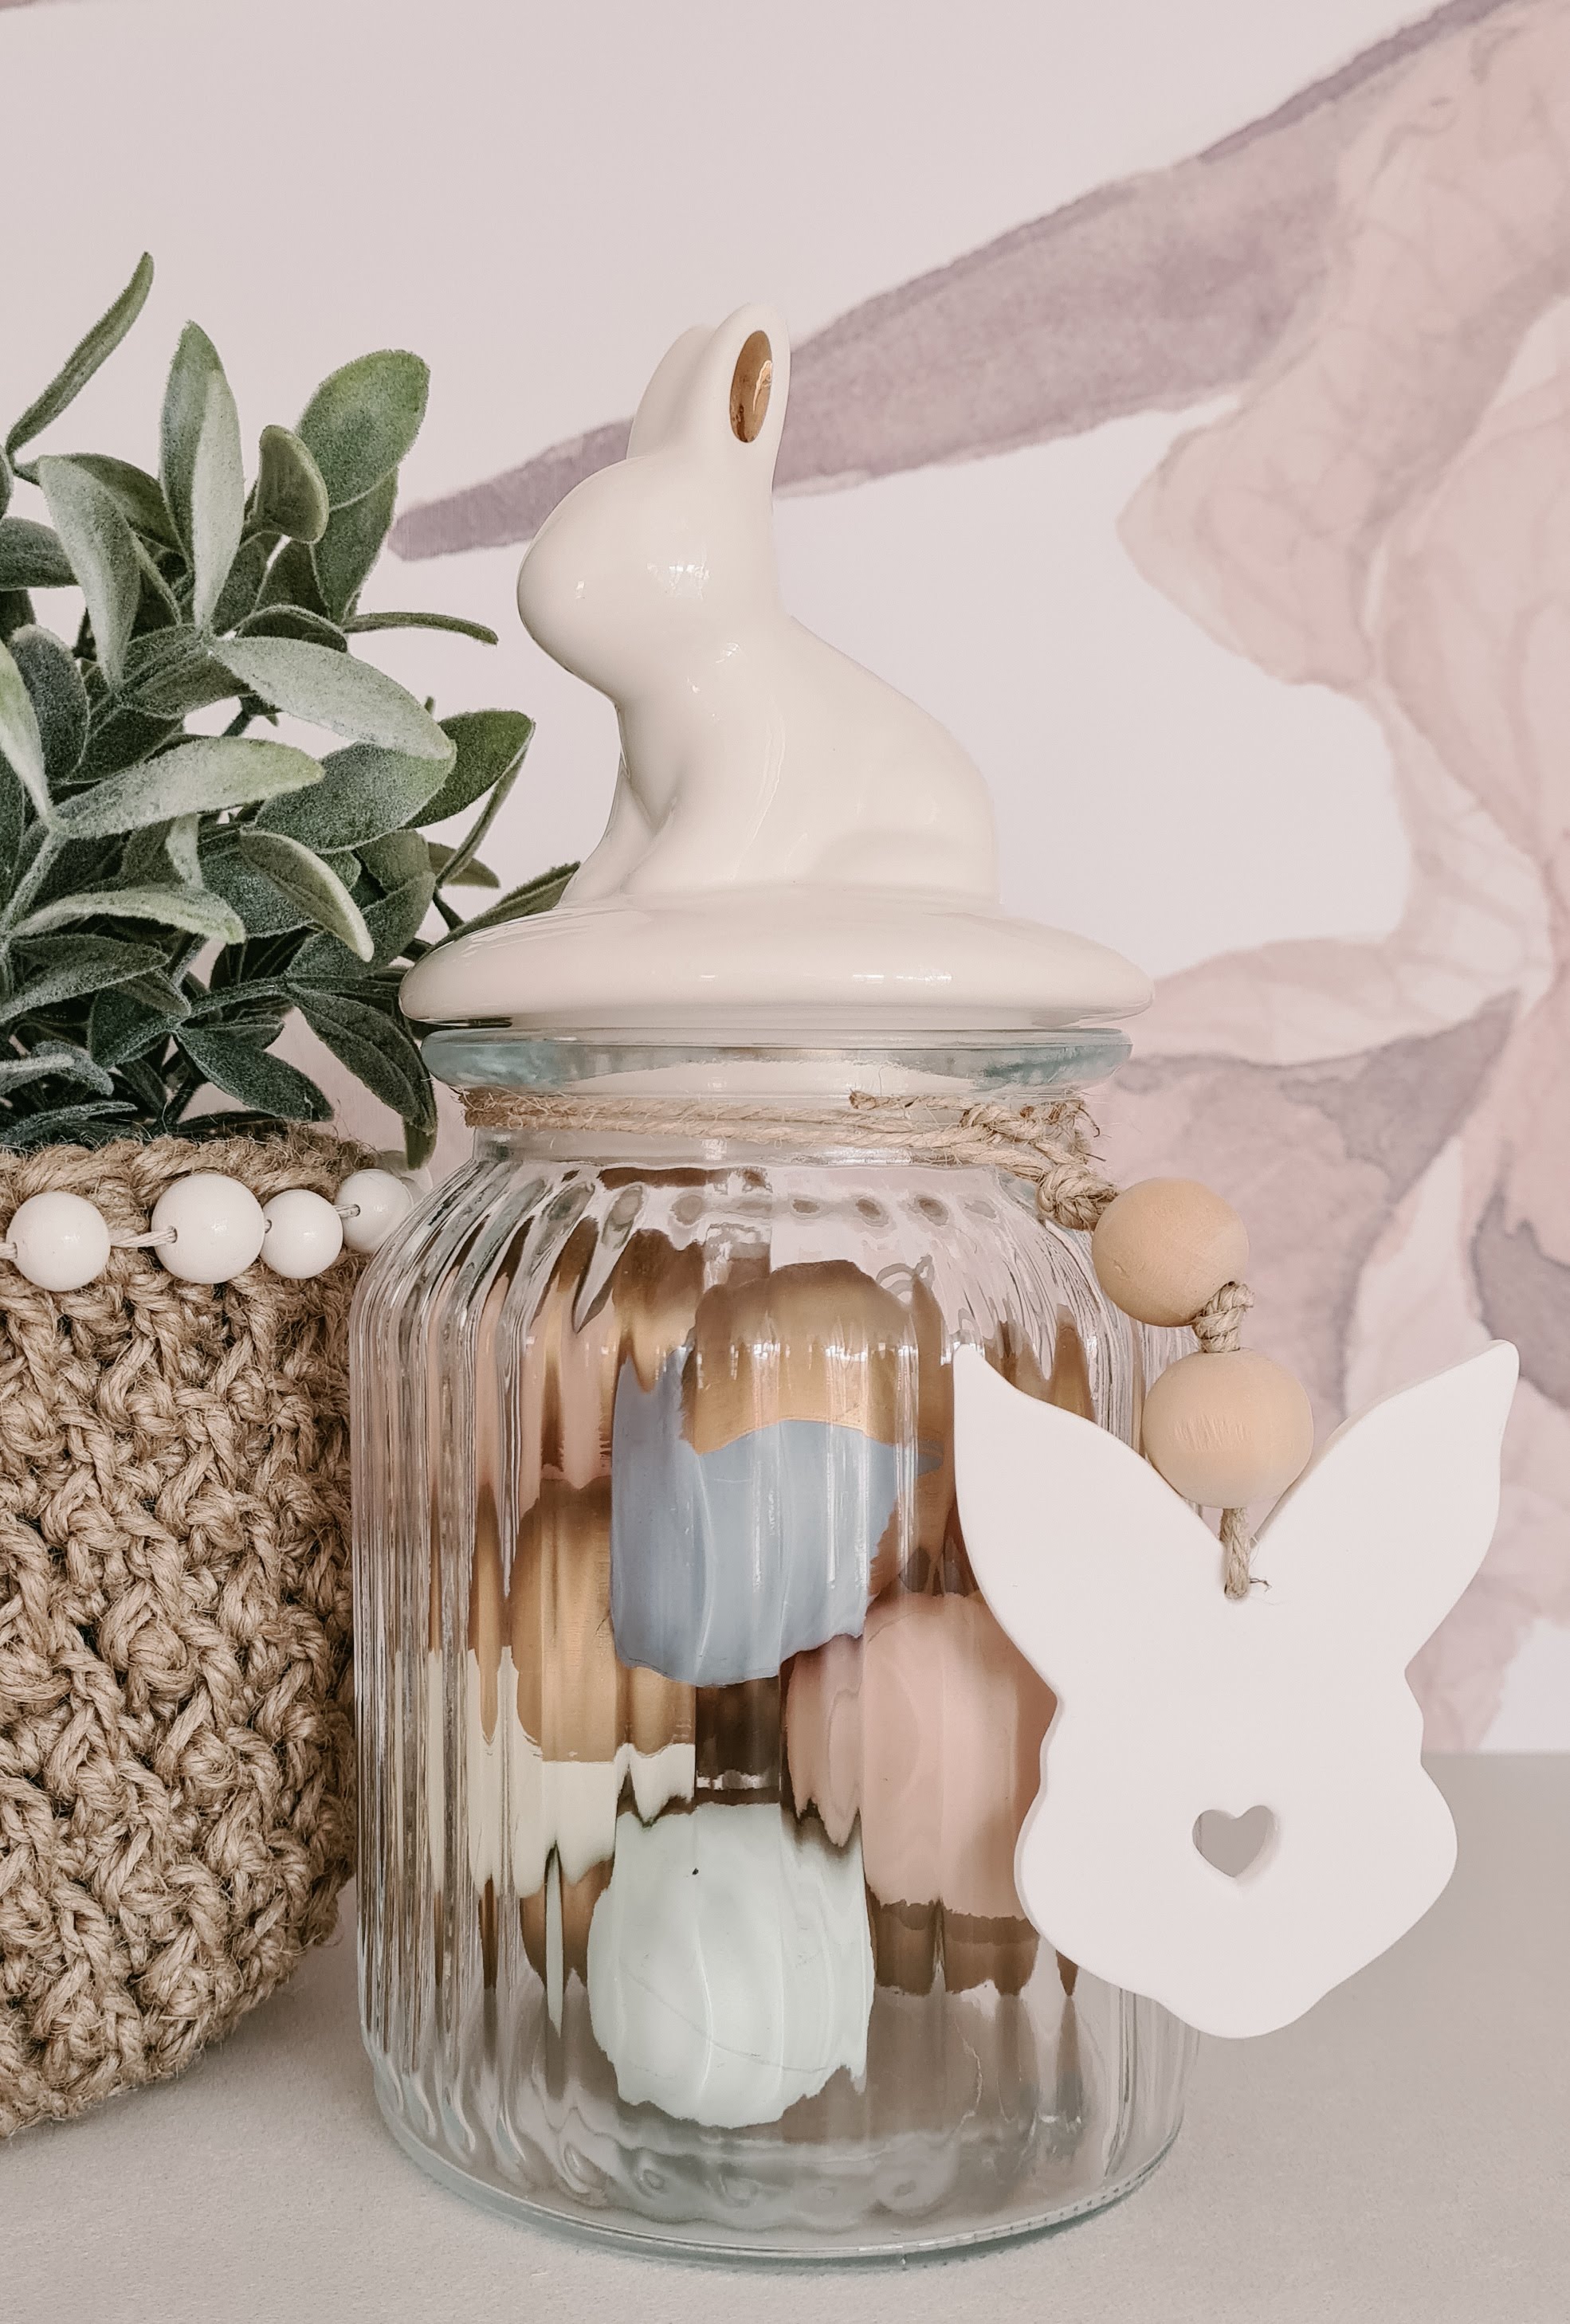
Repurpose on Your Easter Table

They Make Beautiful Easter Ornaments!
Questo articolo è stato scritto da