St. Patrick’s Day Project: Make a Set of Coasters

While celebrations for St. Patrick’s Day might be a little different this year, it doesn’t mean you still can’t have a toast for Ireland’s patron saint; and keep the drink rings off of your table with these snazzy coasters!
Supplies Needed
- Coaster blanks (I used Cricut brand square blanks)
- Alcohol wipes
- Permanent vinyl (I used Oracal 651 and permanent glitter vinyl)
- Transfer tape
- Digital products: Eat Drink and Be Irish SVG & Happy St Patricks Day SVG (or other holiday-themed images/SVGs)
- Weeding tools and scraper
- Square Ruler and/or cutting mat (for alignment)
- Cricut Explore Air 2 (or another cutting machine)
How to Make St. Patrick’s Day Coasters – Prepare Your Workspace
It’s always good practice to prepare your work station prior to beginning any project. Start by gathering all of the necessary supplies, then lay them out on the table so that you have easy access to your materials and tools as needed. Make sure your coasters are separated and wiped clean with an alcohol wipe to remove any dust particles that could interfere with vinyl adhesion.

Cricut Design Space
Let’s get designing! Open up a new project in Cricut Design Space (or the appropriate design software for your cutting machine) and insert a square from the shapes menu. Cricut’s square coasters are 3.75” x 3.75”, so unlock the shape and resize it to those same dimensions if you are using these coasters. If not, adjust the size according to your specific coaster blank. Make sure you lock it after adjusting the size and change the color to white. This will give you a more accurate preview of your finished project as you add in your designs. Now you have created your coaster template!

Go ahead and duplicate your shape four more times to represent the complete set.

Coaster Designs
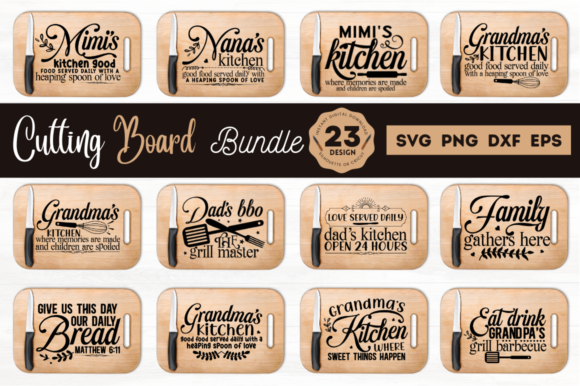
Now for some real fun! This is the part where you get to choose what you would like to add to your blanks. For two of my coasters, I used these designs from Creative Fabrica: Happy St Patricks Day and Eat Drink and Be Irish. They were wonderfully easy to cut and weeding them was a cinch! For the other two coasters, I created my own cutting design directly in Cricut Design Space.
If you are uploading some SVGs, size and place them accordingly on your templates, otherwise, you can start making your own.
Irish Clover
This design is simple and minimalist, yet choosing a flashy vinyl really brings it to life. Start by searching for “four leaf clover” in the images library. You should be seeing it as the second image, but if not, just keep looking for the one that you like. Make sure it’s solid in the middle (no holes) as we will be slicing the center of it later. Once you find it, insert the image into your canvas.
If you find the stem of this clover too long, you can easily cut it shorter as I did. To do this, insert a shape; it doesn’t matter which one, but I used a circle. Drag the shape over to your clover and place it on the stem at the point you want to cut off. Select both the clover and shape together, then slice. At this point, you can delete all of the slices (except the clover of course!)
You can size and rotate the clover to make it fit how you like against the template. I made mine about 3.3” in height and rotated 326 degrees.
- Design Tip: For a better preview, while working with your designs you change the colors to represent the vinyl you will be using. This helps to visualize what your final project will look like. For example, I changed the color to green because my clover will be cut with green glitter vinyl; this will really help to make it pop against the white background.
Now to add something a little extra, let’s make a text cutout! Insert a text field and type whatever you want your clover to say; I recommend only one word for size purposes. I used the Harrington Bold font that came pre-installed on my laptop. You can stop there, or you change the letter spacing and curvature to fancy it up! When you’re done, select the text and clover and then Align > Center. With both still selected, slice.

Leprechaun Hat
To create the leprechaun hat, I simply duplicated the components of the hat from the Happy St Patricks Day design, and then sized and placed it where I wanted it on the coaster. Next, using the same technique from the clover, I sliced the word “cheers” out of the top section of the hat.
Going back to the original SVG, I hid the hat pieces in order to enlarge the phrase on my coaster.
- Design Tip: Using two components of the same design on different coaster blanks helps in complimenting the whole ensemble!
Make it!
Once you have all of your coaster designs sized, placed, and ready for cutting, you can then delete the square shape coaster templates that we created. Now you are ready to cut! Attach as needed and select“Make It”, being sure to choose your vinyl types and/or adjust your settings.

Remember! If you are using multiple colors/types of vinyl, make sure you apply your layering techniques.
Once cut, weed and apply transfer tape.
Applying the Vinyl
Make sure your coaster is straight before attempting to apply your decals. To help with this, I recommend lining it up using this Cricut Self-Healing mat. It’s one of my essential tools and I use it for so many projects! Once you are comfortable with the alignment, carefully apply your vinyl/transfer tape, then burnish to remove any air bubbles and to ensure proper adhesion.

- Burnishing Tip: Some people like to run the scraper over the vinyl after the transfer tape has been removed, but I never advise burnishing this way. You run the risk of scratching the vinyl or even damaging it before it has a chance to cure!
Finishing
After all of your vinyl has been applied to your coasters you can set them aside for 24 to 48 hours to allow the vinyl to permanently adhere to the surface of your coasters. This is known as “curing” the vinyl.

Voila! Now you’ve got yourself some super snazzy coasters to cheers good ol’ Paddy on March 17th!

Keep on Crafting!


