How to Make Shirts with Cricut? – Step-by-Step Easy Guide

Making shirts using your Cricut cut machine has never been easier or more fun. With so many designs and options available, you can create a shirt for any occasion. Shirts make great gifts. You can even start your own small business selling t-shirts online, on Etsy, or at craft fairs and pop-up events! For more creative ideas check out Creative Fabricas section on crafts. They even have loads of free crafts available here!
Getting started
To get started, you need a Cricut cut machine. Your Cricut will be able to cut through Heat Transfer Vinyl (HTV) and prepare the design for being put on a shirt. Make sure you have downloaded Cricut Design Space on your PC or laptop. Instructions to set up your account will be in your Cricut box. Make sure you set up your Cricut on a hard, flat surface with plenty of room for crafting.
A few other items that will come with your Cricut are your cutting mat and a weeding tool. The cutting mat is a large piece of plastic that is sticky on one side. The sticky side is to keep the vinyl in place when cutting. Your weeding tool or tools are small hook tools with a plastic handle. These tools help pull up the excess vinyl pieces once you have completed the cut.
Once you have set up your Cricut make sure you have uploaded Cricut Design Space on your PC or laptop. Cricut Design Space is the platform that Cricut uses to upload your designs for cutting into your Cricut.
Choosing materials
For making shirts with Cricut and Cricut Design Space, you will need to choose Heat Transfer Vinyl for your vinyl option. There are other vinyl types available, such as permanent vinyl, but you will only need Heat Transfer Vinyl for shirt projects. Cricut does have its own brand of Heat Transfer Vinyl, however, I have found that Oracle HTV and other brands are less expensive and work even better.
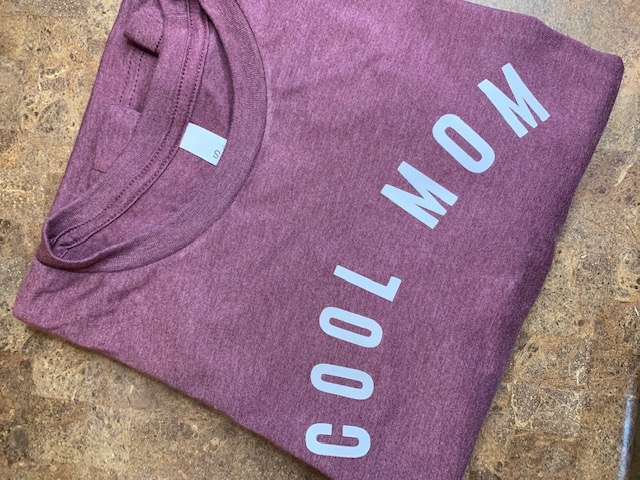
My favorite shirts to work with are the Bella Canvas brand. They are a soft vintage t-shirt material and come in tons of colors. You can also find crew neck or v-neck shirts in this brand. Cricut has their own brand of shirts, however much like their vinyl, I find that their brand of shirts does not work as well. You can also use thrifted or prior-used t-shirts. These also work really well too, especially for practice. Some people have suggested that you pre-wash your shirt first, but I have found that this step is not necessary.
The last thing you will need is a Cricut Heat Press or a clothing iron. I prefer using a Cricut Heat Press for this process. The Cricut Heat Press has a large flat surface and has a digital face where you can heat the iron up easily to the exact desired degree. The Cricut Heat Press also has a Cricut pressing matt. This mat can be purchased separately but totally optional. You can use a folded-up towel or ironing board to press your shirts.
Choosing or creating your SVG
To get started, choose or create your SVG. You can choose and download a free SVG here. Or you can create your own SVG using fonts and Cricut Design Space. To create an SVG in Cricut Design Space, download a font. You can find lots of fonts here, free fonts available here, or choose print fonts for their hand-lettered design. There are so many fonts to choose from, some designed specifically for t-shirts, vinyl fonts, and even fonts made for kids! Once you have your desired font, upload it to your Cricut Design Space. Use the type tool to create a slogan or saying. Make sure you save the design and your SVG is now available to you.
Step-by-step instructions to create your shirt
Step 1 – Begin by uploading your design or creating your SVG in Cricut Design Space.
Step 2 – Measure your shirt and decide on the size of your SVG. In Cricut Design Space size your SVG accordingly.
Step 3 – Change the settings in Cricut Design Space to vinyl, OR change the knob on your Cricut to point to vinyl.
Step 4 – Prep your HTV by unrolling your vinyl. Cut a large square out big enough to cover your design.
Step 5 – Set up your cutting mat. Remove the plastic protective covering on your cutting mat and with the shiny side down press the HTV onto your cutting mat and push down to make sure it sticks.
Step 6 – Feed your cutting mat into your Cricut.
Step 7 – Make sure you click on the mirror image button before you cut in your Cricut Design Space this will create your design cut backwards but will be the correct position once ironed.
Step 8 – Click on the GO button on your Cricut and begin to cut.

Step 9 – Once the cut is finished, peel off the excess vinyl with either your fingers or the weeding tool.

Step 10 – Remove the clear protective coat off of your cutting mat and flip it over using the adhesive on the clear plastic to stick your design on your shirt.

Step 11 – Heat up your Cricut Heat Press or iron.
Step 12 – Press down on your design and shirt for 15 seconds with firm circular motions.
Step 13 – Peel off the clear protective layer and enjoy your new shirt!
Tips and tricks
- Do not over press or press longer than 15 seconds. This will cause the vinyl to melt, and the adhesive will not stick to your shirt.
- Save scraps of HTV for small projects, baby gifts, and more!
- Coupons and resources and Amazon sales are available online to save money on Vinyl, T-shirts, and more.
- If your clear protective layer is too hot to peel off, wait for the sheet to cool first. This is known as a cold peel.
- Vinyl can be layered for a more detailed look, for a complete tutorial click here.
- Choose contrasting colors for shirts and vinyl, a black shirt looks great with white vinyl and a pink shirt looks amazing with black vinyl.
- For longer-lasting wear, wash in warm water and dry in medium heat.
- If after washing your vinyl is peeling up, simply use wax paper and repress only the potion that is lifting on your shirt.
For more SVG designs and even 3D SVGs click here!
Este artigo foi escrito por