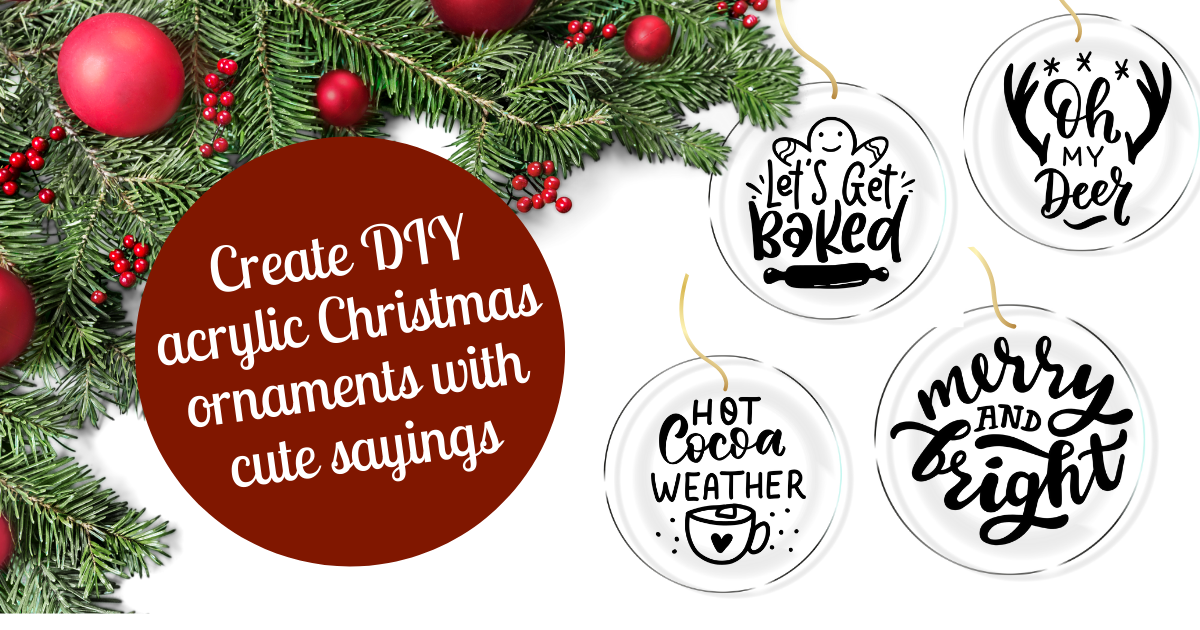
Create DIY Acrylic Christmas Ornaments With Cute Sayings
My favorite time of year is Christmas. It’s so fun to decorate and put up all the embellishments in our home, inside and out. And one of the most exciting things about Christmas is setting up the Christmas tree. Every year I like to craft several special ornaments for our tree. I usually try to stick to a theme and craft ornaments around the tree theme for that year.
This year my family and I decided to go with a traditional Christmas tree with the colors green, red, and gold. Sometimes we choose a more colorful theme or go with somewhat non-traditional colors like teal, pink and green. But this year we wanted to go with a more vintage look. I get a lot of enjoyment out of decorating and styling our Christmas home theme and finding ways to craft new ornaments.
For this year’s new ornaments, I really wanted to try making acrylic ornaments. In the past, I have made wood ornaments with my Cricut, and even crafted little knitted stockings. But this year I wanted to create something different. When searching online I found a pack of acrylic disks online at Amazon.com for around ten dollars for 25 of them and knew I had to get them to try making acrylic ornaments at home.
Materials
For this project, you will need a clear acrylic or plastic disk 3 to 4 inches in diameter. I found a pack of 25 on Amazon for a reasonable price. I liked the fact that it came with a bunch. In case I mess up one or two times I have a lot extra. Make sure, when you purchase your clear acrylic disks, they have a hole drilled at the top for an ornament hook or string. Otherwise, you will have to drill the holes yourself.
Aside from the clear acrylic disks, you will need colorful string to tie the ornament hanger. I purchased gold and white string from Michael’s, my local craft store. But feel free to purchase or use whatever ribbon goes with the theme of your Christmas tree.
The last item you will need to complete this project is permanent vinyl. I chose white vinyl to use against the clear ornament because I really wanted the green color of the Christmas tree to shine through. But I think gold, black, or any color that goes with your Christmas tree theme would work just as well.
The vinyl brand I usually purchase is Sister Vinyl. Sister Vinyl sells at Michael’s crafts stores for a dollar a sheet so I picked up two sheets and had plenty of vinyl left over.
Make sure you are using permanent vinyl, and not temporary vinyl. You don’t want your ornament lettering to become unstuck over time. The permanent vinyl will stick for years to come.
Instructions
Once you have all your materials together, it’s time to get started! This project is not hard and is really great for beginners who are just getting used to cutting and peeling vinyl.
The first thing you are going to want to do is download your free SVGs here. This project comes with several free SVGS. I used all of them to make my ornaments but feel free to choose just one or make them all like I did!
After you have downloaded your free SVGs, open and upload your SVGs in Cricut Design Space.

Prep your clear acrylic disks. The ones I purchased on Amazon had a protective film on both sides so make sure you peel that layer off first if your disks are not completely clear.
Measure out your clear acrylic disk and size your SVGs in Cricut Design Space accordingly. For my project, I had 4-inch acrylic disks and wanted a lot of clear borders around my vinyl, so I made my vinyl lettering 3 inches. If you want less of a border on your ornaments, size your SVGs larger and closer to the size of your acrylic ornament.
Once you have your sizing done, prep your cutting mat and begin to cut out your project. Because this is permanent vinyl and not heat transfer vinyl, you do not have to mirror your project. However, make sure your Cricut is set to cut vinyl either on the machine dial, or in Cricut Design Space.
After your vinyl is cut out, remove the excess vinyl from the project, leaving only the vinyl cut lettering intact.
For ease of putting on Acrylic disks, cut out each individual vinyl saying. Using the contact paper method, cut a piece of contact paper out as large as each vinyl saying.

One at a time, peel up the vinyl and place over each ornament’s vinyl cut. Using a credit card or the Cricut tool shown, gently scrape over the lettering to loosen them up from the cutting page. Peel the contact paper back making sure each sticker is now stuck to the contact paper. If you are having trouble, go over the vinyl again making sure all air bubbles are removed.

Peel up your contact paper, taking all the vinyl cut out onto the contact paper. Now take your acrylic ornament and carefully place your vinyl sticker down with the contact paper. Press down and using the same Cricut tool or credit card, scrape along your vinyl to press it down to your ornament.


Repeat this until all your ornaments are completed. Using your string, loop a hole on the top and string it through.
Tips
Ornaments make great gifts! Make one for everyone on your wish list! Perfect project for large office gifts, family, friends and neighbors.
Use glitter vinyl in holiday colors to create a different effect. Tie with fancy ribbons or bows.
Use two or more different colored vinyl to create this project. Make the vinyl letters one color and the decorations on the acrylic ornament another color.
Tie ornaments on top of Christmas gifts for an ‘extra’ gift next to your gift tag.
Make your own SVG quotes and create different sayings for your acrylic ornaments.
Este artigo foi escrito por


