I don’t know what the weather is like where you live, but in Michigan, we really, REALLY, look forward to spring starting. We unfortunately are teased by mother nature a few times before the snow finally melts for the last time and the spring blooms start sprouting. Of course, spring is also around the same time as Easter which happens to be one of my kid’s favorite holidays.
They absolutely love the Easter bunny and that he brings a basket filled with goodies for them one sunny Sunday morning. Who doesn’t love waking up to candy and a few small toys?
I decided we need to have a beautiful spring floral arrangement for our table to celebrate the occasion. During my last trip to the craft store, I saw a beautiful white metal basket that inspired this whole project. My next stop was the floral aisle and I found a sheet of green moss and the ideas spiraled from there.
Supplies Needed:
- Metal Basket (needs to take a magnet)
- Moss Sheet, 16” x 18”
- Extra Loose Moss
- Floral Foam (wet for real flowers)
- Saran Wrap
- Yarn (pink and white)
- Cloth Stem Wires
- Fresh Flowers (or faux)
- Magnet Printable Paper
- Graphic Designs
- Silhouette Cameo
- Hot Glue Gun and Glue
- Scissors
- Printer

Prepare the Basket
Let’s start by prepping the basket for the flowers. You’ll want to open the moss sheet and measure in on the corners so you can fit the sheet inside the basket with minimal bunching. For my sized basket cutting out 3.5” squares from the corners worked well for helping it to fit. You still want a little bit of overlap so there aren’t bare corners.


If you are going to work with real flowers like I am, you’ll want to take some saran wrap and line the inside of the basket to help prevent leaks from the wet foam block.

Soak the Floral Foam
For fresh flowers, you’ll need to prep your foam block by soaking it in some water. A tip I read on the foam I purchased was to add the flower food packet to the water. You’ll need to let it soak for about 15 minutes or so.

I also cut open the floral bags and had those ready to grab for when I was ready to add the fresh flowers.
Make the Bunny Ears
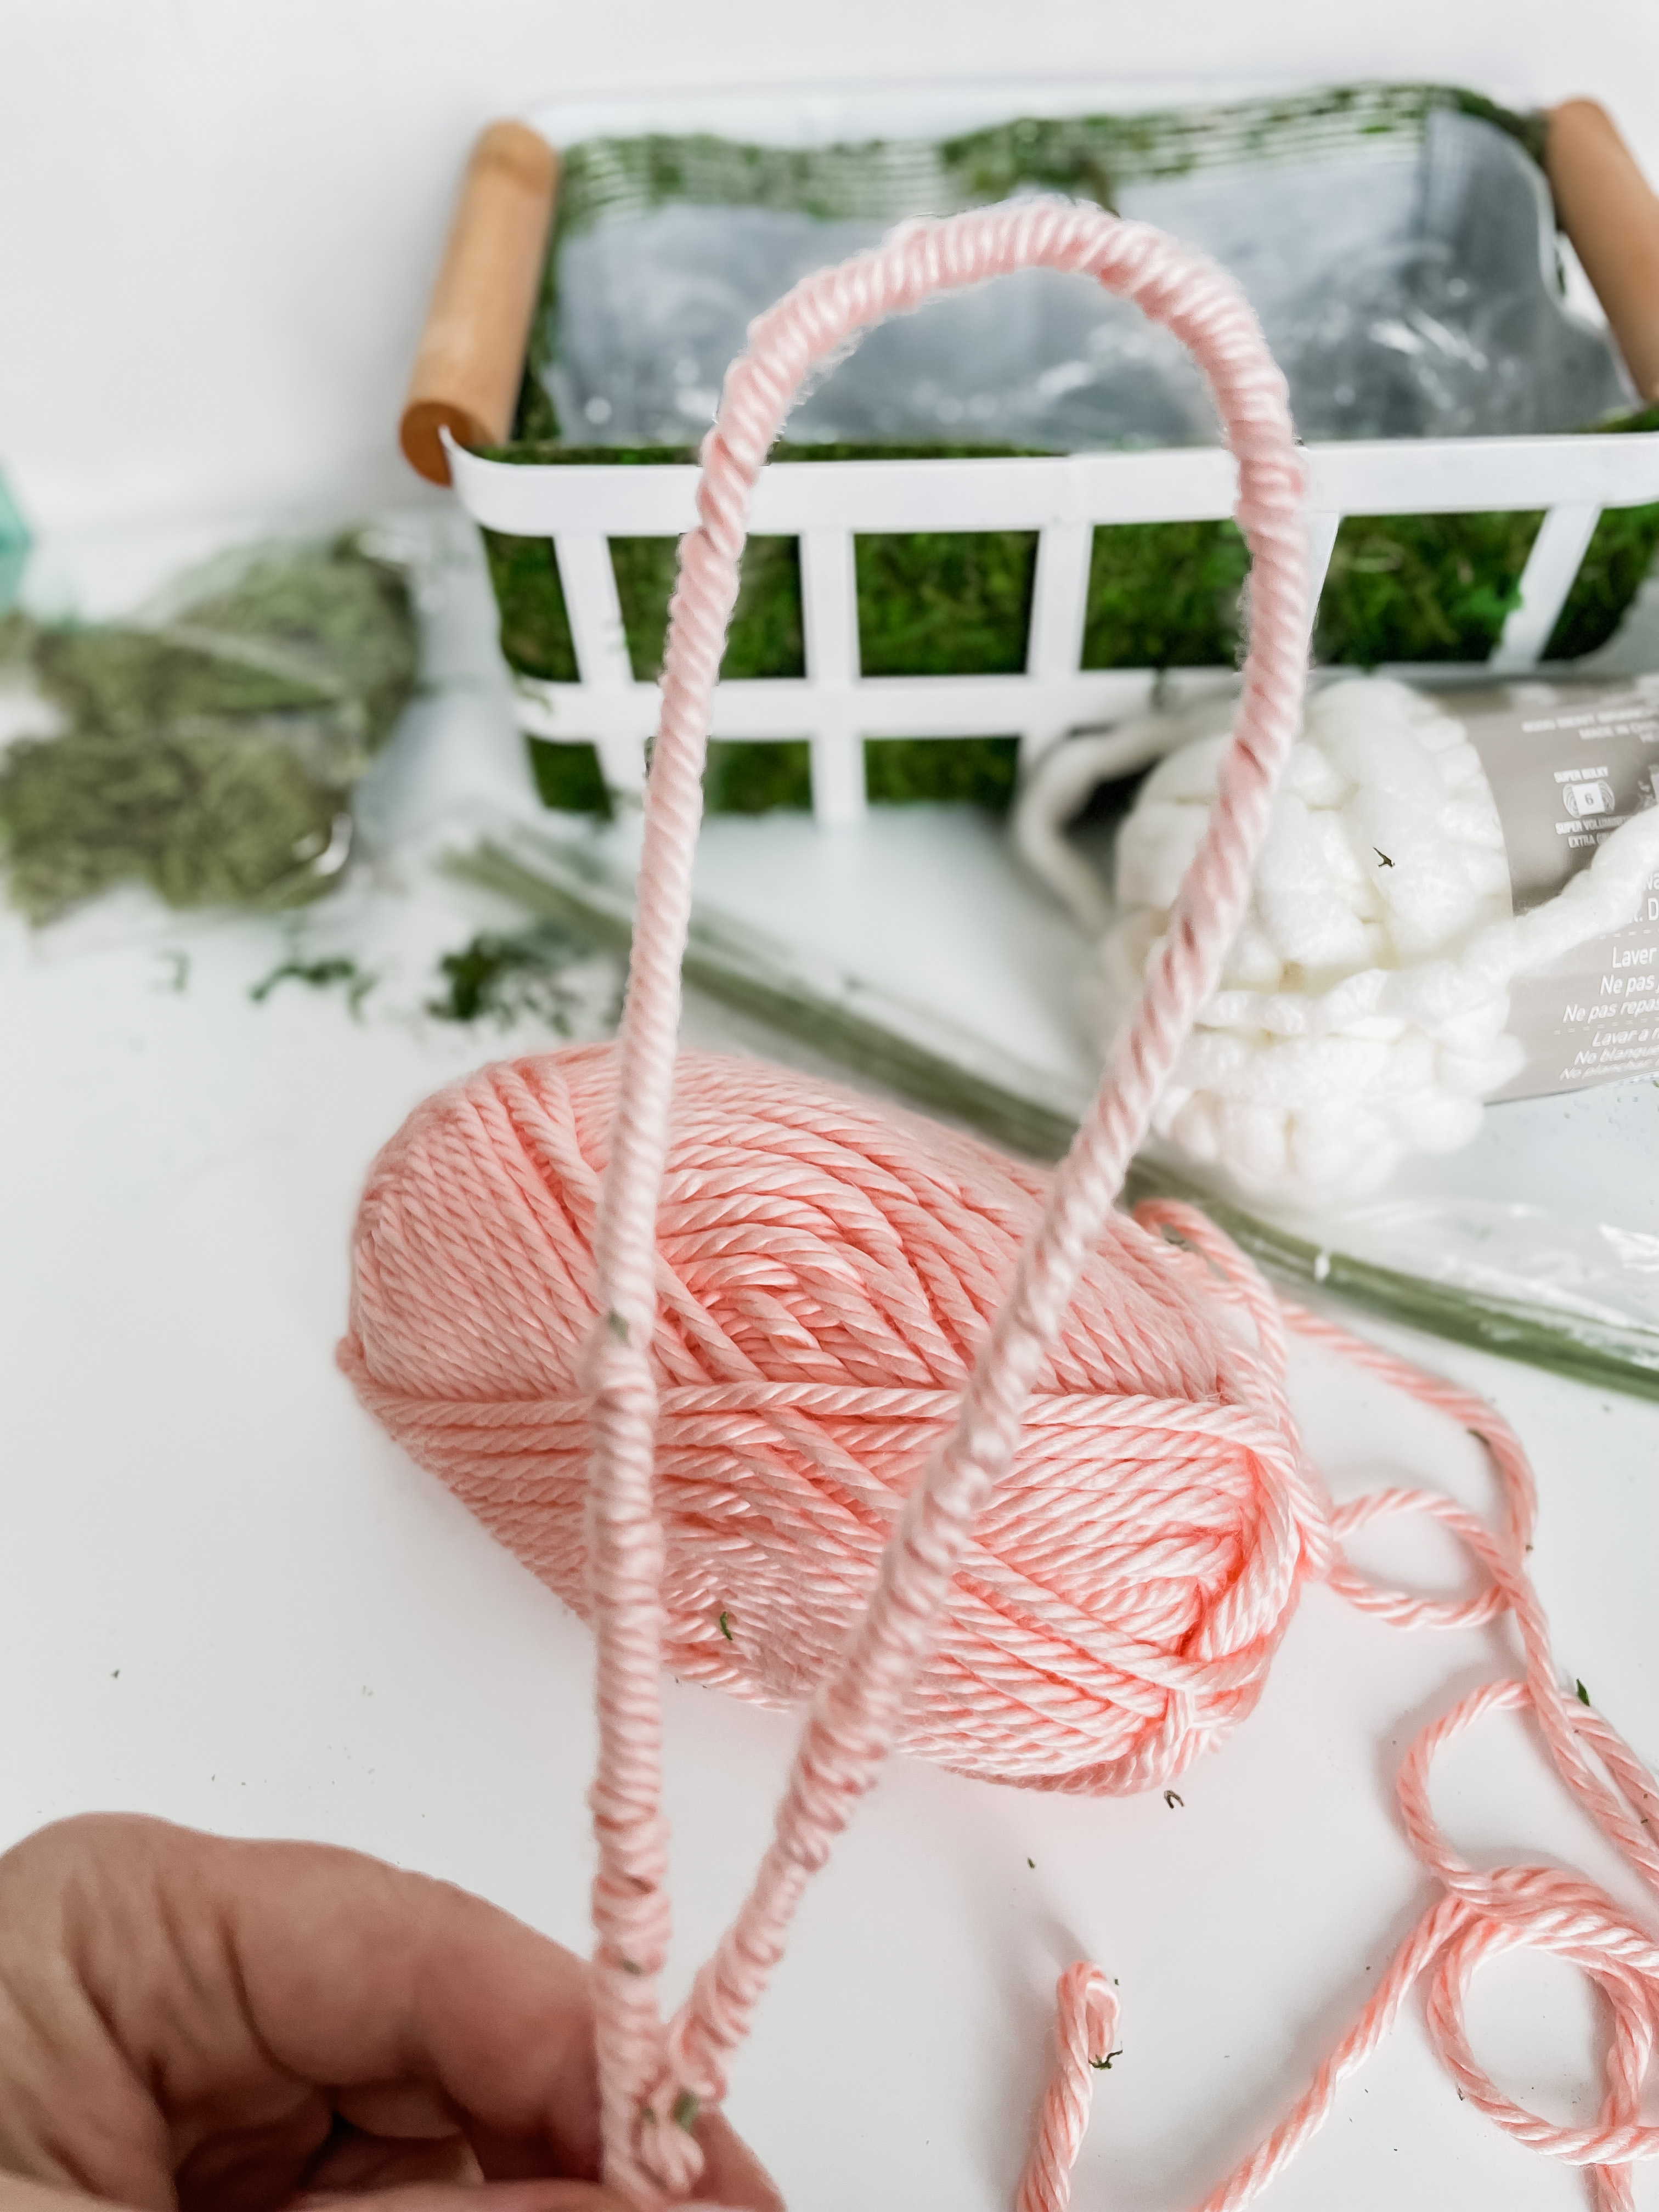
This is my fun twist to this floral arrangement, adding some yarn bunny ears! I bought some thick pink yarn and extra fluffy white yarn so it looks like fuzzy bunny ears.
Start by adding a small dab of hot glue to the end of the stem wire and just wrap the pink yarn around the wire. This is to help the next yarn wrapping stick to the wire better so you won’t really see this part.

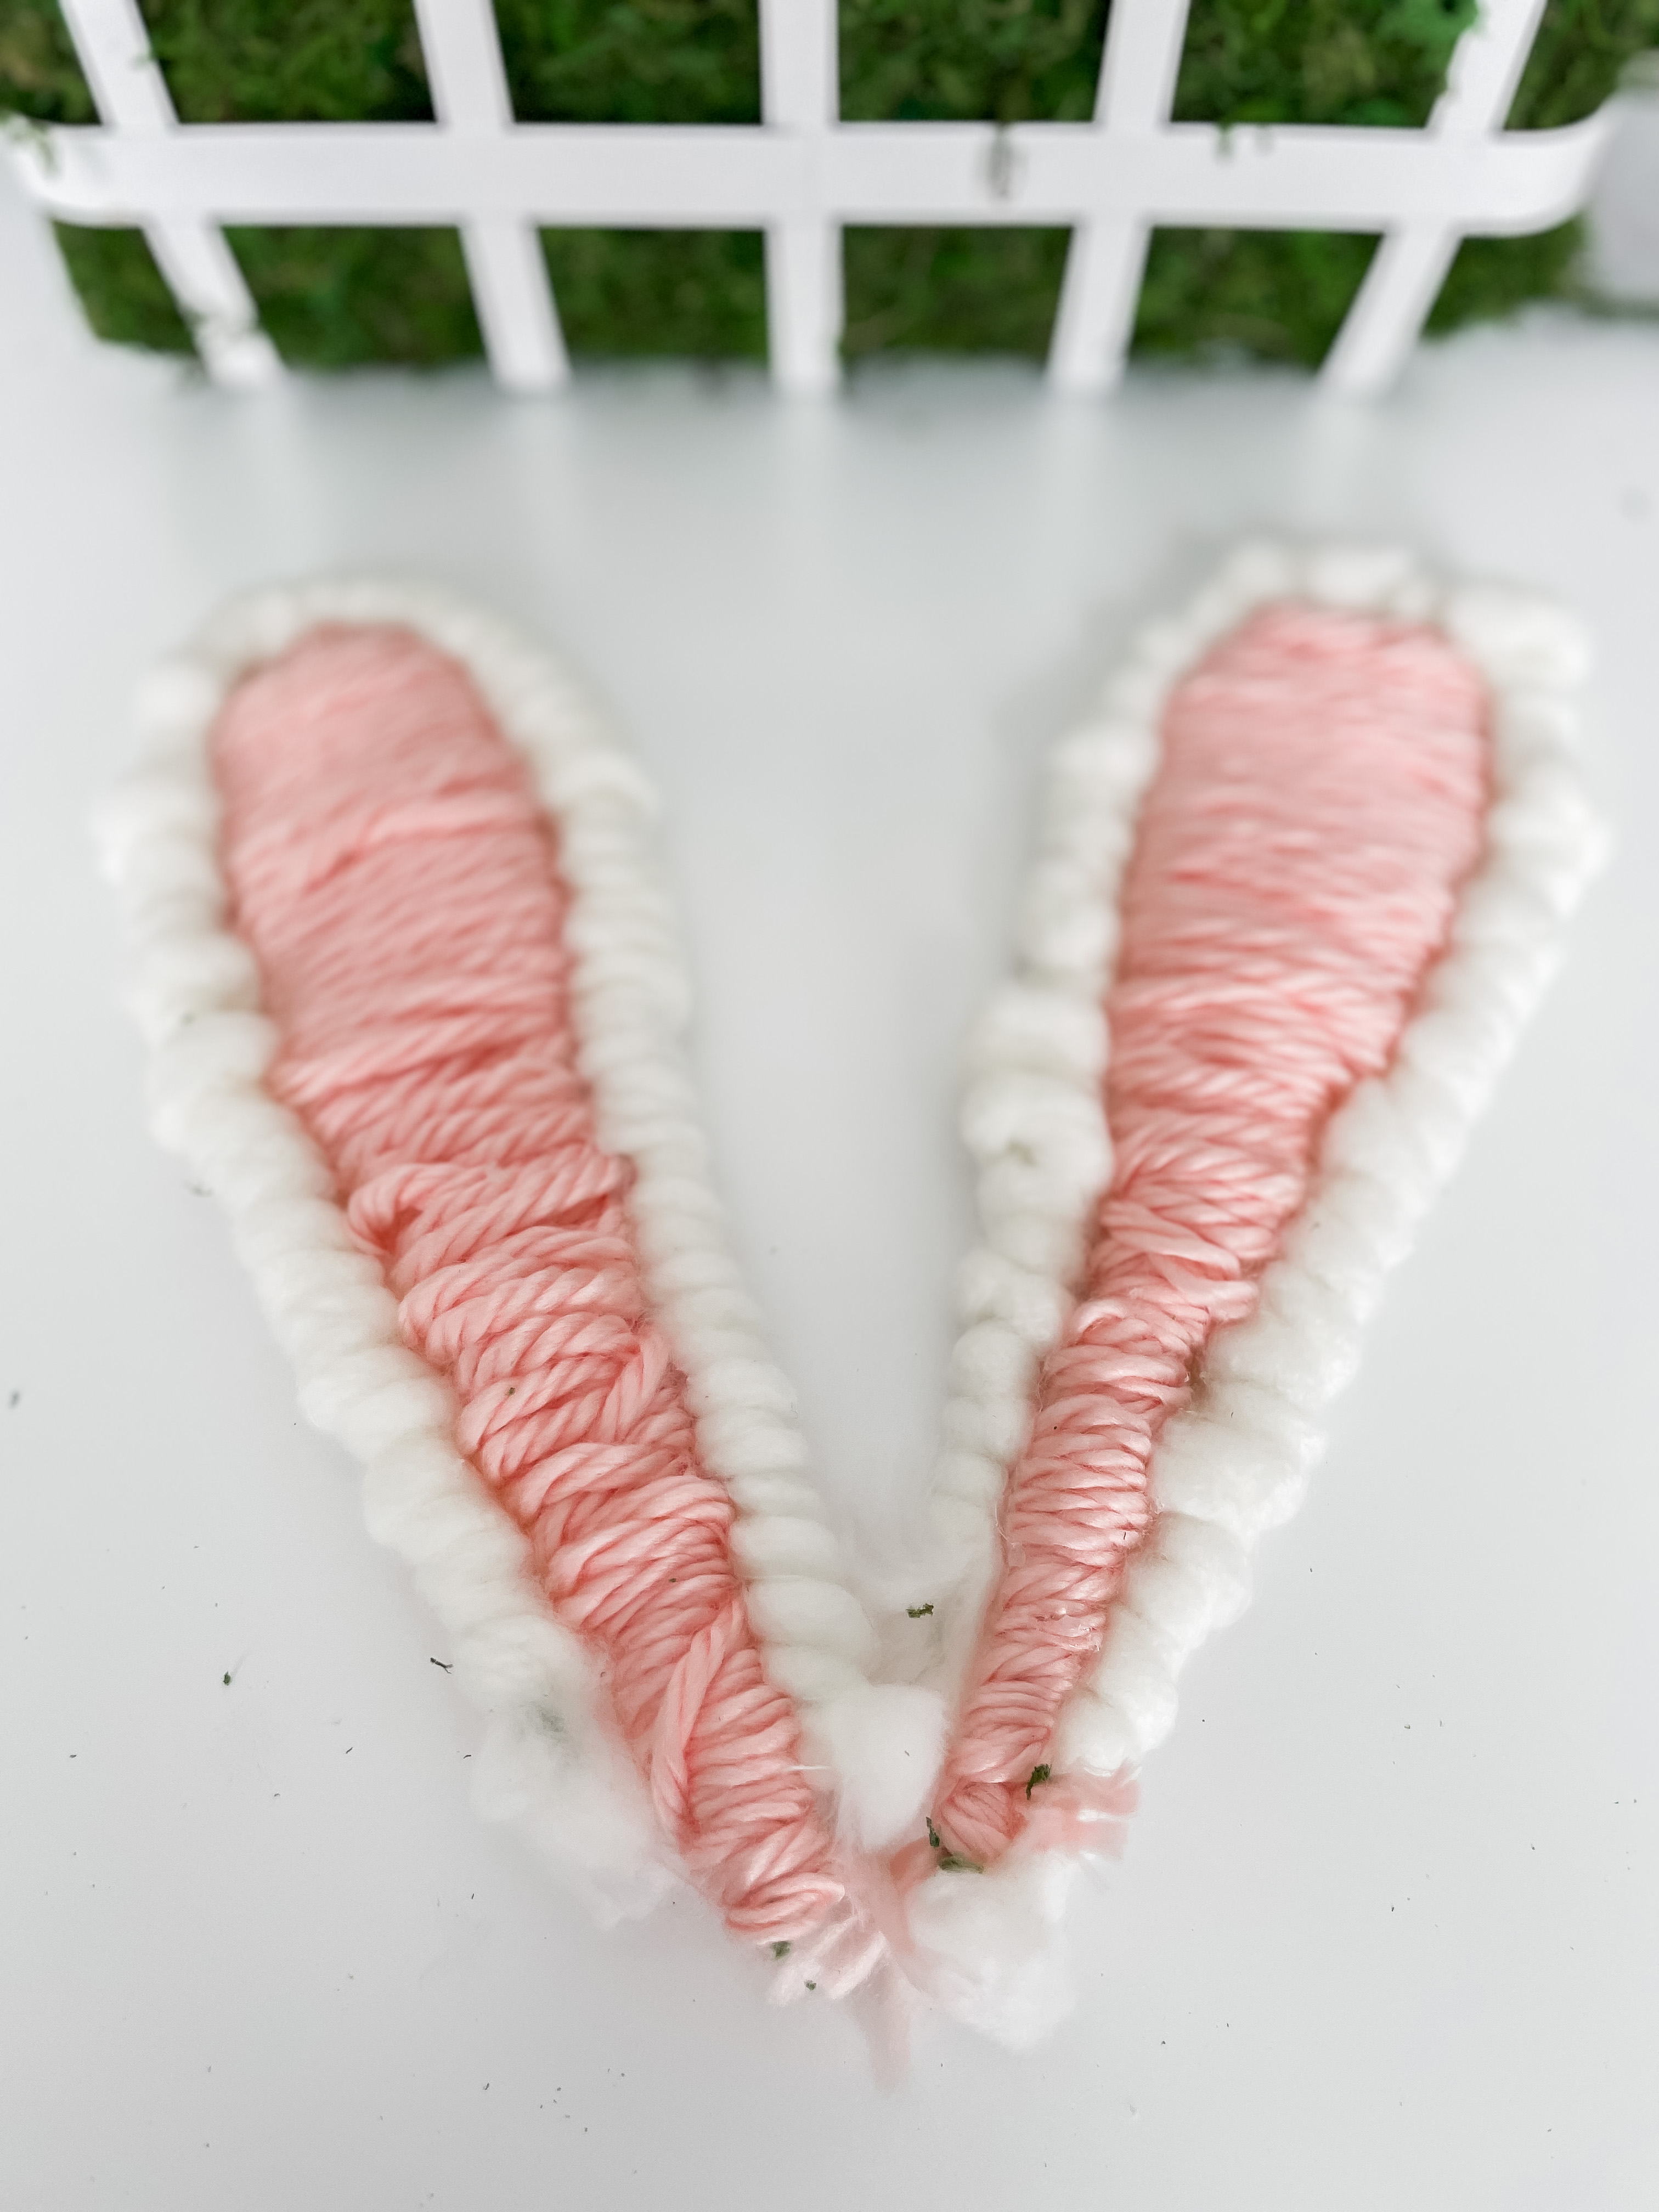
Next, form the wire into an ear shape by bending it loosely in half. Then wrap the yarn around the outside of the ear shape.
As you get towards the middle of the ear start taking some yarn and wrapping it vertically around the top of the ear, this will help close the gap at the top without the yarn slipping off. I also added small daps of hot glue to make sure it stayed in place. Finish wrapping the entire ear and then wrap some yarn going back down and secure it at the bottom with more glue.


Now let’s make the outer white portion of the ear. You’re basically going to follow the same steps as the pink layer, only this time you’re only wrapping the wire. I wrapped it so the yarn looked irregular and extra fluffy. Make sure to add glue to the ends so they don’t come unwrapped.


Finally, to attach the white ear to the pink inner ear I used a line of hot glue on the edge to adhere them together. Be careful not to burn yourself!


Repeat that process a second time to make the 2 ears.
Create the Floral Arrangement
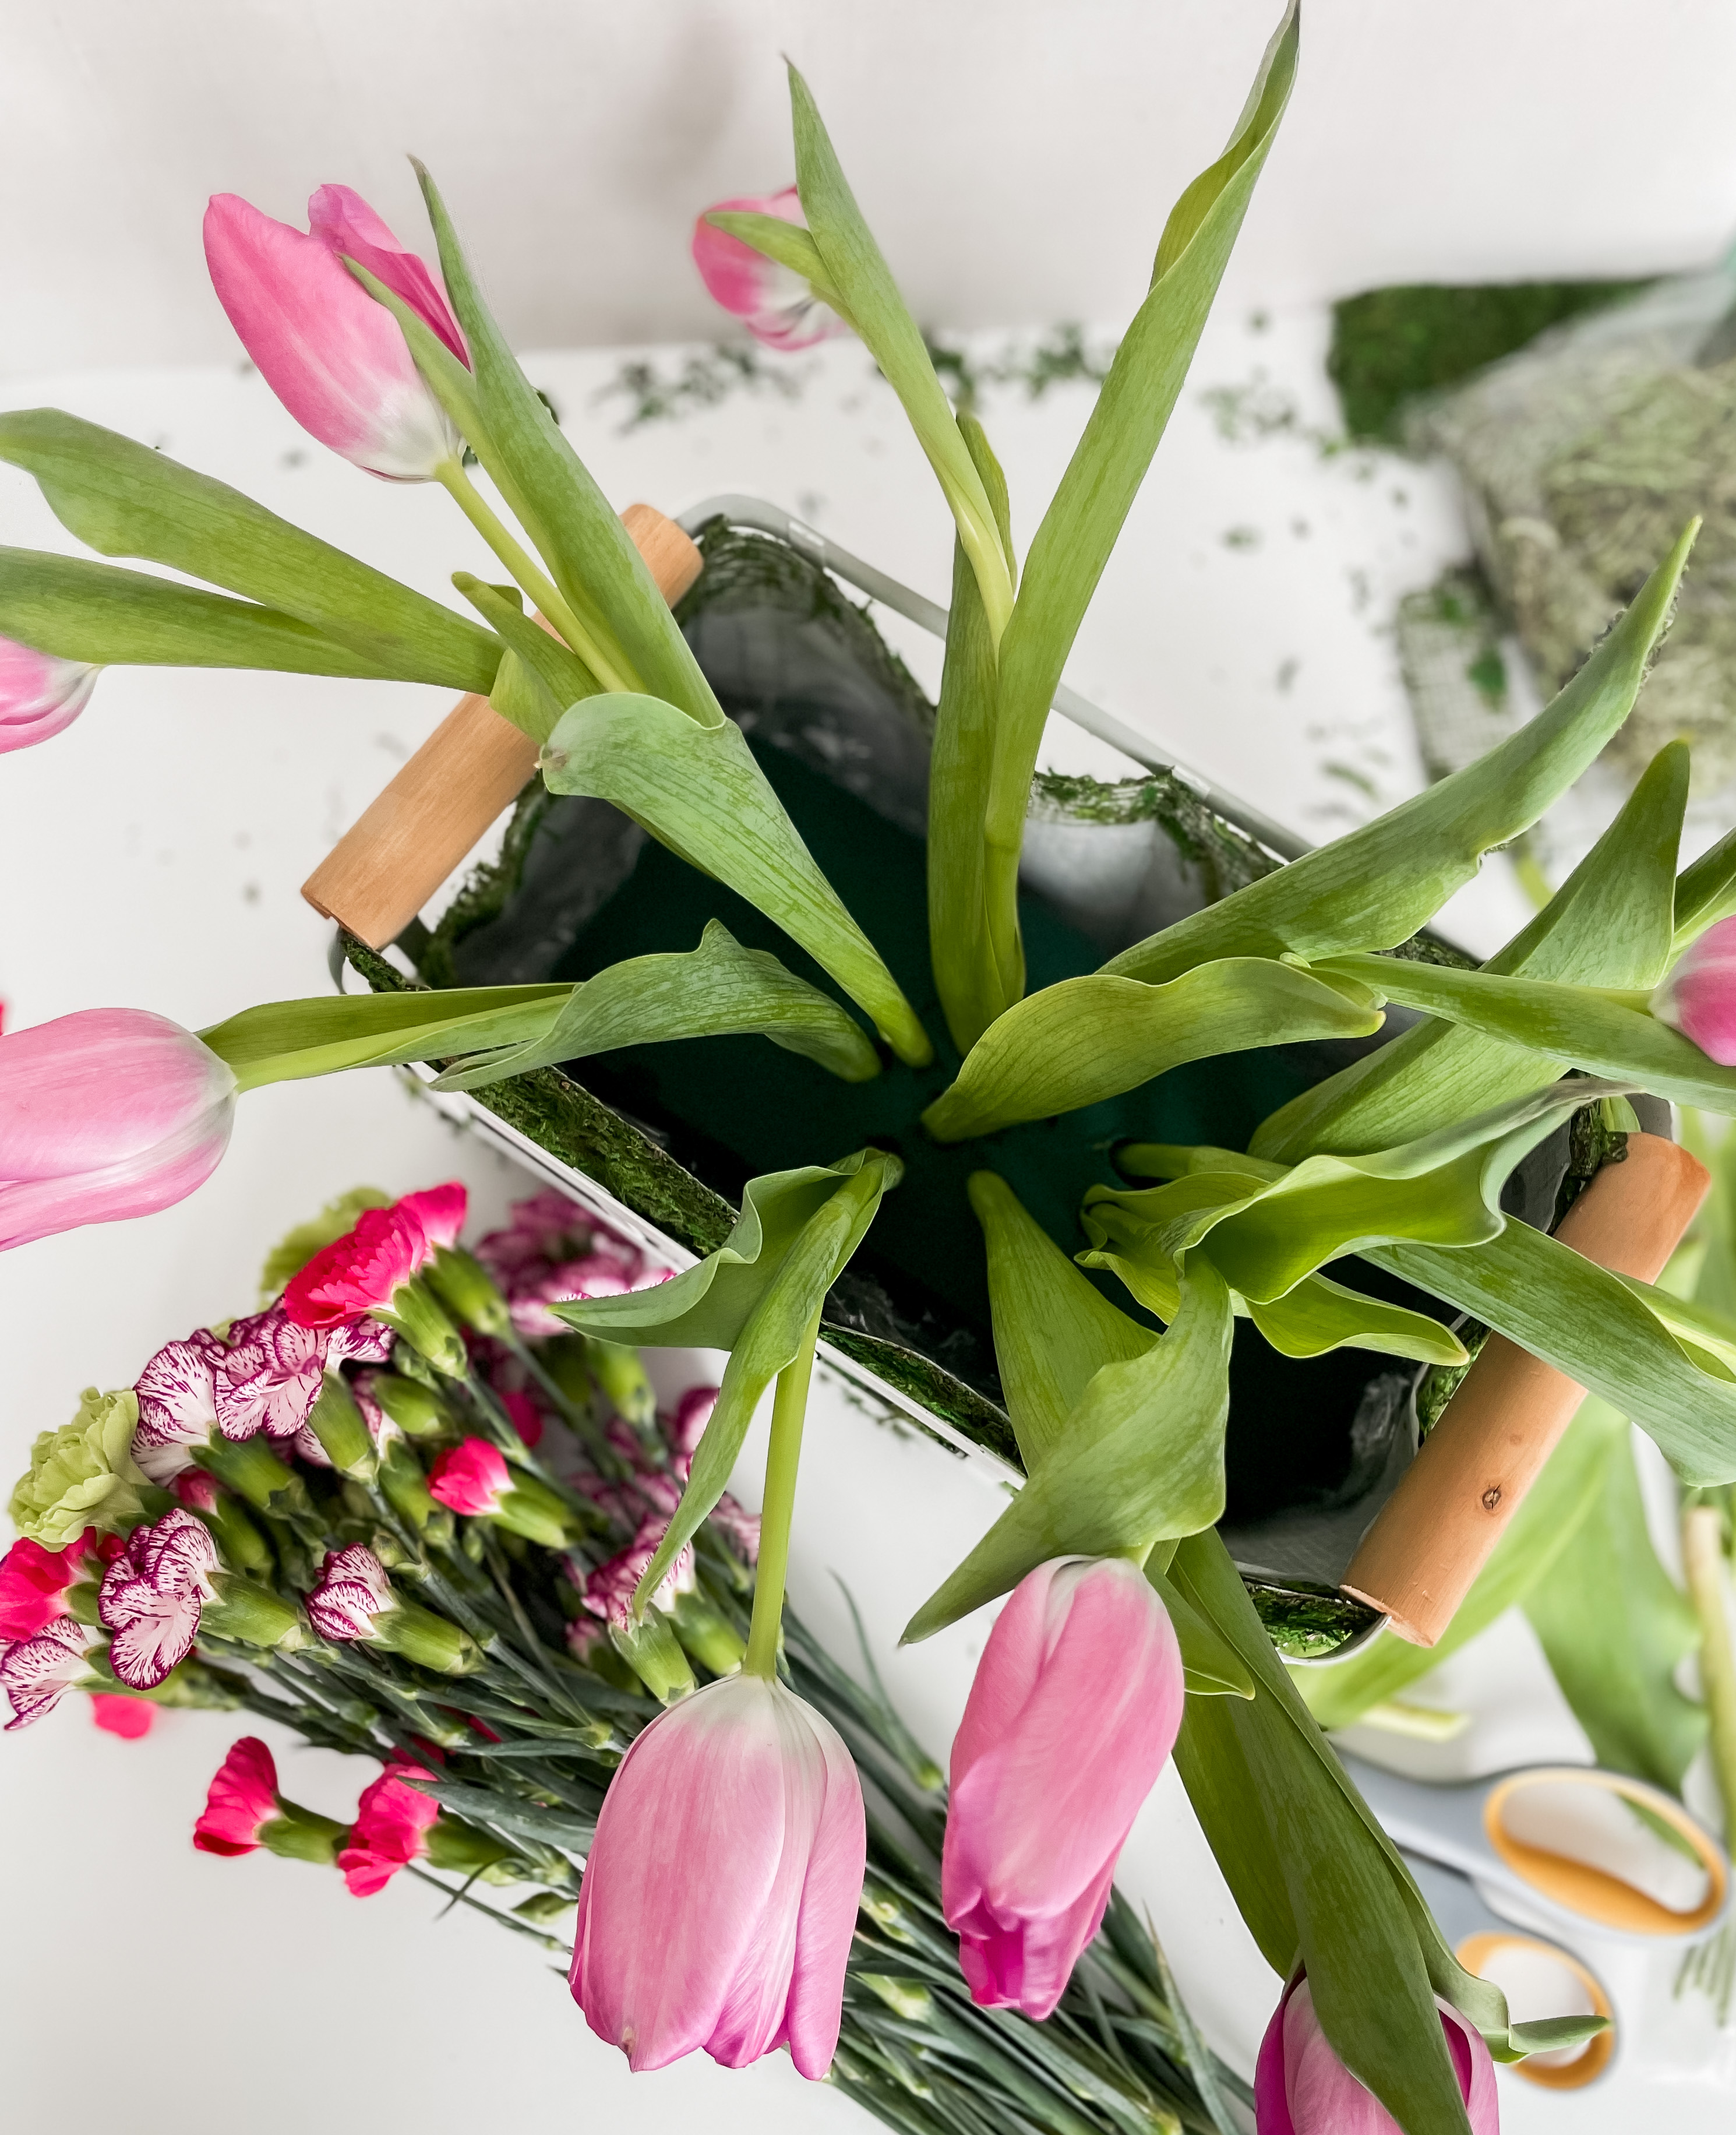
By now your foam is probably ready to go. You’ll want to carefully pick it up and add it to your prepared basket. Now start adding your flowers!

I bought tulips and mini carnations at my local grocery store but you can also use faux flowers if you want this to last forever.
I started by adding the tulips first. You could add thin wires to the stems to help them stand up better, but I skipped that step. Then I added each different colored carnations and made sure to evenly distribute the colors throughout the arrangement. I did also add a few faux grass stems to help fill in the bare spots.
Add the Bunny Ears
The final step for the ears is to wrap a piece of wire around the bottom of them so you can stick it into the floral foam. I absolutely love the looks of the ears poking out of the flowers! It adds a layer of whimsy to your standard arrangement.


Design the Magnet
This portion is optional, but I think it helps add extra personality. I’m using a sticky tape graphic from this card set.
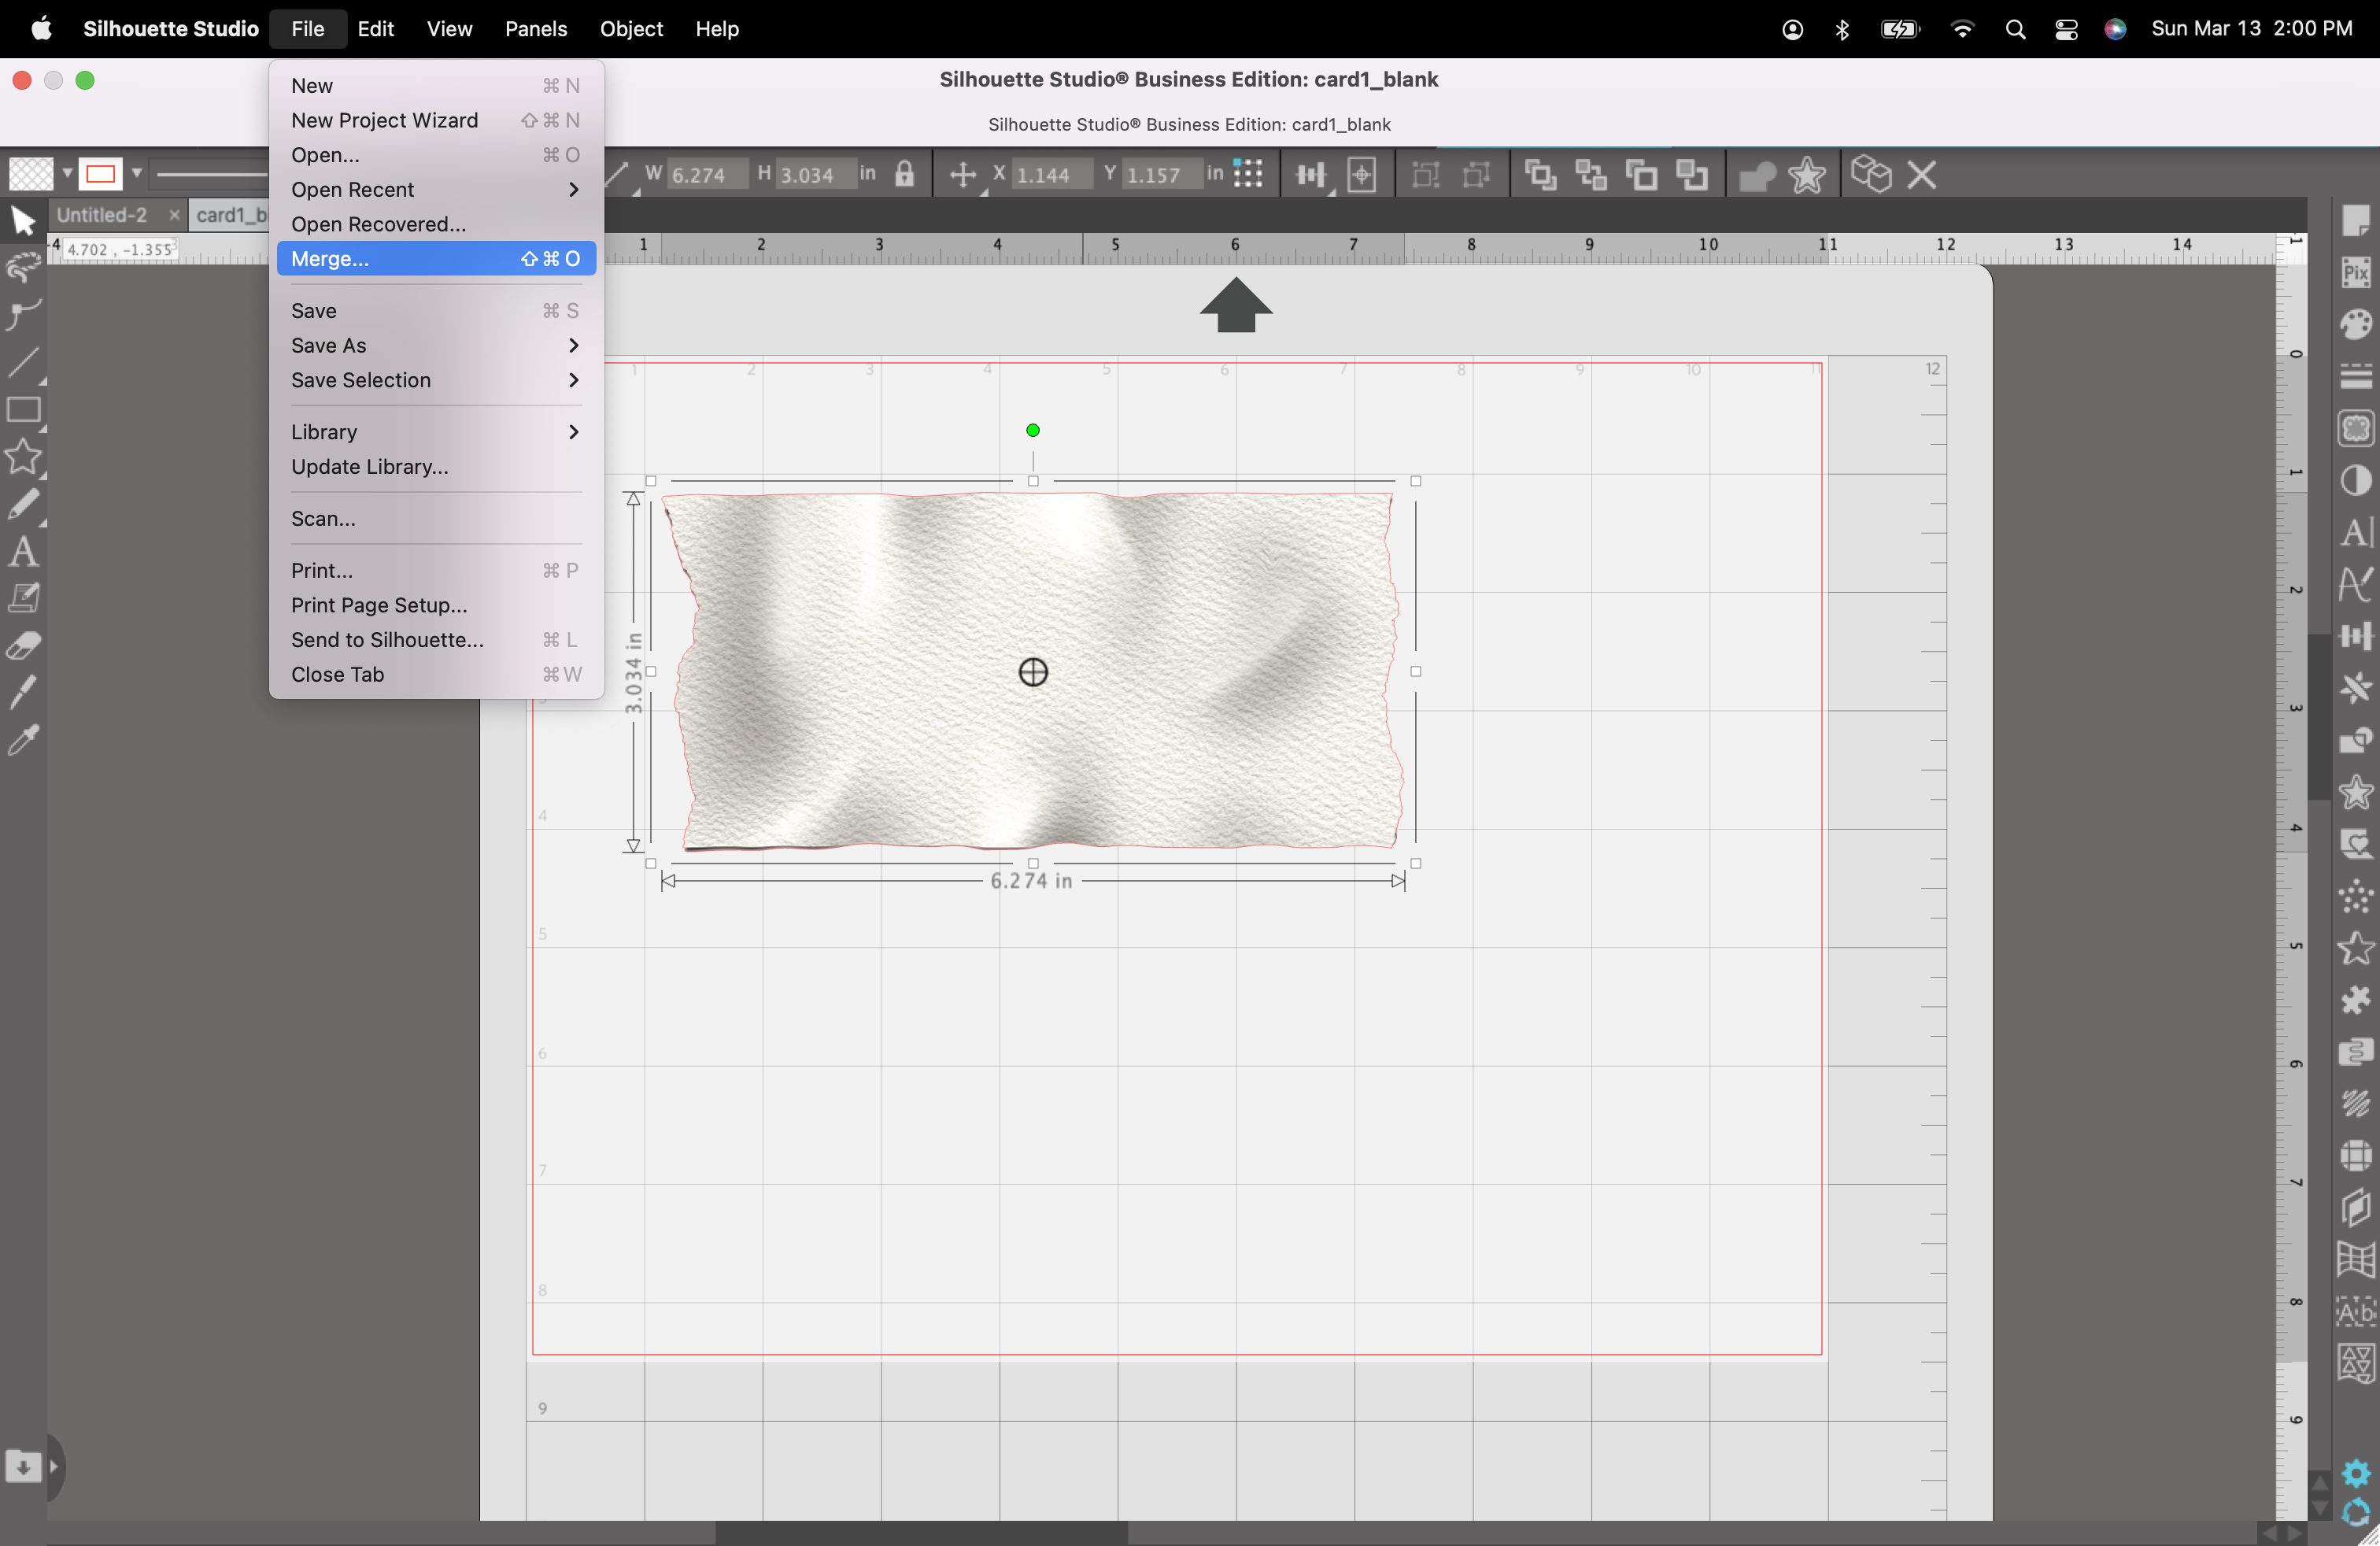
Next, I grabbed a gorgeous floral sketch that’s currently a freebie! Seriously, run quick and download it! You’ll add it to your design by going to the File drop-down menu and selecting merge.


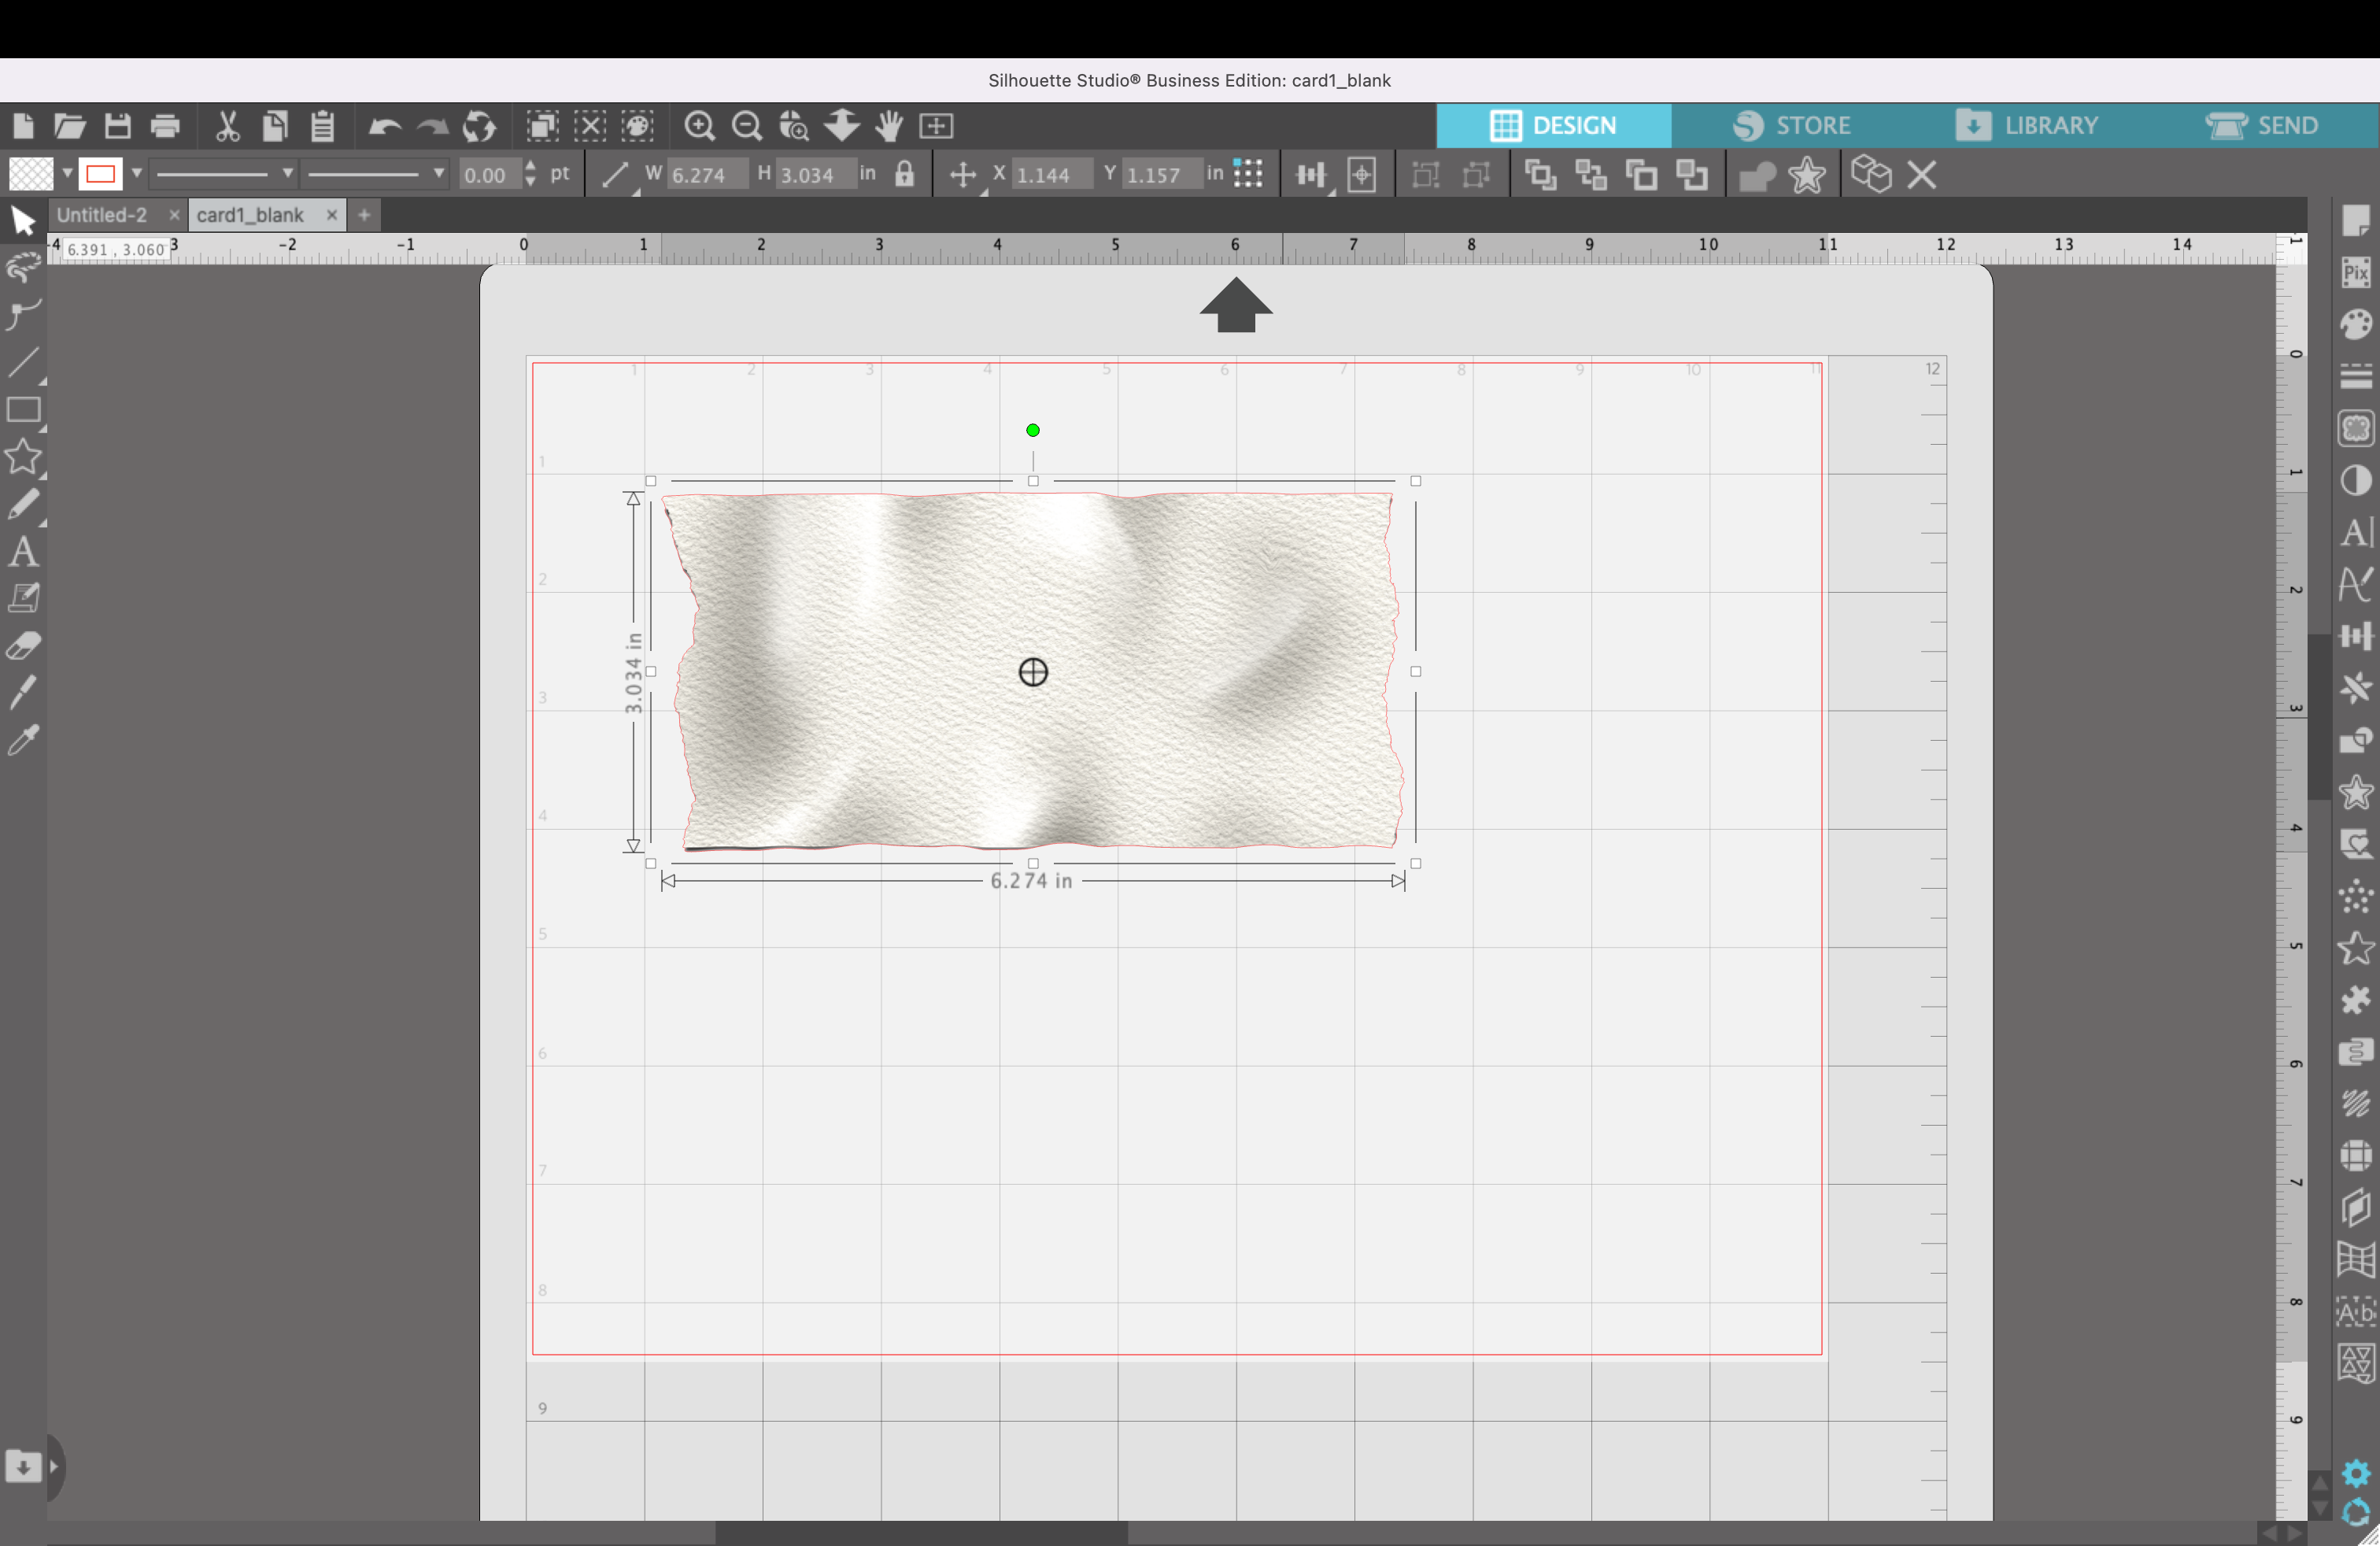
Scale the designs to your size, I’m making the overall magnet about 3” x 6” so it fits on the horizontal bars of the metal basket.
You’ll also want to change the line color to black from the standard red since we’ll be printing it out.

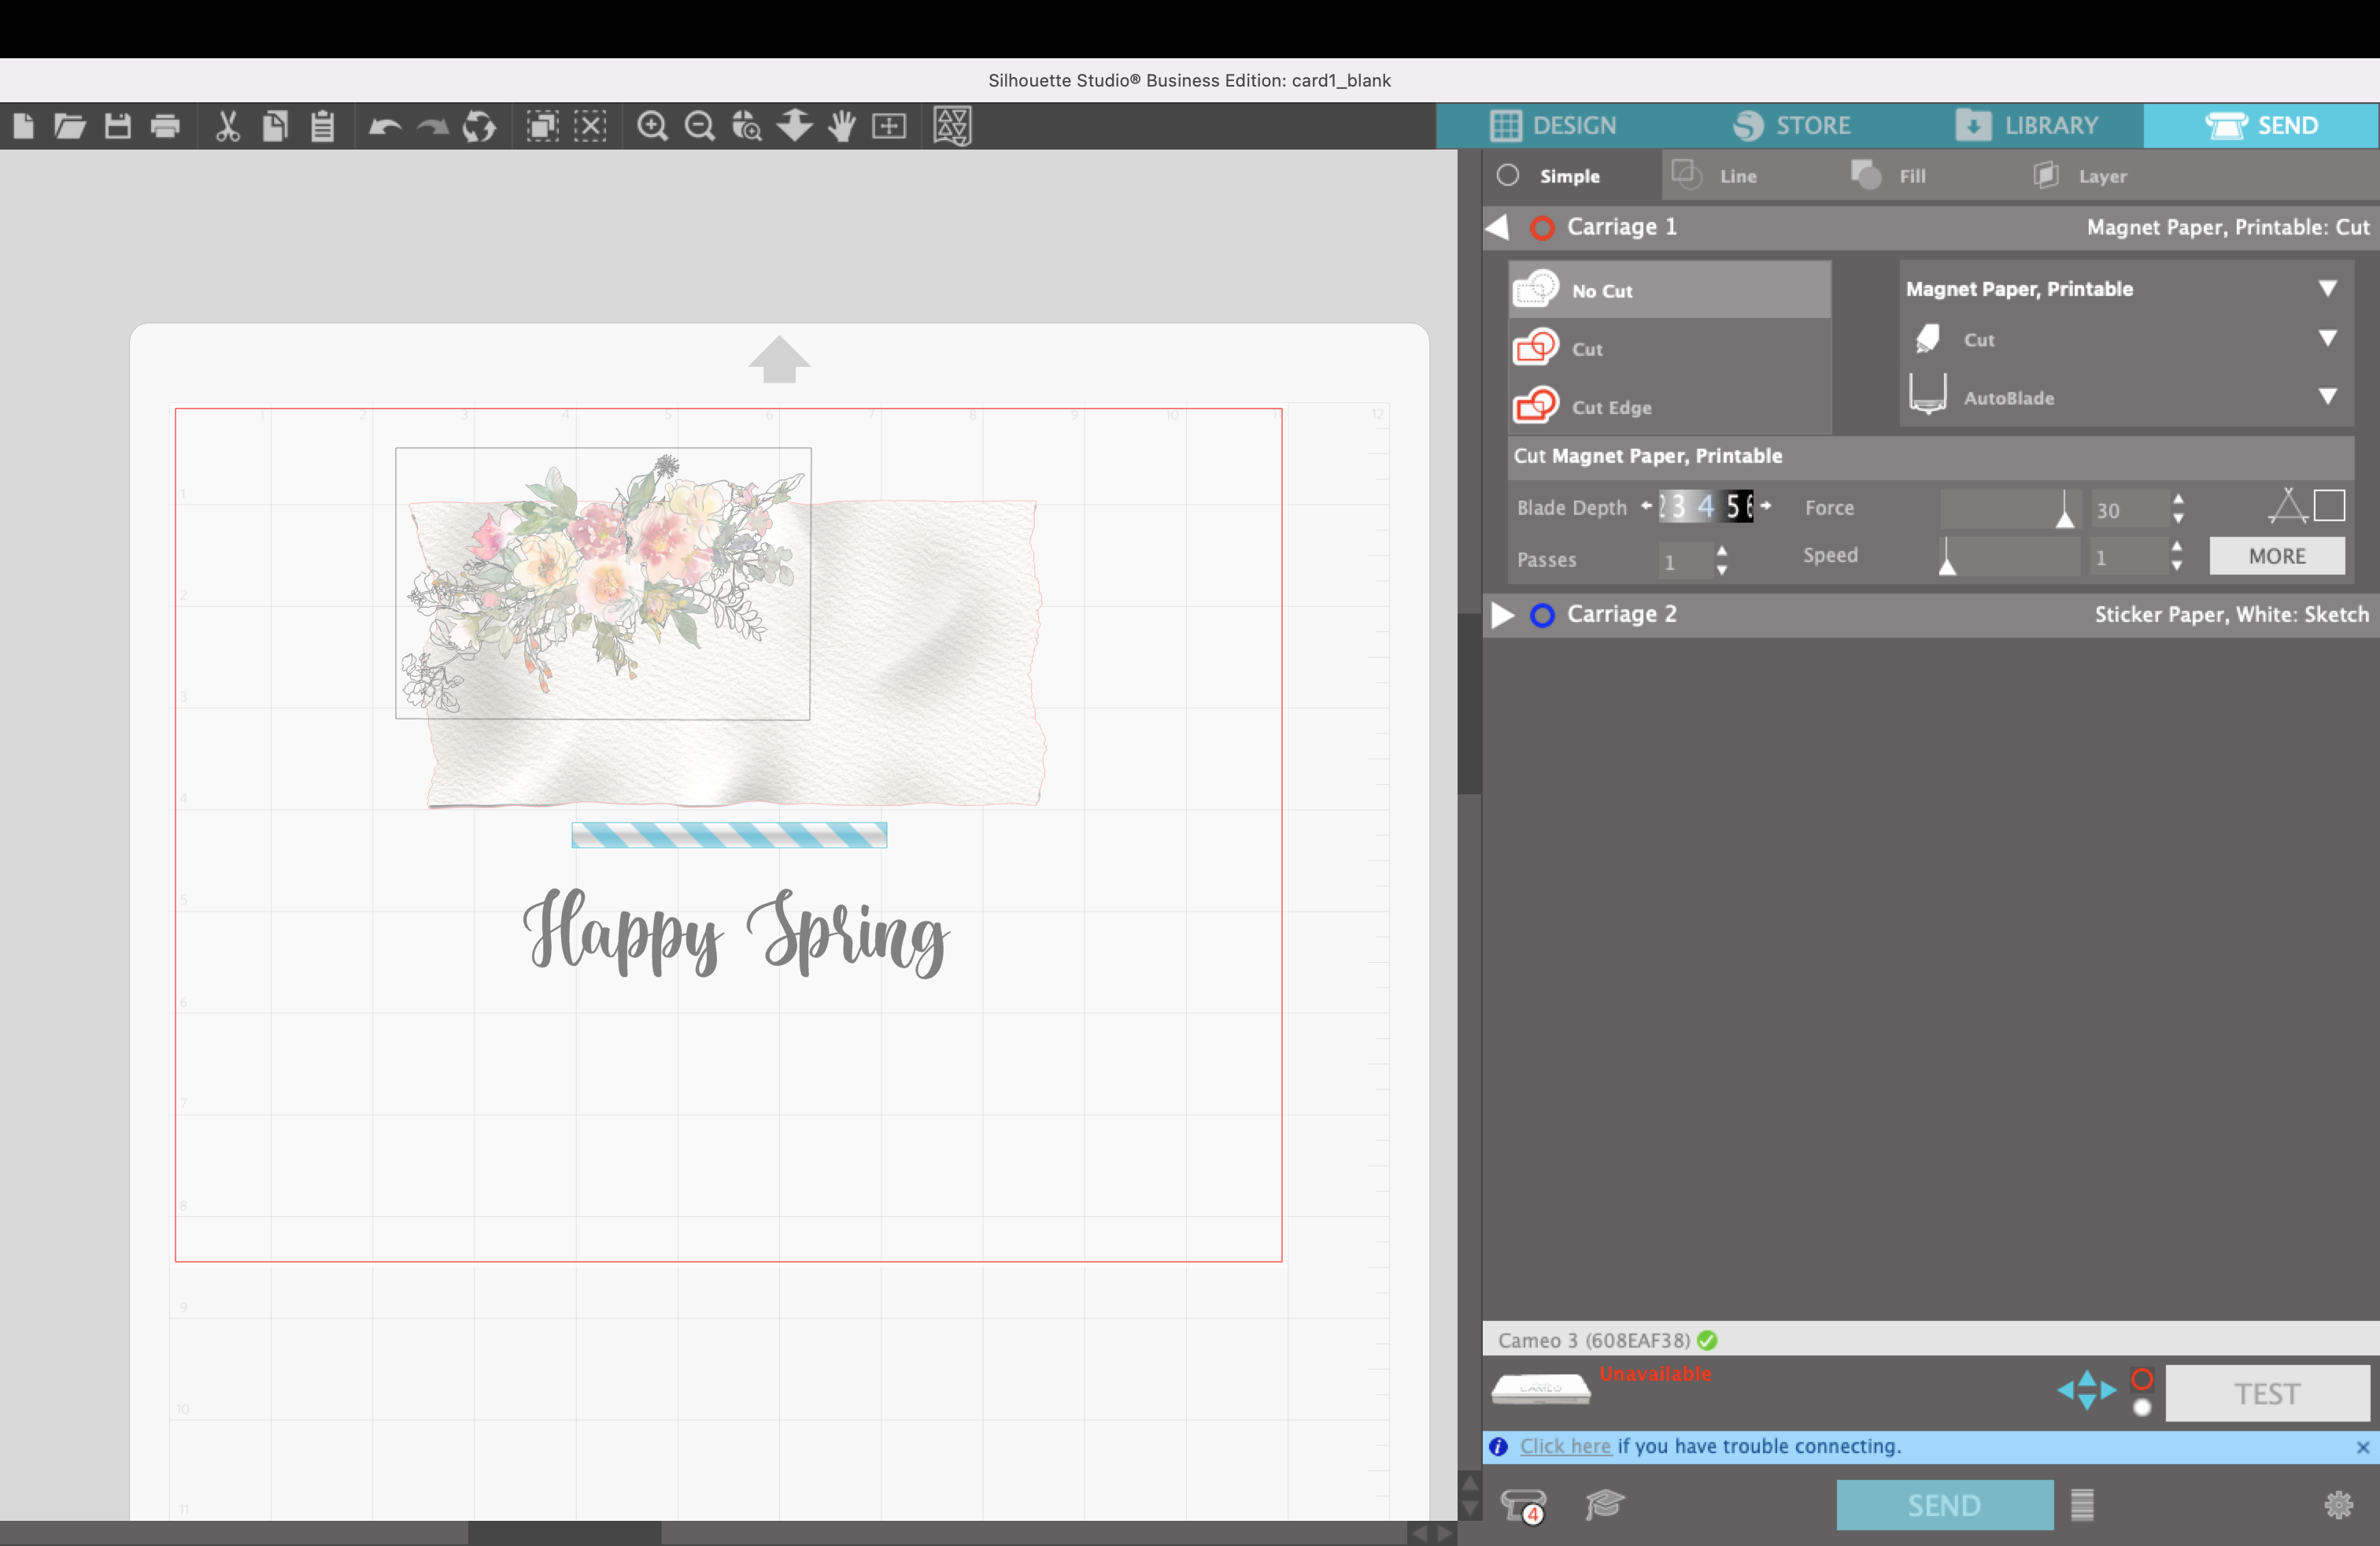
I’ve learned to head to the send screen next to make sure I turn off the cut lines around any design I don’t want to cut out. You could do it at the very end but sometimes I group it all together and then when I head to the cut screen I have to go back and undo all of that work.
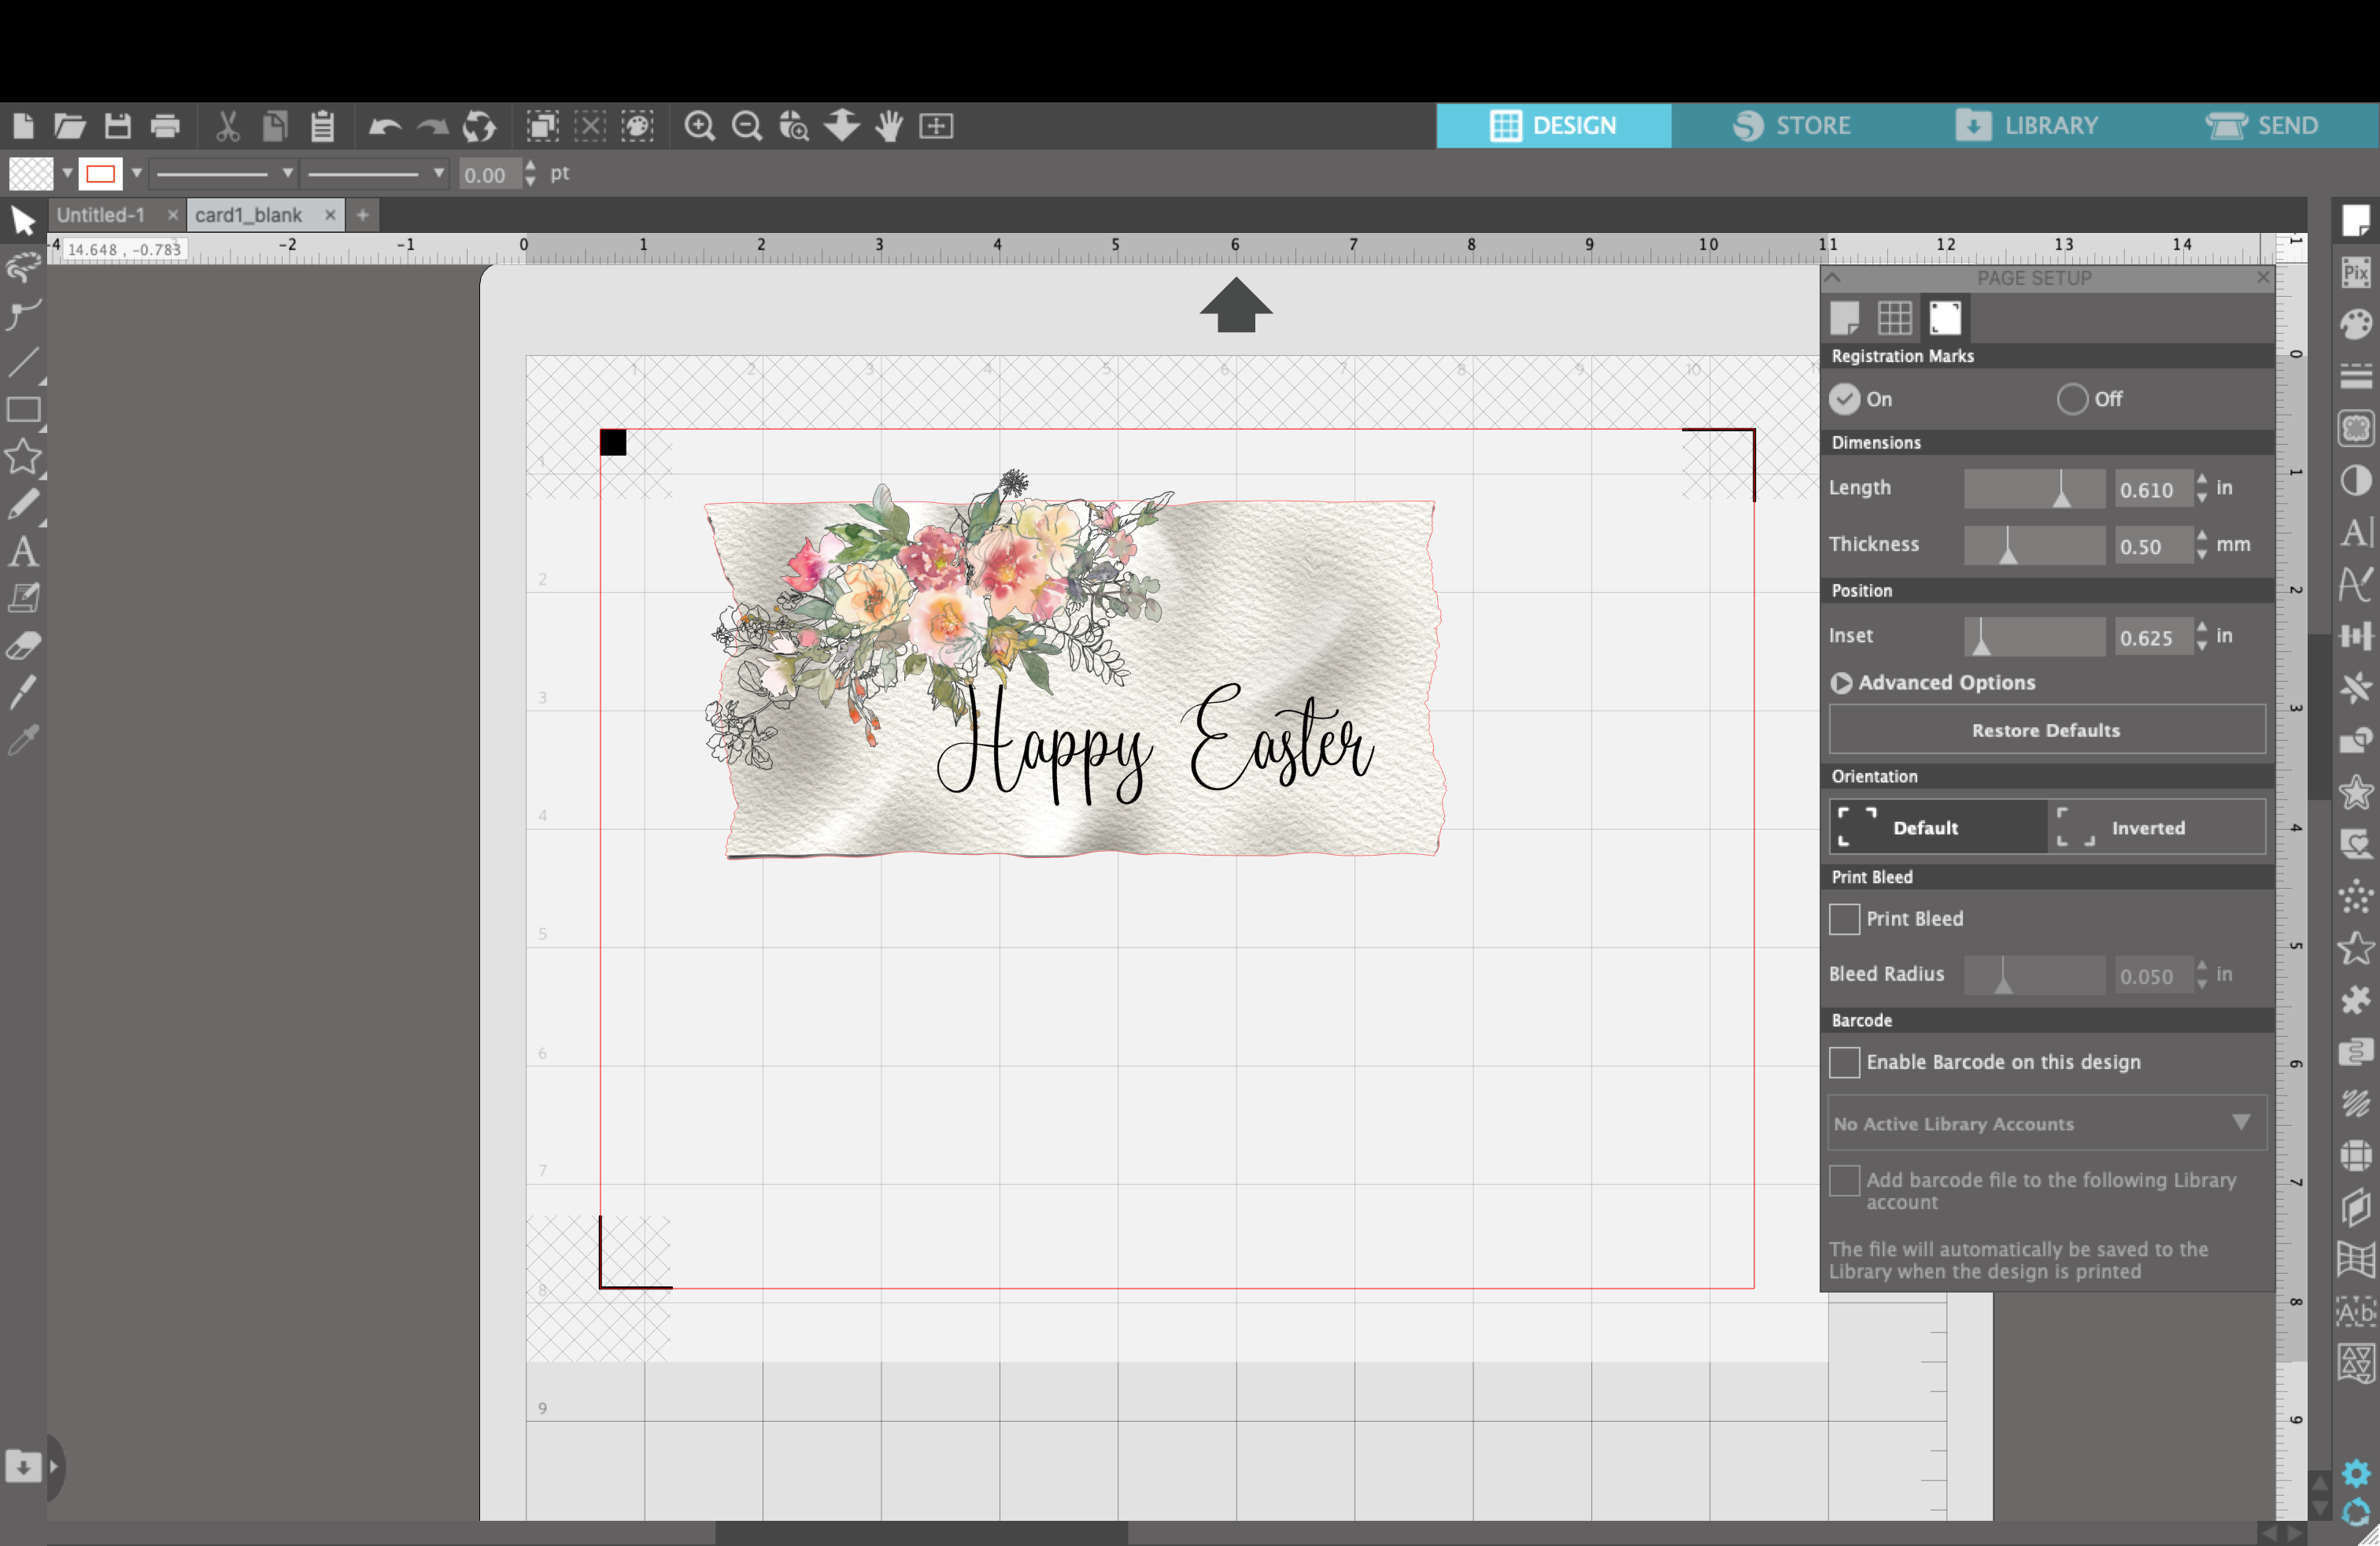
Finally, I figured out if I wanted to type Happy Spring or Happy Easter and which font looked best with my design. My son voted for Happy Easter so that’s what I went with. I used the font Everline after trying out several different options within this great font bundle. You’ll want to make sure to turn off the cut lines for this portion as well and fill it in with the color black.

Let’s turn on the registration marks so the Silhouette Cameo cuts it out perfectly, I’ve learned to not mess with the default settings to have fewer struggles when it comes to the machine registering the marks while cutting.
Print the Magnet
Now you’re ready to print the design onto the magnet paper. For my printer, I find that it’s best to use the manual feed because it jams in the regular paper tray.
Make sure to print using the best settings and to change the paper type settings.


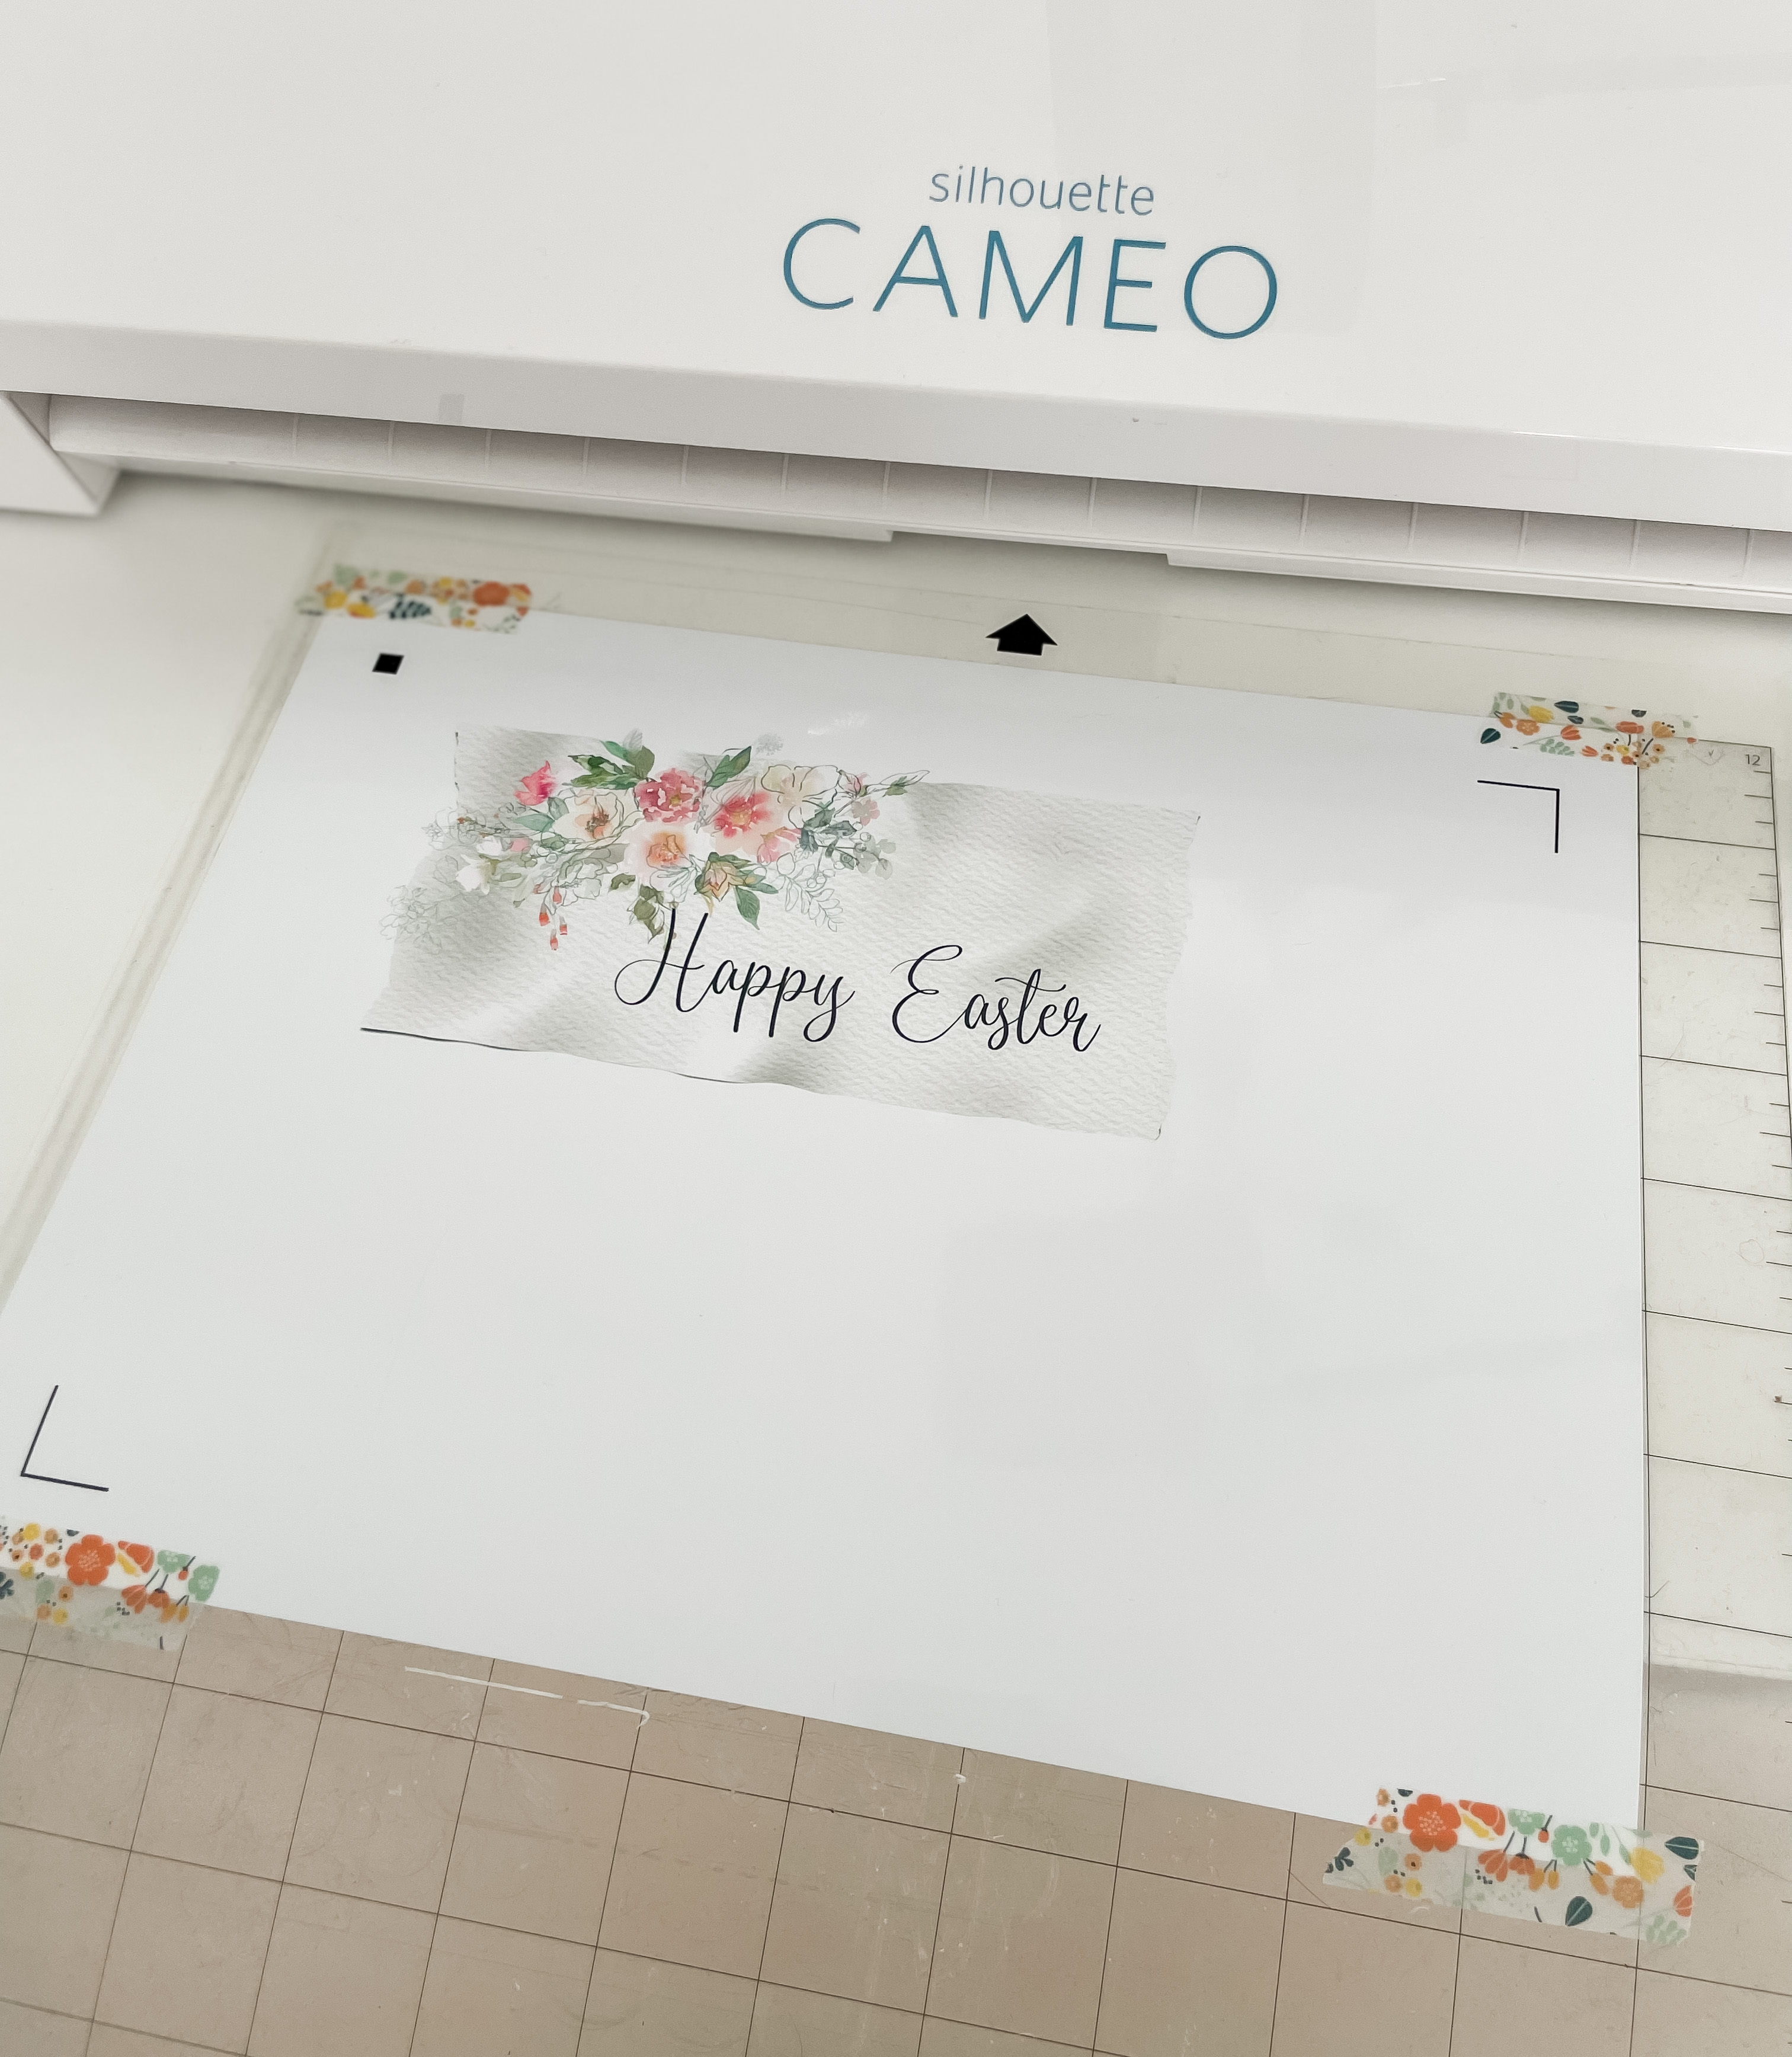
Cut the Magnet
The final step for this craft project! Cutting the magnet out with your Silhouette Cameo. Since magnet paper is heavy and my mat isn’t super sticky anymore I added some washi tape in the corners to help secure it to the mat so it doesn’t slide around while cutting.
It’s been a while since I’ve cut a magnet out so I wanted to make sure to do some test cuts before cutting the actual design. Did you know you can use the arrows on the screen to adjust the test cut location? I moved it so my test cuts were done in the bottom corner away from any registration marks.

I didn’t get a clean cut the first time so I changed the depth of the blade deeper thinking that would help and it did for the test cut.
I could pretend that it worked perfectly and that I never mess up, but that’s not real life and I don’t want you getting frustrated that it didn’t work for you the first time. I was 90% done cutting it out when suddenly the Cameo blade jammed and then it cut off course for the last corner. This is part of crafting!
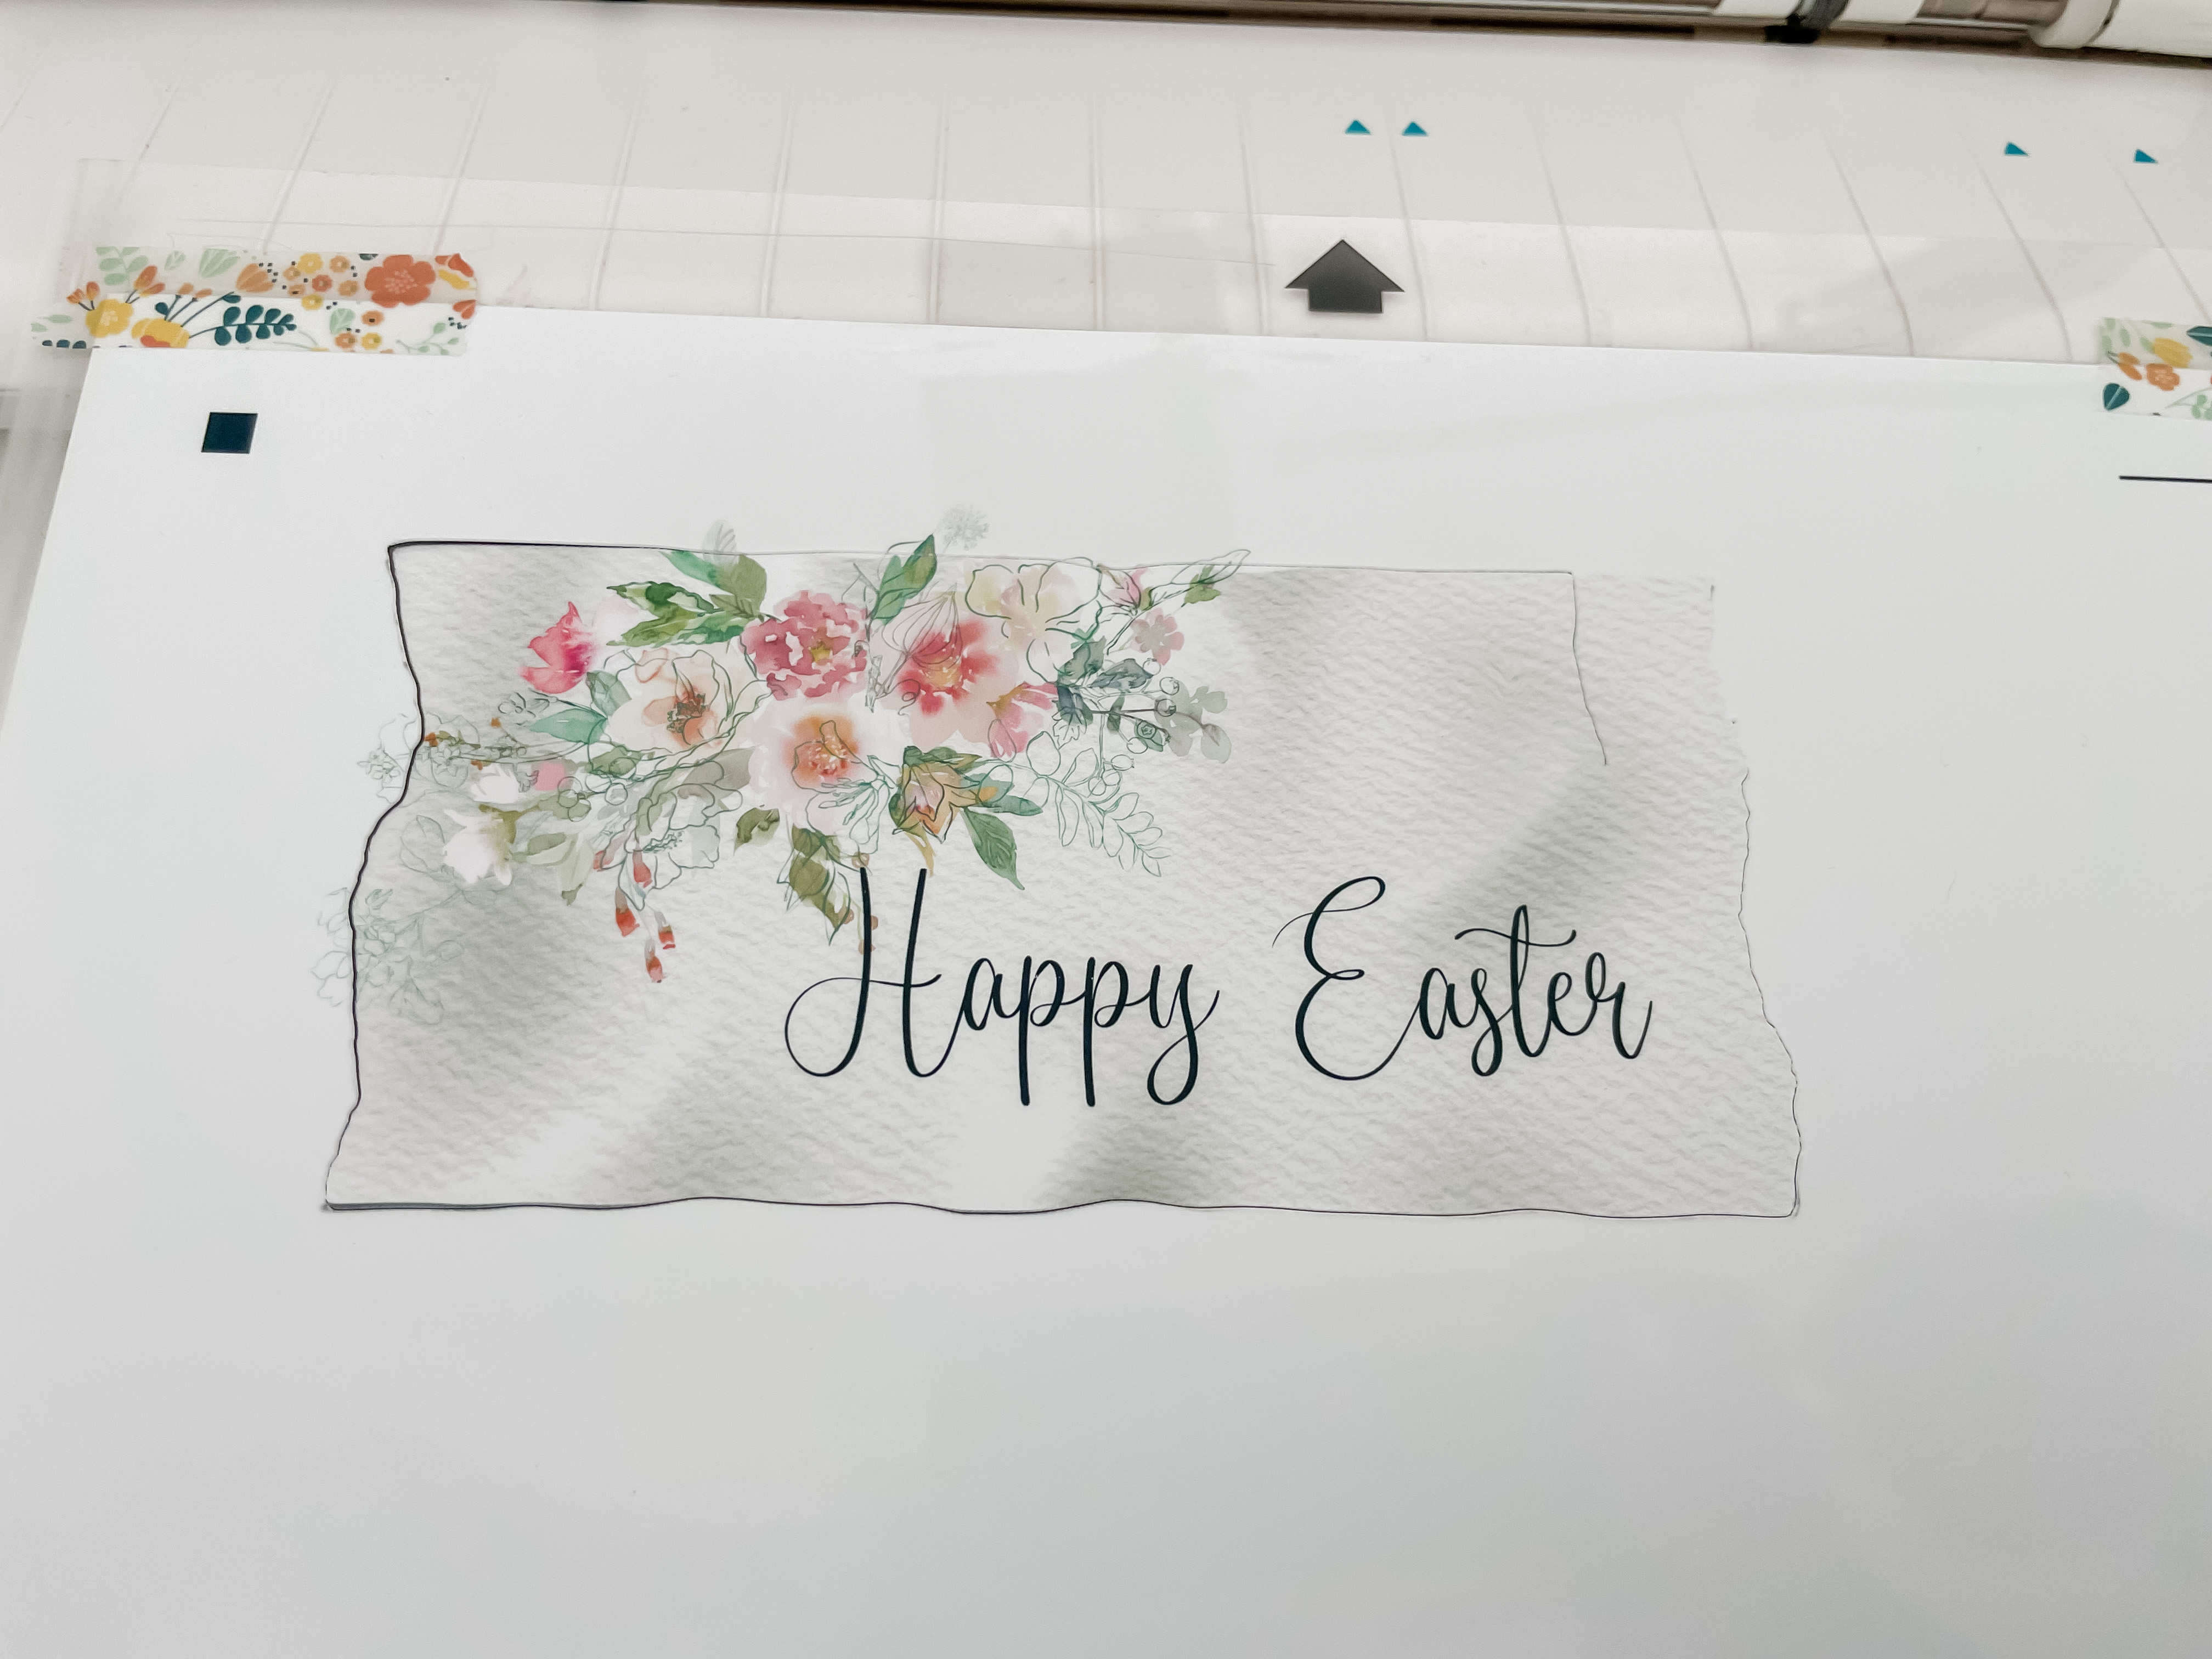
I reprinted a new page and adjusted my settings back to the blade 4 depth but told it to cut twice; I didn’t want to risk another jam and wasting more expensive paper! This time the magnet cut perfectly. Trial and error is sometimes the name of the game even with a test cut!
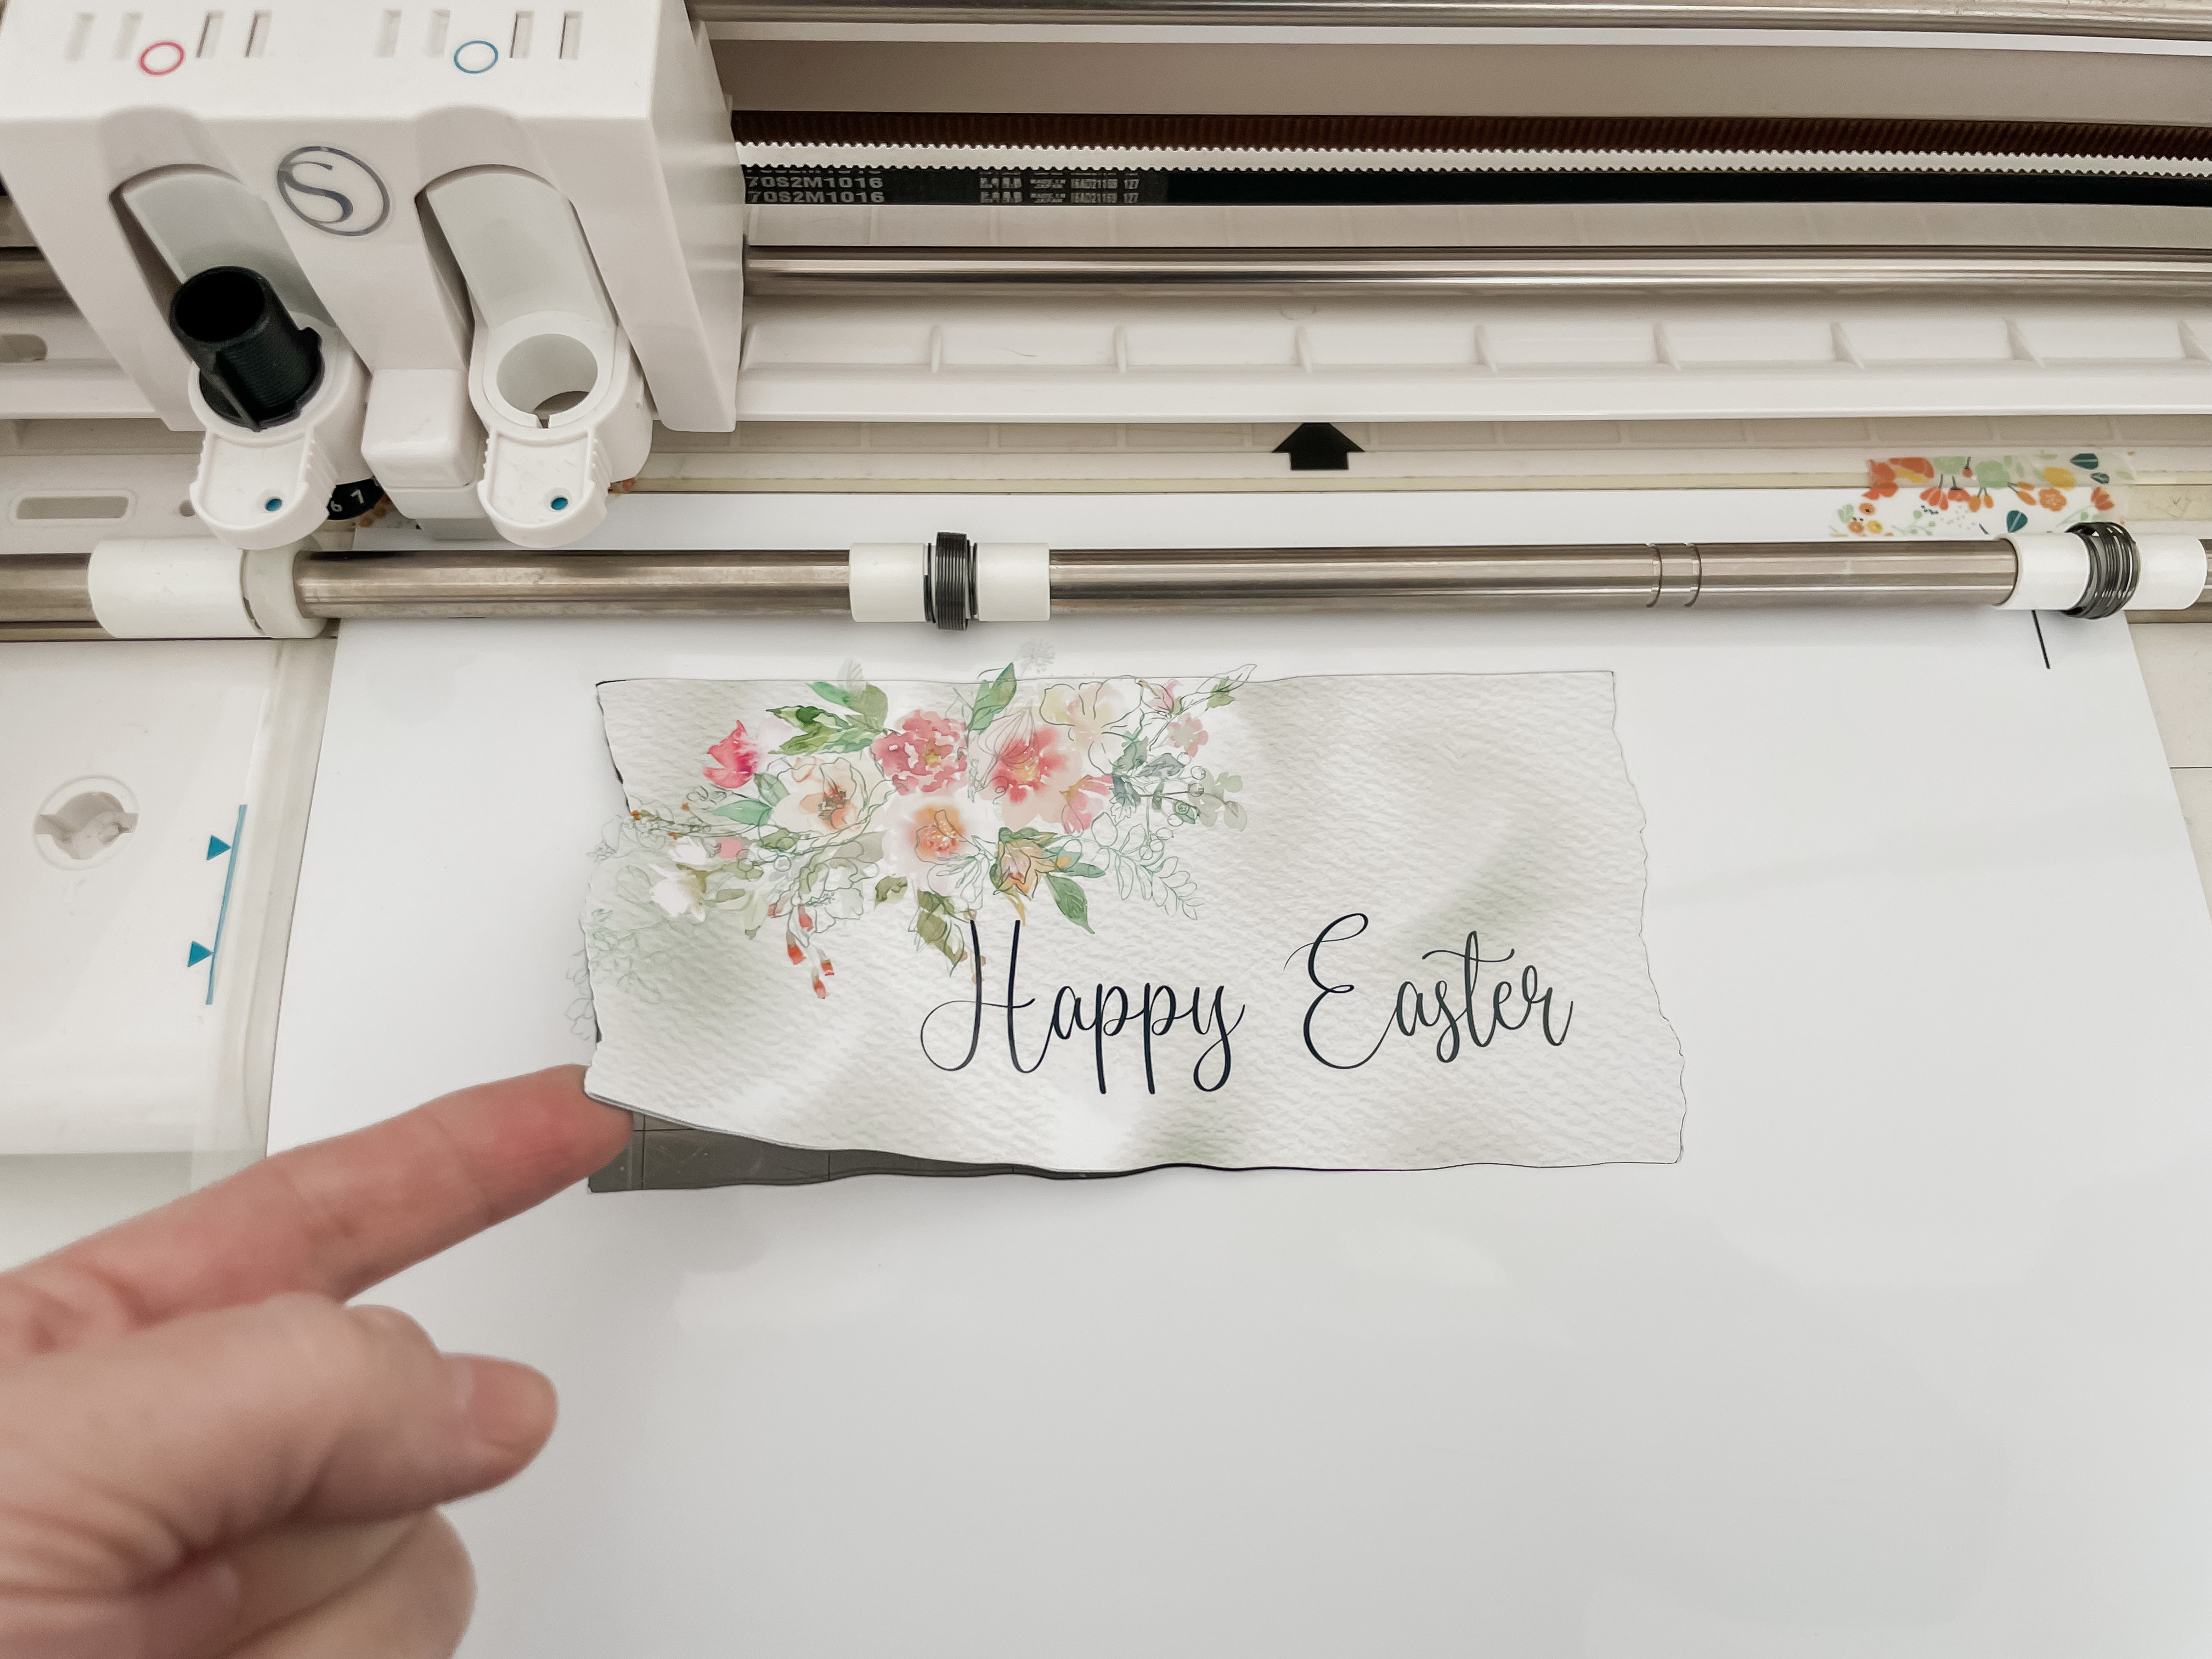
Now add that beautiful magnet to your basket and share your gorgeous creation with the world!


Seasonal Changes
What I love about this project is that it can easily be changed to represent any season or event. You can make clovers for Saint Patrick’s day, hearts for Valentine’s Day, Snowmen or Christmas trees for Winter, pumpkins for Fall, etc.
Change the flowers out to match the season, create any message for your magnet.
This would make a fun wedding shower gift and you can have all of the various seasons/event elements ready to go so they only need to change out the floral foam and flowers.
Bonus Idea
I know some of you saw all that extra magnet paper not being used and cringed. You of course can fill your page with designs before cutting, especially if you’re making it as a gift or want to use it year-round.
I have two young sons and my one little helper has virtually been standing over my shoulder this entire project. I gave him the scrap magnet paper and told him to draw on it to make his own magnets and his face lit up. Here’s what he created:

My momma heart just burst with his happy messages! I hope it brings a smile to your face too.
Happy crafting everyone!!
-Carrie Christenson
This article was written by