This year, I decided to take Yoga classes to balance my physical and mental health needs. And, of course, I needed a cute bag to carry my Yoga mat and a water bottle. Instead of buying one, I decided to embroider and sew a Tote bag that would suit my needs and be pretty. It will inspire me not to drop the lessons after the first month.
If you need a personalized shoulder bag to inspire you – make one for yourself too. This step-by-step tutorial will demonstrate all the processes from the beginning to the finished piece. And for extra guidance – watch this video tutorial.
Tools and materials you will need for this project:
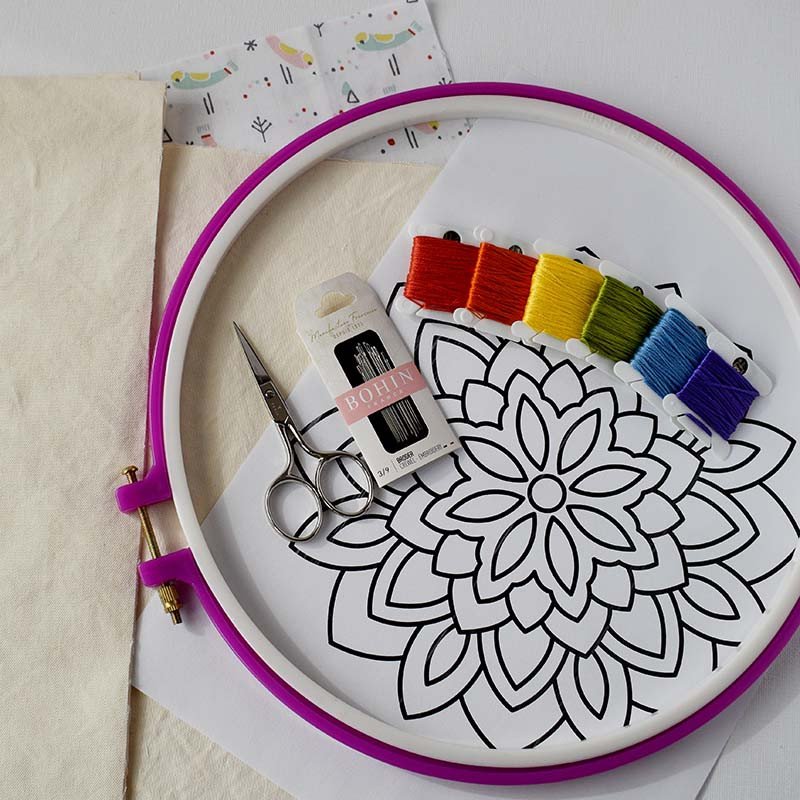
Photo credit: Tatjana Iljaseviciute from Practical Embroidery
- Embroidery pattern. I used a Simple Mandala image from the Creative Fabrica image library.
- Fabric: two pieces of 41×41 cm (16×16 inches) for a tote bag, two pieces of 41×41 cm (16×16 inches) for the lining, and two pieces of 72×10 cm (28×4 inches) for straps. If you want to add an inner pocket, cut an extra element.
- Embroidery floss. I used the rainbow colors of DMC Embroidery floss: Red (DMC #350), Orange (DMC #720), Yellow (DMC #726), Green (DMC #581), Blue (DMC #334), Purple (DMC #333). You can change the thread and colors to your liking.
- Embroidery needle.
- Pattern transferring tools. I used a friction pen for pattern transfer. It will go out with the iron heat when the project is finished.
- Embroidery hoop. My hoop is 29 cm in diameter to accommodate the pattern. You can use a smaller hoop, but you will need to move the fabric as you embroider.
- Scissors – big fabric scissors to cut the material and small embroidery scissors or snips to cut the thread.
- The sewing machine, pins, and sewing thread. Choose a color that matches your outer fabric.
Hand embroidery stitches you will use:
 Photo credit: Tatjana Iljaseviciute from Practical Embroidery
- Backstitch
- Stem stitch
- French knots
- Blanket stitch
- Chain stitch
- Running stitch
If you are unfamiliar with any of these embroidery stitches – read the article “Six basic embroidery stitches to learn first” before moving to the next step.
Embroidery step-by-step tutorial
Step 1
Gather all materials. Cut the pieces for the tote bag and iron them if needed. Choose the colors for your project. You can embroider the whole Mandala design in one color or change them for each round.
Step 2
Download, and print the pattern. I used a .png file of the Mandala image and printed it on my home printer. When you print, set the image to fit the page, and you will print it without trouble. If you want to make your Mandala smaller, put the smaller size when printing.
Step 3
Transfer the pattern to the fabric. I used a simple light-box method for the pattern transfer:
- Tape your printed design to the bright sunny window.
 Photo credit: Tatjana Iljaseviciute from Practical Embroidery
- Tape the fabric above the pattern (with the image centered on the material).
 Photo credit: Tatjana Iljaseviciute from Practical Embroidery
- Repeat all the lines of the design with a friction pen.
 Photo credit: Tatjana Iljaseviciute from Practical Embroidery
Step 4
Place the fabric in the hoop and tighten the tension screw. I used an embroidery hoop of 29 cm. As mentioned above, you can work with a smaller hoop. Move the fabric in the hoop to access the area you want to embroider.
 Photo credit: Tatjana Iljaseviciute from Practical Embroidery
Step 5
Start embroidering from the central element of the Mandala. For this piece, I used a Chain stitch to embroider with two strands of Red embroidery floss (DMC #350).
 Photo credit: Tatjana Iljaseviciute from Practical Embroidery
TIP. To join the last Chain stitch with the first one, pass the needle under the first stitch you made to form the ultimate Chain of the row. This way, the joining place will be invisible.
Step 6
Embroider the first round of petals. Use two strands of Orange embroidery floss (DMC #720) to make Backstitches. Start stitching at the angle closest to the center, so the jumping thread between elements on the back side will be the shortest.
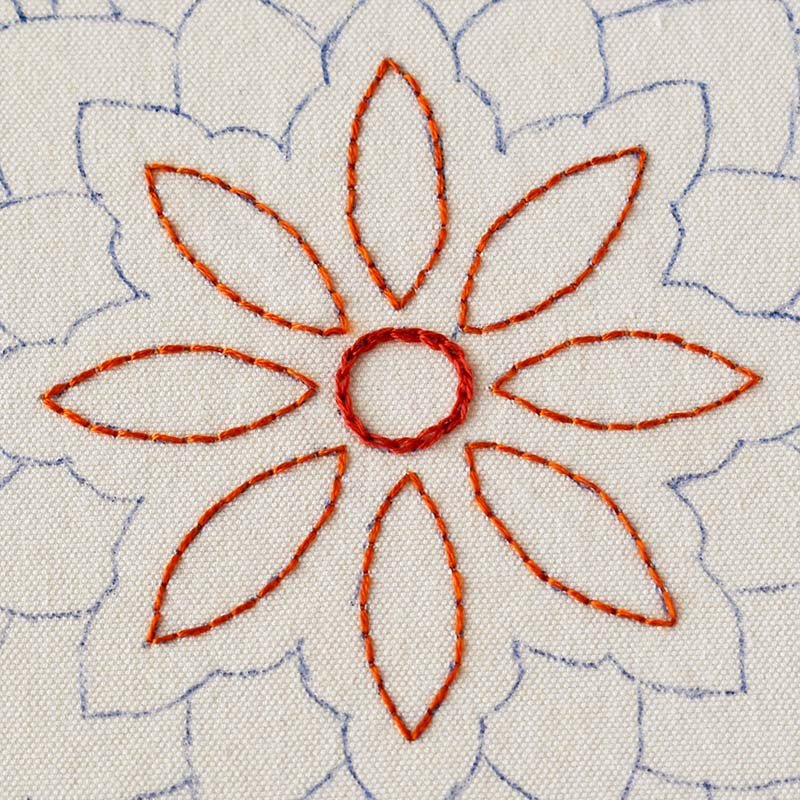 Photo credit: Tatjana Iljaseviciute from Practical Embroidery
Step 7
With two strands of Yellow embroidery floss (DMC #726), embroider the next section of the Mandala. I used a Stem stitch for this part.
 Photo credit: Tatjana Iljaseviciute from Practical Embroidery
TIP. Stem stitch is excellent for curves but not easy to make on sharp angles. To make your angles look good, make shorter stitches. And if the angle is more acute than 90 degrees, do this: embroider till the angle and finish the stitch there. Then, make a Backstitch from the other side of the angle, leave a loop for the Stem stitch, and continue making Stem stitches from there.
Step 8
For the next section of the Mandala, use two strands of Green embroidery floss (DMC #581). I chose the Chain stitch for this part.
TIP. To create neat petals, you will need to make regular Chain stitches and reverse chain stitches that meet at the extremity of the petal. Here is how to make it:
- Start at the bottom and embroider Chain stitches till you reach the angle and make an anchoring stitch.
- Now take a needle up one stitch away and pass it under the last Chain stitch and the anchoring stitch.
 Photo credit: Tatjana Iljaseviciute from Practical Embroidery
- Make reverse Chain stitches until you reach the base of the petal.
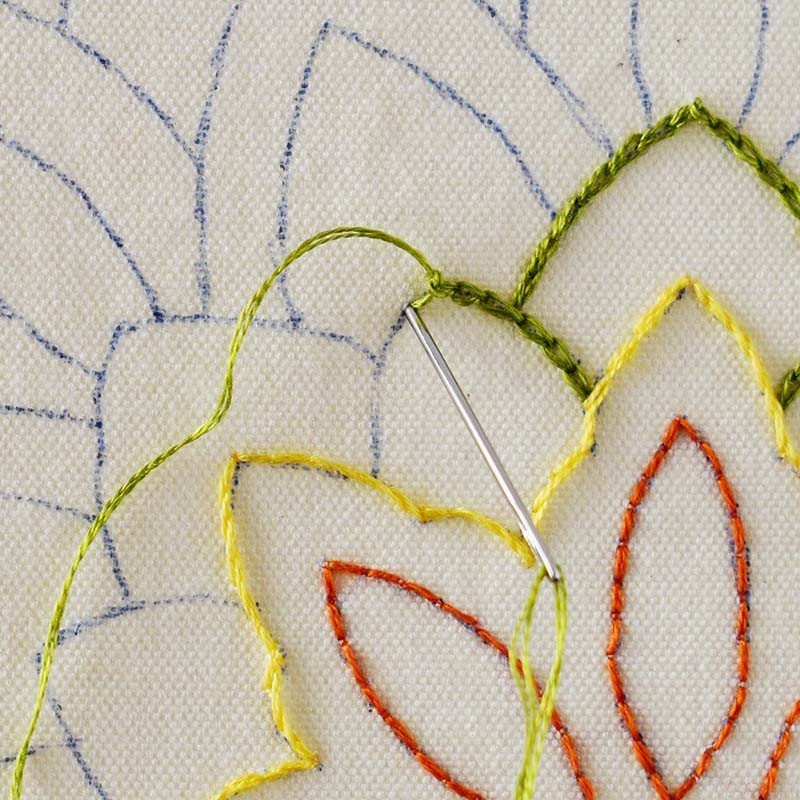 Photo credit: Tatjana Iljaseviciute from Practical Embroidery
Step 9
Embroider the next row of the petals. I used two strands of Blue embroidery floss (DMC #334). For the outer line – use Stem stitch.
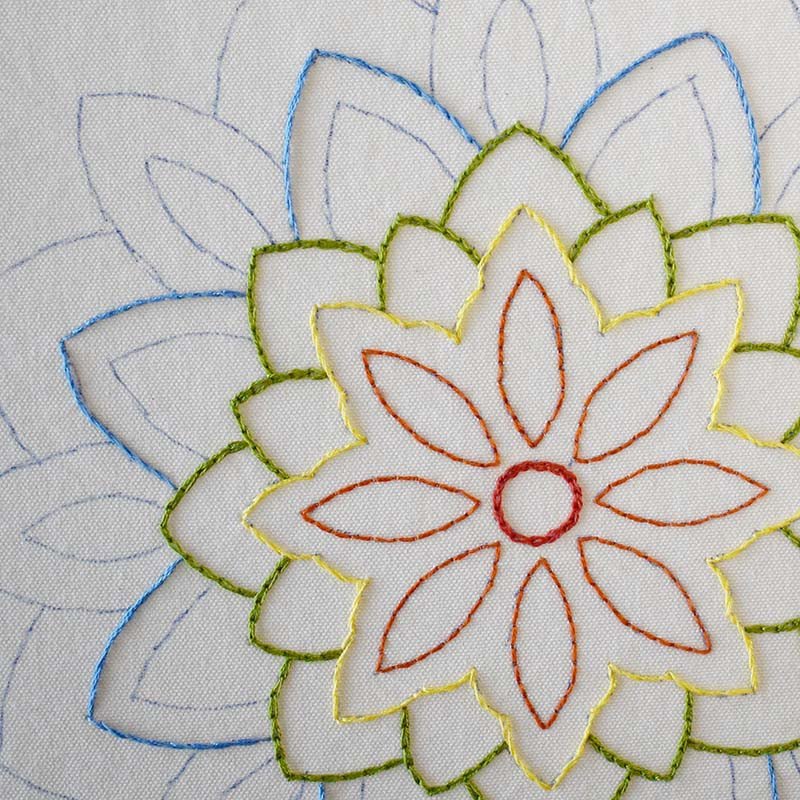 Photo credit: Tatjana Iljaseviciute from Practical Embroidery
For the inner line – use a Running stitch. To make angles look sharp, start or finish a stitch at the tip of the petal.
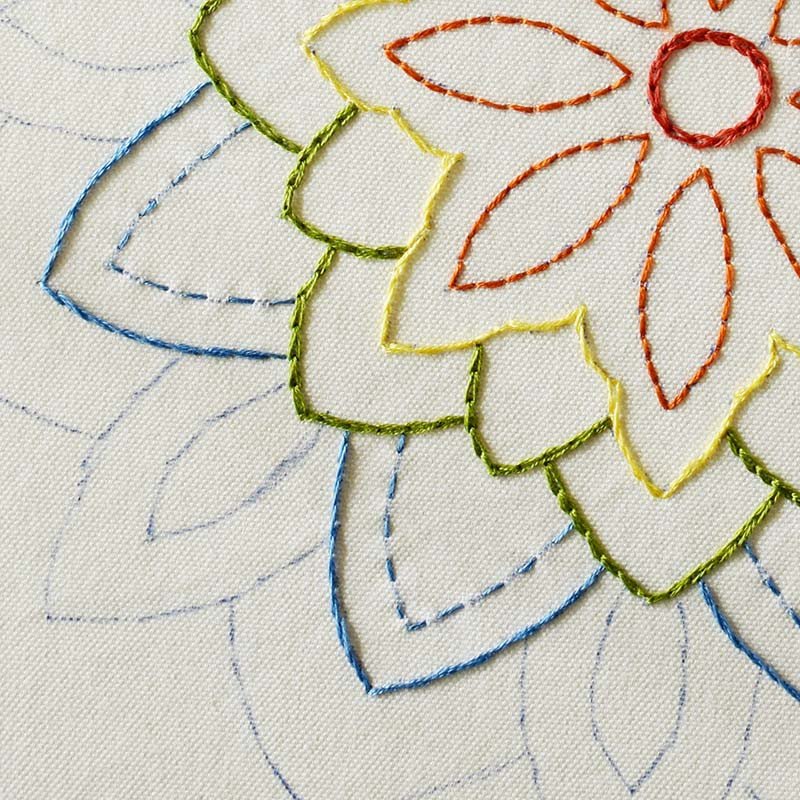 Photo credit: Tatjana Iljaseviciute from Practical Embroidery
TIP. At this point of the pattern, the distance between sections is too big to leave a jumping thread on the back. To secure the thread – pass it under already made stitches (in our case – green chain stitch) and take the thread up at the beginning of the new section.
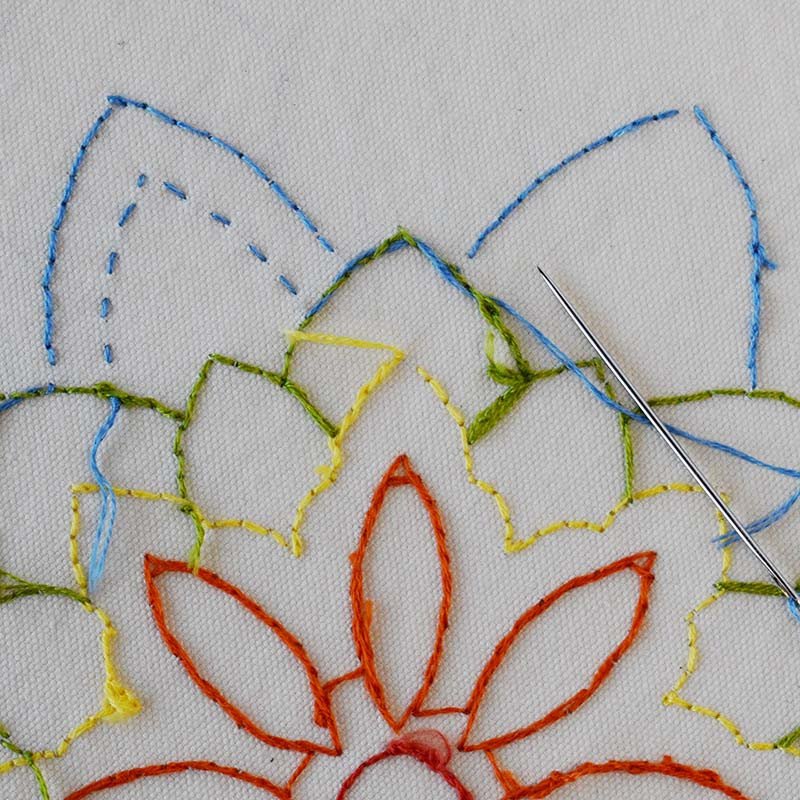 Photo credit: Tatjana Iljaseviciute from Practical Embroidery
Step 10
Cut the piece of Purple embroidery floss (DMC #333) and separate the two strands for the last – Purple section.
First, embroider the outline of the petals attached to the blue section with a chain stitch. The technique is the same as in the Green petals – use a reverse chain stitch to form sharp angles.
 Photo credit: Tatjana Iljaseviciute from Practical Embroidery
Then, embroider the inner line of the same petals with equally distanced French knots. Always make a knot at the tip of the petal. You can mark the places to make French knots and Blanket stitches with the same transferring tool you used for pattern transfer.
Now embroider the Blanket stitch. Make smaller stitches on the corners.
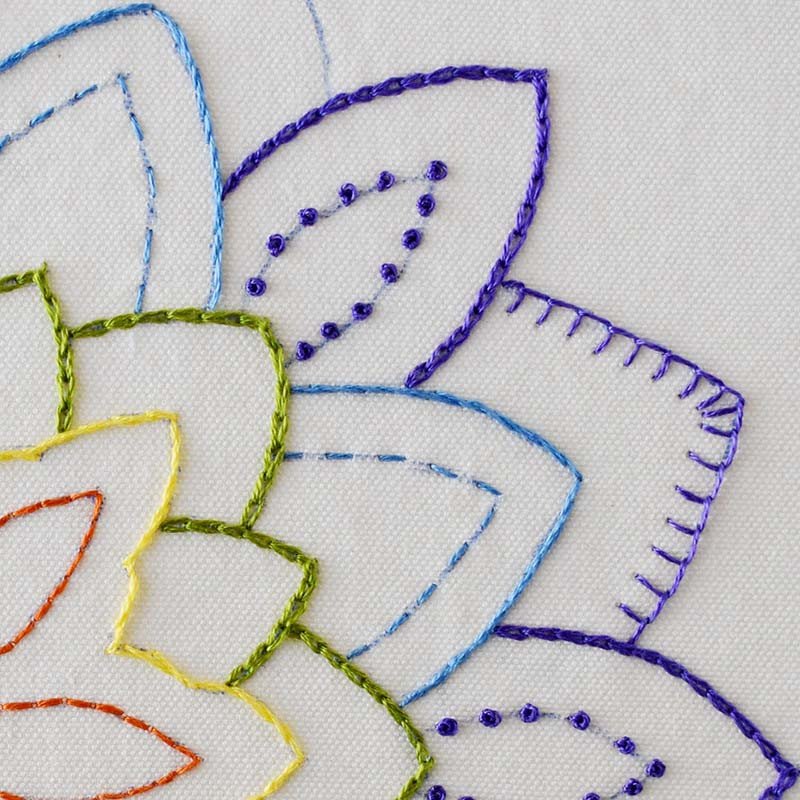 Photo credit: Tatjana Iljaseviciute from Practical Embroidery
You should embroider French knots and Blanket stitch in sequence in the same round, so you will have fewer thread passages on the backside.
Before sewing
Before jumping to the sewing stage, you need to take care of the marking signs on your fabric and iron your embroidered piece to remove the creases from the hoop.
 Photo credit: Tatjana Iljaseviciute from Practical Embroidery
Sewing tutorial
Now, when the embroidery is finished, and all the pieces are ready, let’s sew a Tote bag.
Step 1
Place the outer fabric pieces with the embroidery facing inside and sew three edges – leave the top of the bag open. Next, sew the inner fabric the same way.
 Photo credit: Tatjana Iljaseviciute from Practical Embroidery
Step 2
Prepare the straps. Fold the fabric, iron it, and pin it.
Sew along both edges. Repeat with the second strap. Now all the pieces are ready.
 Photo credit: Tatjana Iljaseviciute from Practical Embroidery
Step 3. Optional
I prefer when my bags have boxed corners. For that, fold the corner with the seams aligned, measure the distance from the angle (mine is 2 cm), and mark the line at 90 degrees. Then, sew it and cut the excess material. Repeat with all corners of the outer and inner fabric, measuring the same distance from the tip.
 Photo credit: Tatjana Iljaseviciute from Practical Embroidery
Step 4
Turn the outer fabric of the tote bag with an embroidery facing out. Measure the distance from the seams for the straps. I distanced my straps 9 cm from the seams. Pin the straps and sew them to the tote bag. Repeat with the straps on the other side of the bag.
 Photo credit: Tatjana Iljaseviciute from Practical Embroidery
Step 5
Place the outer bag inside the inner bag (with the seams facing out) and pin the top edge together. Leave the gap that is necessary to turn the bag. Sew along the border, leaving the gap.
 Photo credit: Tatjana Iljaseviciute from Practical Embroidery
Step 6
Turn the bag. The inner fabric is inside the bag, and all the seams are between both layers. Pin the fold of the edges and sew around the border to close the gap.
 Photo credit: Tatjana Iljaseviciute from Practical Embroidery
Done!
Use this bag for your yoga equipment, books, or knitting project. As with any other tote bag, this shoulder bag can be used for many purposes, but this one is better because you put some much work into it!
P.S. Don’t forget to share this tutorial with your crafty friends!
 Photo credit: Tatjana Iljaseviciute from Practical Embroidery
This article was written by