I have seen so many cute coir doormats all over social media, in stores, and on crafting blogs, but I have never tried to make one until now. Since the Christmas season is almost here, I wanted to make a doormat to spruce up my front porch. I learned a lot when I began this project, and through trial and error, perseverance, and only a few tears shed, I perfected a technique that worked extremely well on this material. I will share all my tips and tricks (and disasters!) with you so you can learn from my mistakes.

Contents
- What is a coir doormat?
- Creating a design in Cricut Design Space
- Cutting your design and choosing materials
- Transferring your image onto your doormat (the right way!)
- Painting your mat
Materials
- Coir doormat
- Cricut Maker or Explore machine with Cricut Design Space (CDS)
- 12×24 cutting mat (or 2 12×12 mats taped together)
- Masking tape or painter’s tape
- Vinyl (12×24” long), any color
- Transfer Tape (12×24’ long)
- Hair dryer or Cricut Mini heat press
- Flex Seal spray
- Lots of patience!
What is a coir doormat?
A coir doormat is a mat made from the natural fibers found in coconut husk. They are biodegradable and mold and mildew resistant, repels bugs due to the natural coconut oils, and are fairly inexpensive to manufacture. For these reasons, they make excellent doormats. Coir material can fade when exposed to sunlight, is prone to shedding, and is not very soft on the feet or skin, which is why this material is better on the porch than inside the home.
Coir doormats can be purchased at a variety of retailers, such as Amazon, Ikea, and Walmart. Shop around to find a style and size that fits your budget and design, but keep in mind that a single cricut mat is 12’ tall, so if you go with a very large mat, you will need to cut multiple sheets and piece them together to fill the space properly.
For this project, I purchased a Mainstays coir doormat from my local Walmart. It is a natural light brown color and is an 18×30 inch rectangle.
Creating a design
Since I set out to make a Christmas doormat to decorate for the Holidays, I wanted to find something that fit a theme we had throughout our home, Christmas trees. Originally, I chose a pre-made design called Merry Christmas Trees by Kewteepieshop, which I absolutely fell in love with. Upon trial and error, I realized this design didn’t work well for my doormat because it was too detailed, and the outline was too thin. It resulted in a cut that was almost impossible to transfer onto the mat. I was so stoked when I found a similar design in a Christmas Doormat Bundle that worked so much better!
With this project, since we only want a stencil in which we can paint inside of, it is important that the design is realistic. It needs to be large enough to fit the mat appropriately, and should have words that are large and easy to read by someone standing above it. Small details make transfer difficult and can result in unclean, unprofessional lines. Keeping the design simple makes a world of difference with this project, as coir mats are very uneven and textured, making it a challenge to transfer your image onto.

Once I loaded my image into CDS, I added my family name to the canvas. For this project, I used the font called Banana Pancakes. I sized the name to fit how I wanted to underneath my tree image and highlighted all of the contents and welded them together. From there, I was able to size my image to 23.5×11.5 inches, which is the largest size you can cut on a 12×24” cutting mat. Before I cut, I usually save my image in case there are any issues.

Cutting your design and what materials to use
When choosing what material to make your stencil out of, there are many options to choose from: Cricut stencil vinyl, heat transfer vinyl (HTV), cardstock, freezer paper, and traditional vinyl. I am sure that if you are patient enough, all of these mediums will work as a stencil for your coir doormat, but let me be the first to tell you, I am not a patient crafter. I have 4 kids and work full-time, and while I love to craft, I want to make everything- tonight- right now. So, when I have to spend hours trying to transfer an image onto a canvas, I become impatient. The one thing you will need with this project is patience!
Stencil Vinyl
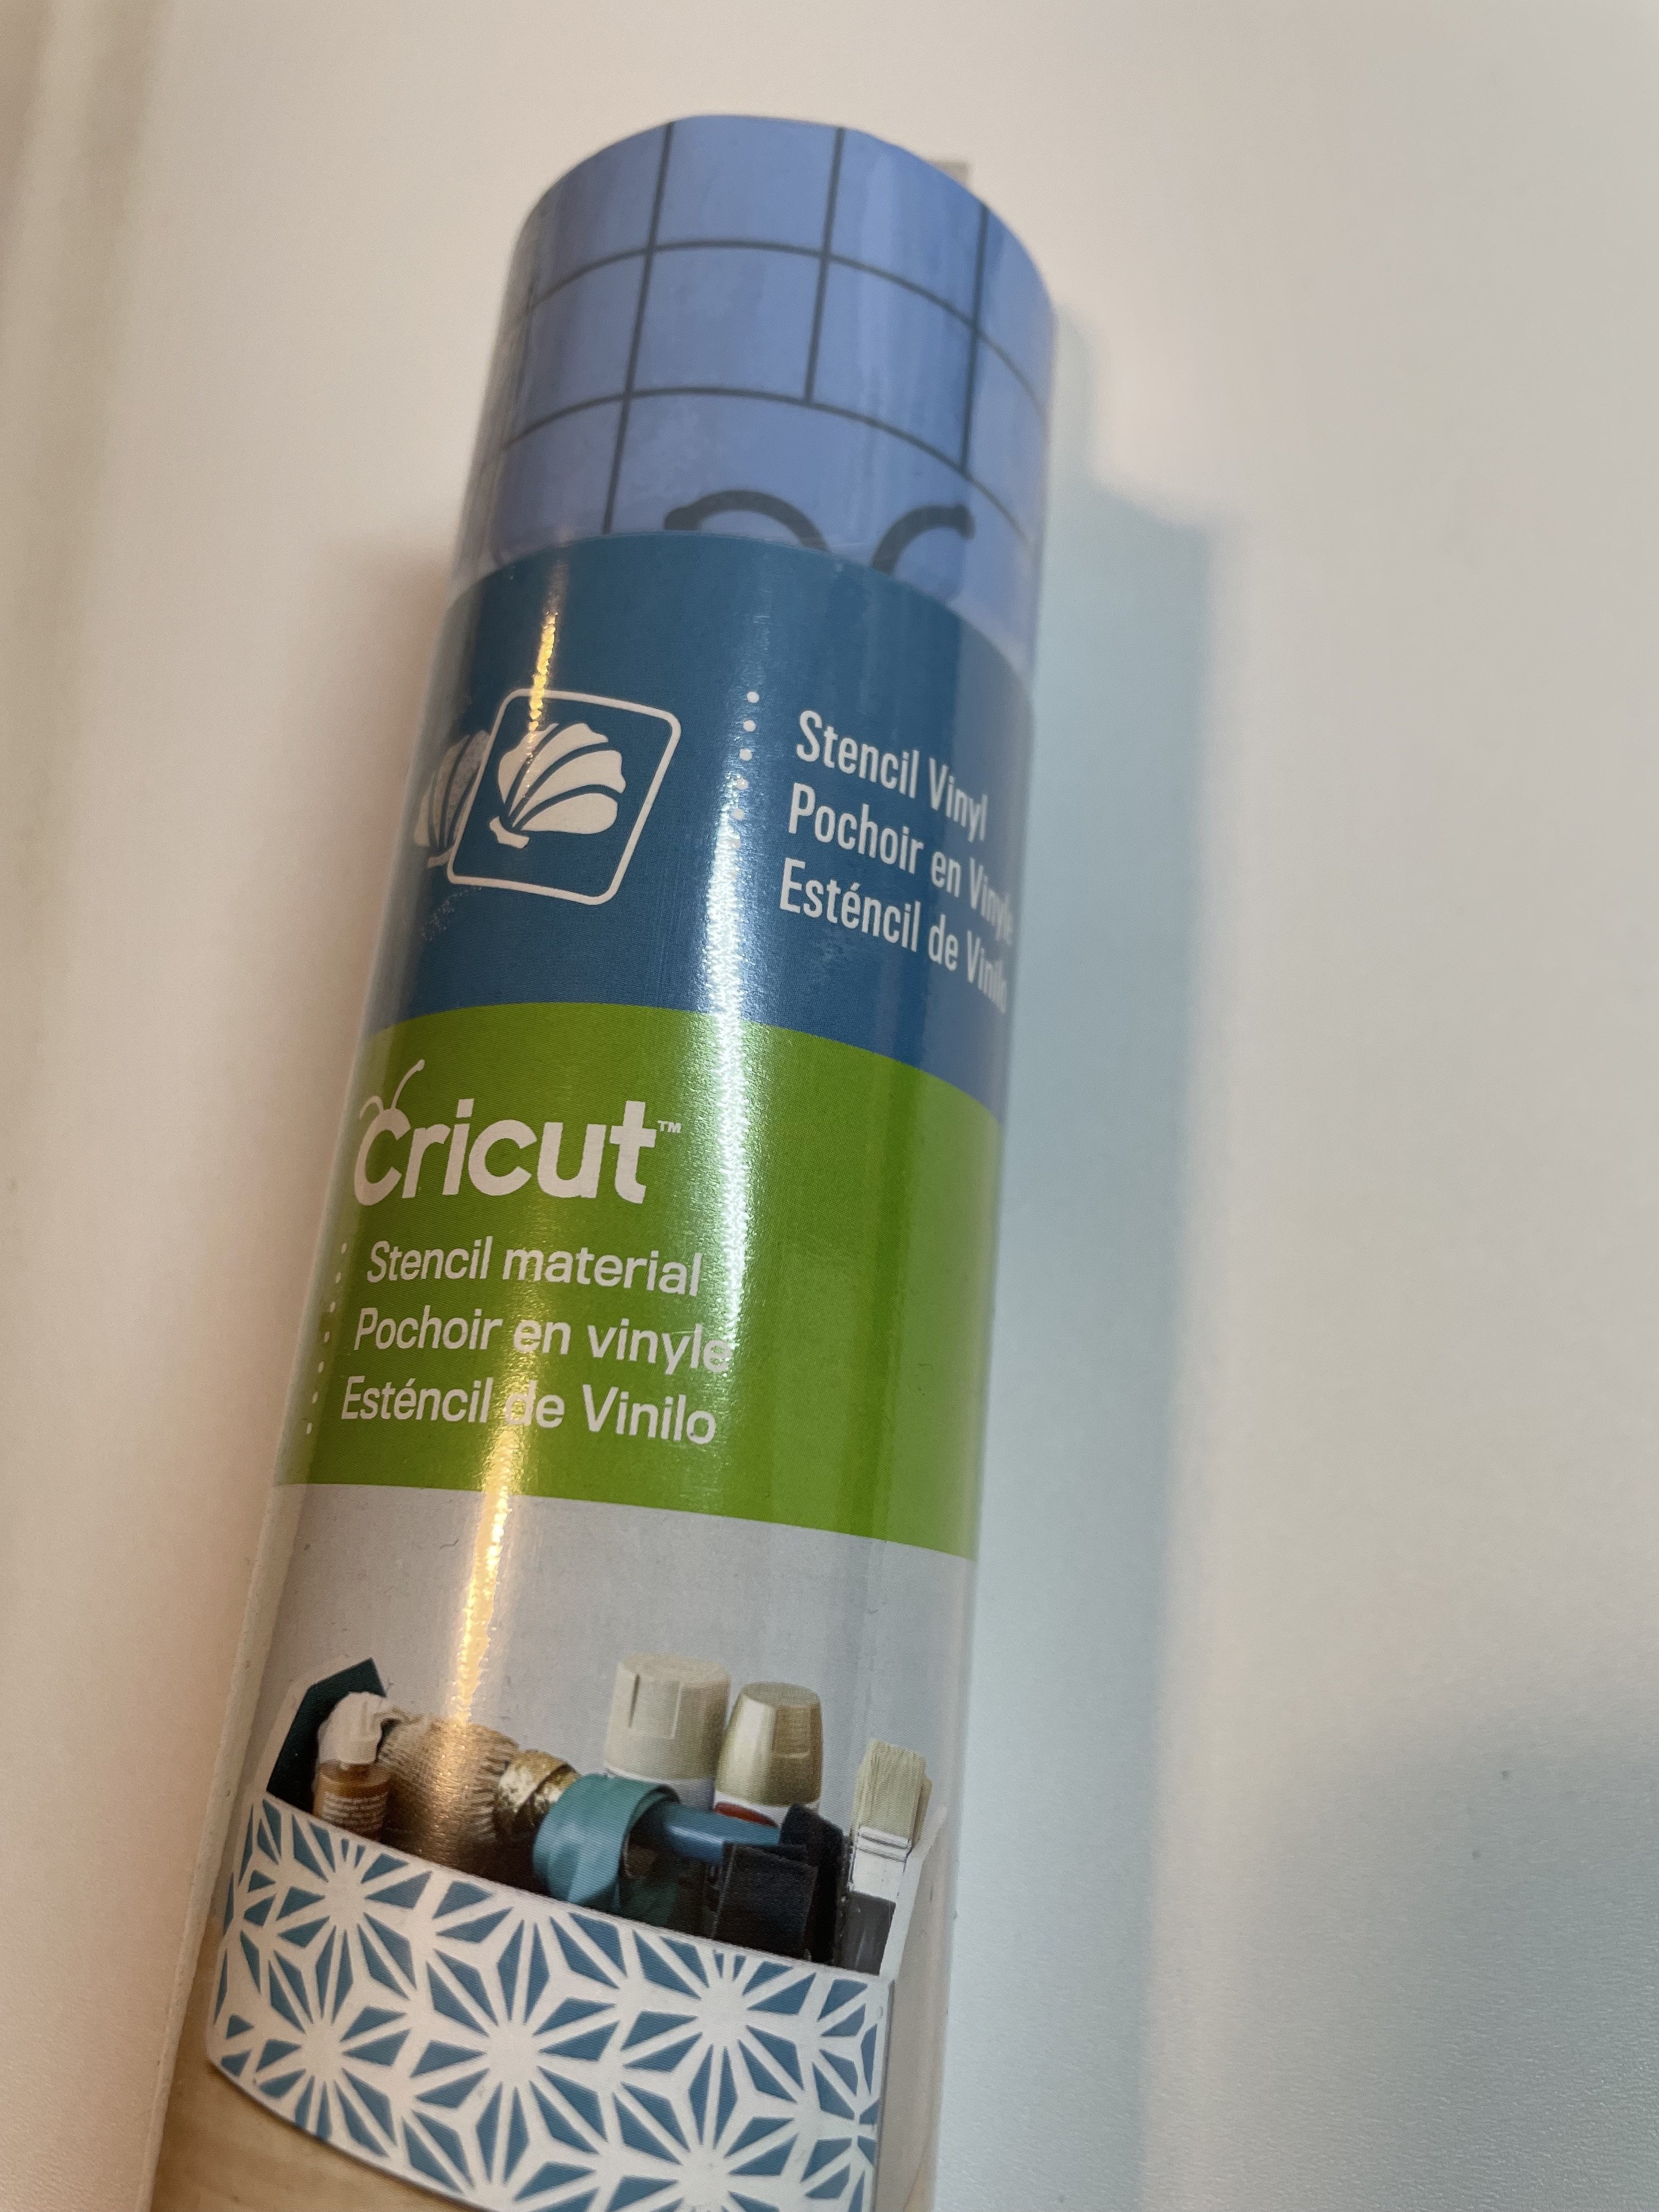
I only had stencil vinyl on hand because it came in the bundle when I purchased my Maker machine. I had never opened it up until this project. I cut my image un-mirrored using “Cricut Stencil Vinyl” default pressure setting and it cut like a dream. Once I weeded the middle of the image out for my stencil design, I covered the stencil vinyl with cricut standard-grip transfer tape, and I applied it to the doormat. And guess what? It didn’t stick. I burnished it with a brayer, I lifted slowly and carefully, and I could not pull the transfer tape off of the stencil vinyl to save my life.

So, then I got the idea that I would try a little bit of heat to the transfer tape to see if that helped. Well, folks, do not do that! It completely ruined my design and was a failure.

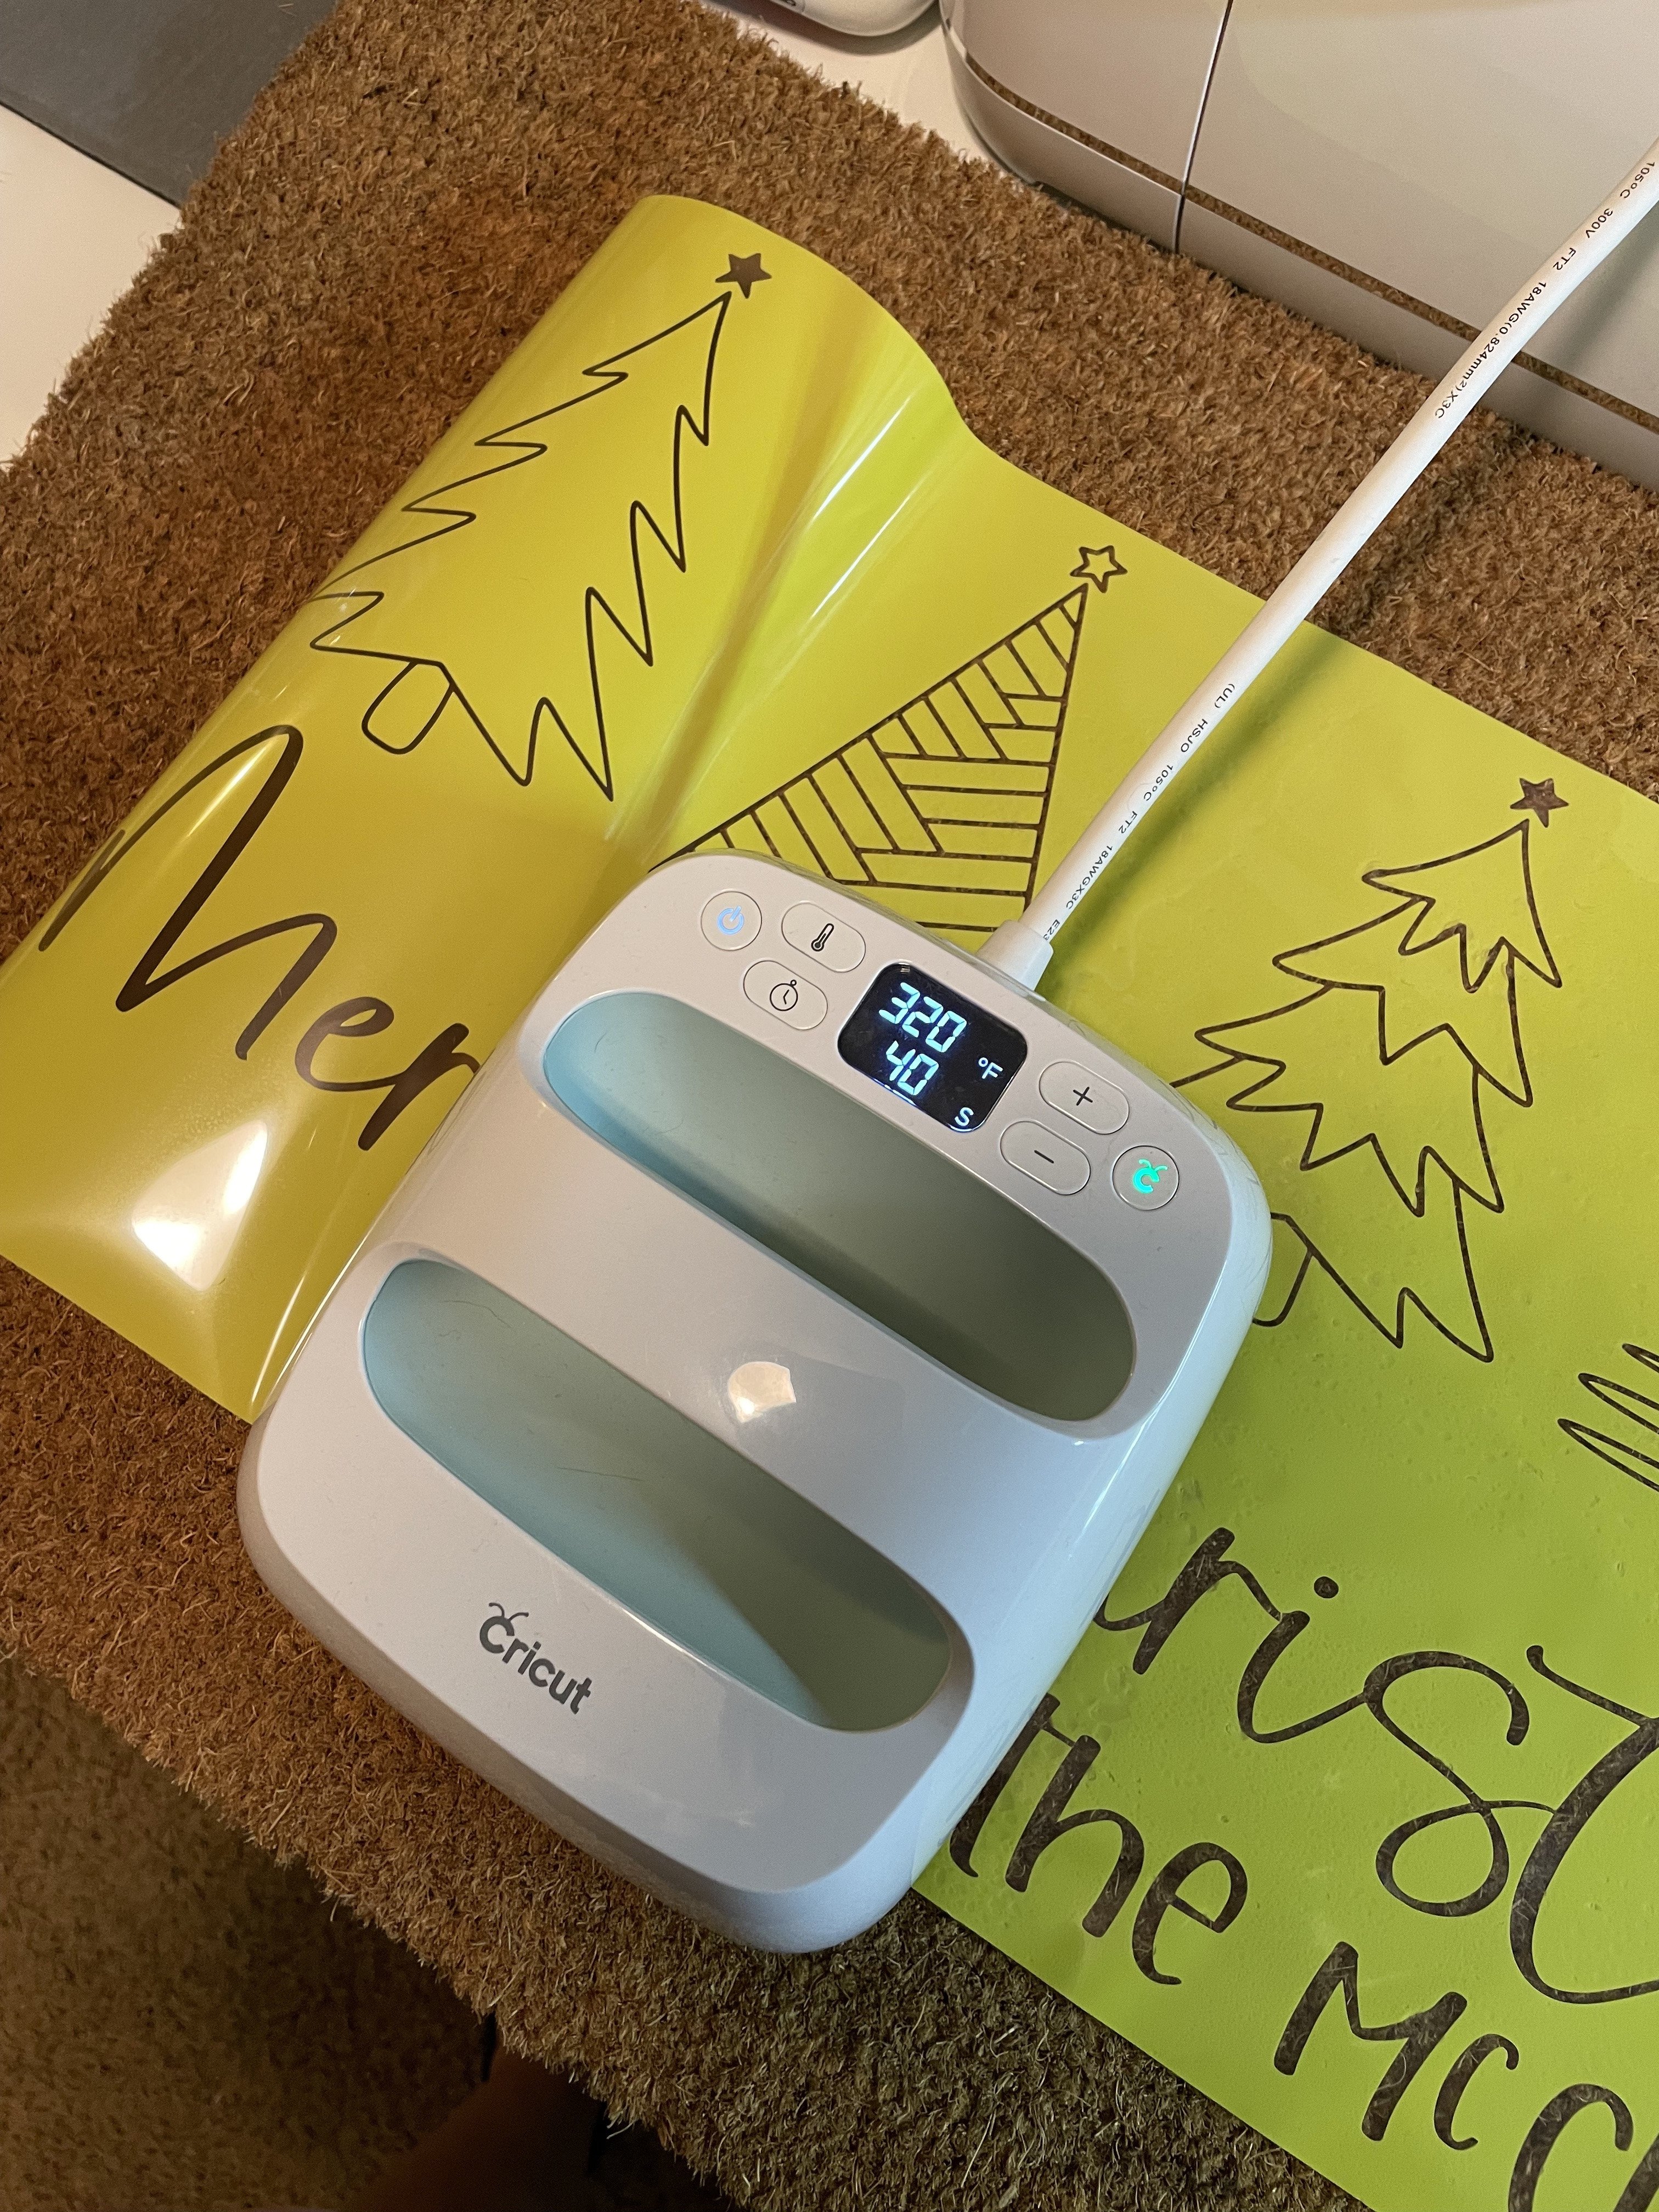
HTV

The next thing I tried was HTV, since it had a carrier sheet already attached that was heat-proof, I thought “yes, this will work.” It did not. I mirrored my image before cutting, cut on the “Heat Transfer Vinyl” default setting, and cut it out. I weeded the middle of the image for my stencil as I did in my previous attempt, and the design looked great. I warmed up my heat press to 320* and slowly pressed my design into the mat. Because of the unevenness of the fibers in the mat, the HTV curled up and shrank in some spots more than others and left the image looking uneven. Another failure.
Freezer Paper Stencils
I have made stencils using freezer paper before, and it came out fantastic! If you have never tried this technique, I recommend checking out my article Crafting with Freezer Paper Stencils. I cut a sheet of freezer paper, shiny side down, onto my 12×24 Cricut mat, and cut on the “parchment paper” setting. Using my easy press mini, I tried to “stick” the paper to the mat the way I was able to do with cotton canvas before and it was a no-go. Another failure. I shed a few tears at this moment and with a trashcan full of wasted materials, I knew it was time to walk away.
Vinyl- THE BEST WAY!

The next day, while listening to a continuing education course on my iPad, I decided I would re-think my design, choose something more manageable, and try using Oracle 151 permanent vinyl. I created a new design in CDS using one of the images from the Cricut Doormat Bundle by AnitaAlyiaLettering. I added my family name, sized it to smaller than 11.5×23.5 inches. I cut the image using the “Vinyl” default pressure setting and weeded like I had 5 times before.

I applied standard grip transfer tape to the black vinyl. I burnished the stencil I made to the coir doormat using a brayer. If you do not have a brayer, or do not know what a brayer is, you should look into it. It is one of the most underutilized tools in the toolbox. A brayer is used to roll over the top of your vinyl to help smooth it out and stick it firmly to what’s below, whether that is your Circuit mat or your coir doormat. Burnishing can also be done with a craft stick, a scraper tool or even your hands.

Once the vinyl is stuck to the doormat securely, I grabbed a corner of the transfer tape and slowly (and I mean SLOWLY!) pulled back the transfer tape using one hand to secure the vinyl while slowly pulling the transfer tape up. This requires some patience but is totally do-able.

Once the transfer tape has been successfully removed from the stencil, I used a Circuit mini easy press on the lowest setting with a bit of parchment between the heat press and the vinyl image and slowly pressed the vinyl into the fibers. I did this in almost a tapping motion, as opposed to pressing hard onto the vinyl. I didn’t want to burn the vinyl, as this is not heat transfer vinyl. I was trying to make sure that there was a tight seal between the edges of the letters and images so that my transfer would be clean. This worked so much better than any other method I tried.


I covered up any outside parts of the mat that were uncovered with tape and scraps of paper so that it protected the mat from overspray.

Finally… painting your mat
There are a variety of paint products you can use to paint a coir doormat: outdoor acrylic paint, outdoor spray paint, Flex Seal? While Flex Seal technically is not a paint, it is an aerosol rubber in a can, it works so well for this project, which is why I decided to use it. I recommend using a respirator or mask and working in a well-ventilated area, as this stuff has a strong odor.

When spraying my stencil, I held the can 10-12″ away from my design and sprayed slowly back and forth forming a light layer. I was trying to maintain crisp lines and didn’t want any of my paint to seep under the vinyl stencil I created. Once my first thin coat was dried after a few hours, I sprayed another coat and let it sit for about 12 hours.

Once it was completely dry, I peeled off my stencil, which was surprisingly easy, and what lay below was an absolutely perfect doormat. I am in love with the way that this came out. I will certainly be making more of these for wedding and housewarming gifts, holiday presents and probably some seasonal ones for my own front door.

This article was written by