

How to use Procreate: a tutorial for beginners
Learn the basics of this popular app
Read the articleThe items in your cart are not available in the selected currency. Do you want to continue in the selected currency and remove these products from your cart?
Don't switch currency
Discover how to use this basic creative feature.

The Pen Tool is one of the most useful and essential features in Adobe Illustrator. It’s effortless to understand and work with!
In today’s post, you will learn how to use and display the Pen Tool. You just have to follow some simple steps!
If you’d like to learn more about Adobe Illustrator, check our Ultimate Graphic Design Guide.
Let’s get started!
On this article:
How to display the pen tool on Illustrator?
How to use the pen tool on Illustrator?
How to add an anchor point on Illustrator?
How to delete an anchor point on Illustrator?
How to use the Anchor Point tool on Illustrator?
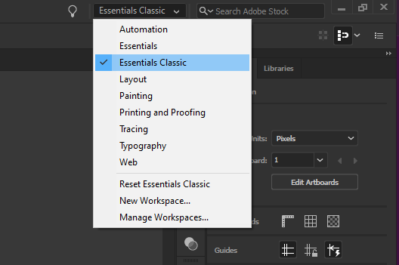
For the sake of this tutorial, we have displayed the Essentials Classic Workspace in the latest version of Illustrator. You can choose what workspace do you want to see on the upper right corner of your screen.
Bear in mind that the user interface will vary depending on the Workspace that you choose.
The third icon of the left toolbar represents the Pen tool. To activate the tool, click on the icon. You can also activate the Pen tool with the shortcut CMD + P on Mac and with the shortcut CTRL + P on PC.
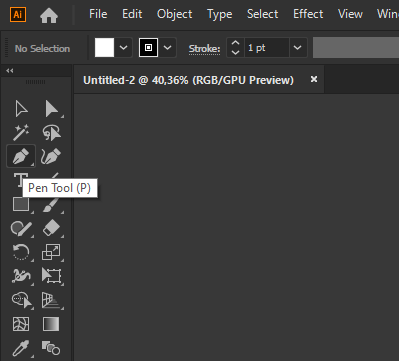
As you can see, the icon that represents the Pen tool has a small arrow on the lower right corner.
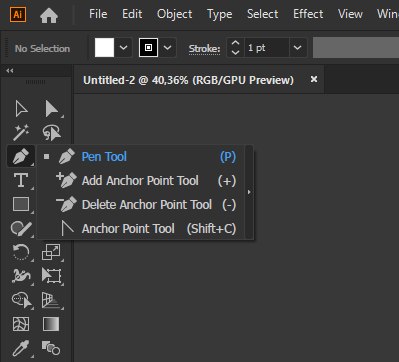
By pressing this arrow, you will display a menu with four different options: the Pen tool, the Add Anchor Point tool, the Delete Anchor Point tool, and the Anchor Point tool.
You can find the shortcuts that you can use to access these tools on the image below.
We’ll explain how to use these tools later in this article.
It is possible to change the way Illustrator displays the Pen Tool menu. If you only want to see the icons, press the small arrow on the right side of the list.
To go back to the original appearance of this menu, hit the “rewind” icon on top of the new display.
Now that you’ve learned how to display the Pen tool menu, let’s see what you can do with every feature.
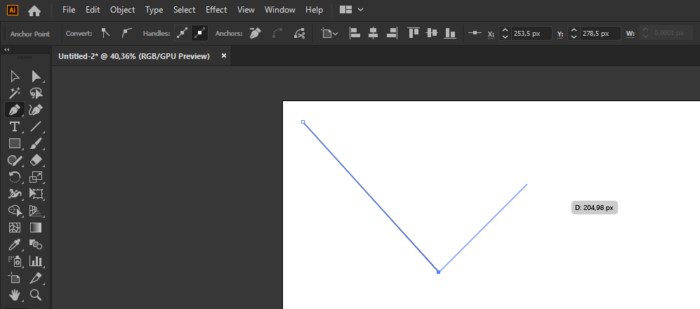
The Pen tool allows you to trace strokes. Every stroke is located between two anchor points.
To set the first anchor point, click on the canvas with the mouse.
To trace the stroke, slide the cursor in the direction that you want.
To finish the stroke, hit the canvas with the mouse. This way, you’ll set the final anchor point.
By joining different strokes, you can create your own shapes. It’s possible to start multiple strokes at the same anchor point.
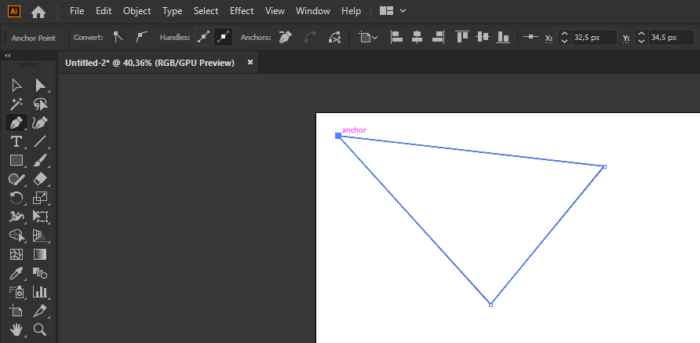
By combining different strokes and anchor points, you’ll be able to create basic figures. You’ll be able to change the properties of these figures later in the process.
If you want to learn how to edit the properties of a figure, check this article.
It is possible to add new anchor points to a shape that you’ve already traced. The procedure is straightforward!
Let’s start by choosing the Add Anchor Point tool in the Pen tool menu.
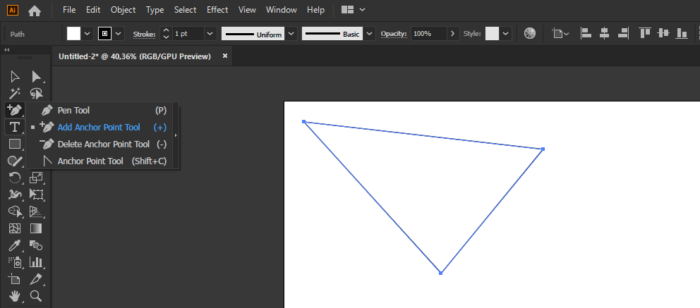
Once you’ve chosen the Add Anchor Point tool, hit a point of the figure. The location that you’ve chosen will become an anchor point.

By adding new anchor points, you get new chances to modify the shape of your figure.
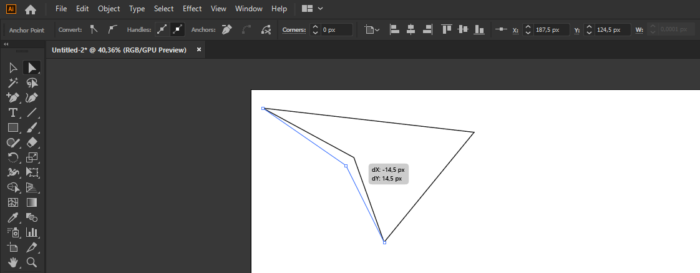
You can move the anchor point with the Direct Selection tool.
The Delete Anchor Point tool allows you to eliminate an anchor point from a figure. It’s so easy!
To start, select the Delete Anchor Point tool in the Pen Tool menu.
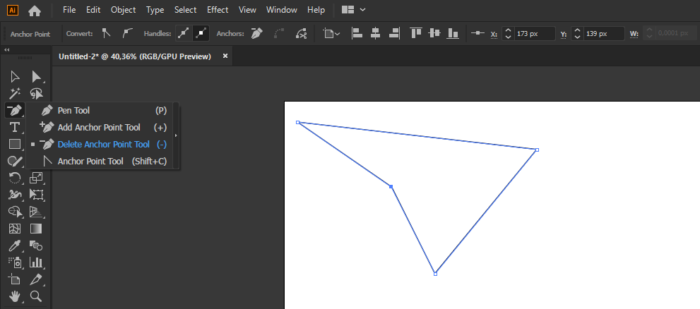
Once you’ve selected the Delete Anchor Point tool, hit the anchor point that you’d like to delete.
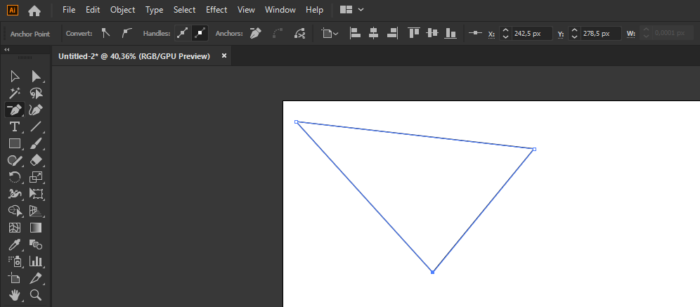
And that’s it! As you can see in the image above, the anchor point has disappeared.
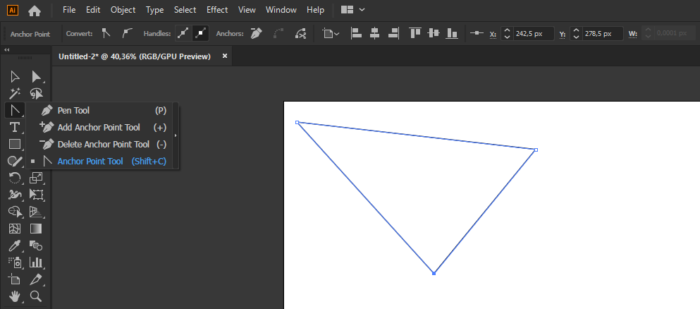
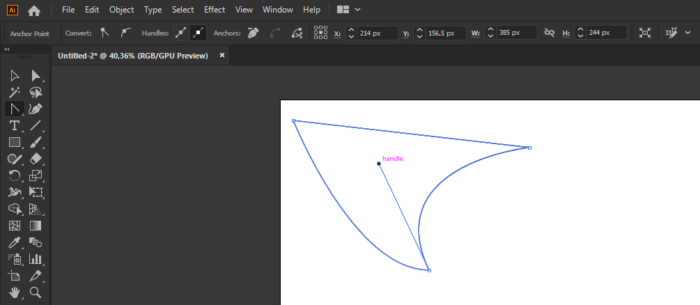
The Anchor Point tool allows you to modify the shape of the strokes that start on an anchor point.
Let’s start by selecting the Anchor Point tool in the Pen Tool menu.
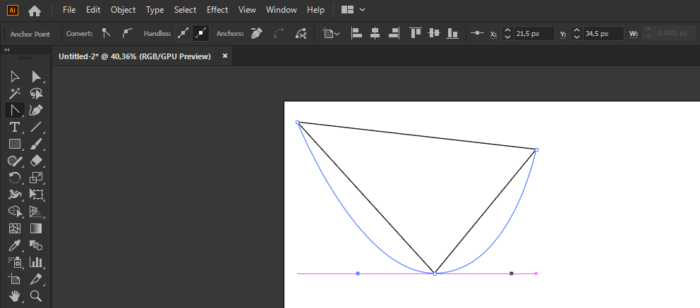
Hit an Anchor Point with the Anchor Point tool. As you can see in the image below, two small handles will appear.
By pulling these handles, you can turn straight strokes into curved ones. Depending on how much you stretch them, the curvature will be bigger or smaller.
Now it’s time for you to try! Take your time to experiment with the handles, placing them in different positions.
We hope you’ve found this tutorial useful. Good luck with creating your own strokes!
Receive a weekly digest that highlights the most popular articles on The Artistry.

Every week we release new premium Graphics for free, some available for a limited time only.
Continue
Get access to 9,190,819 Graphics as part of our Graphics subscription. Check them out now.
Continue
Our discount deals are premium products for just $1. Available for 1 week only, so act fast!
Continue
Learn the basics of this popular app
Read the article
Unlock new creative possibilities by learning to use masks.
Read the article
All you need to know to start designing with fonts.
Read the article
Learn how to create impressive artwork. It's simple!
Read the article
Learn how to save your work in progress.
Read the article
